


We have a jewelry sales business in our home and so we were looking for a great way to display and organize inventory – we made these Jewelry Display Flip Boards and I LOVE how they turned out!!
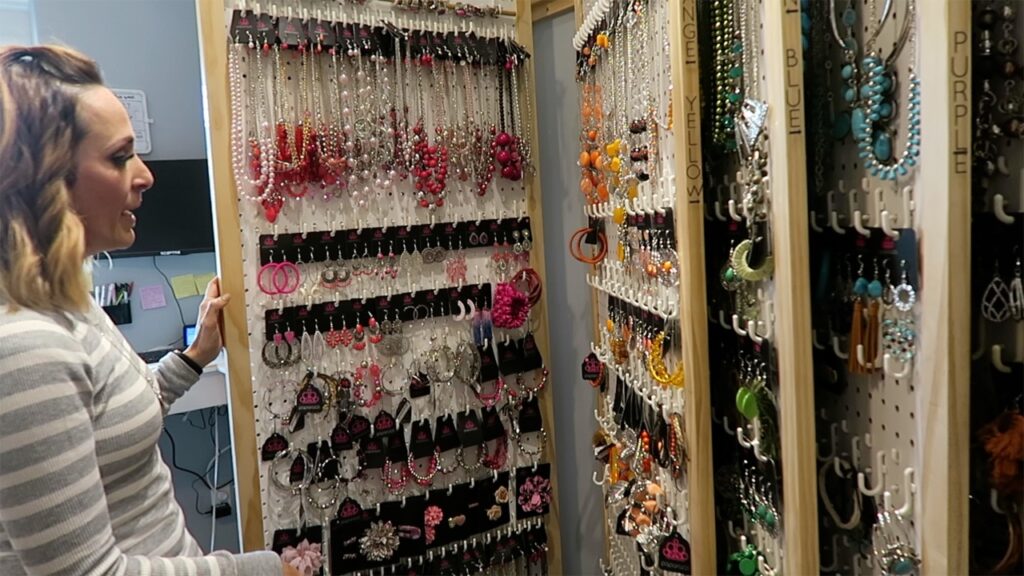
They really help me to be able to mix and match pieces and put sets together quickly. Today I have a tutorial on how to make them in case you are in need of pegboard flip boards as well.
This post may contain affiliate links.
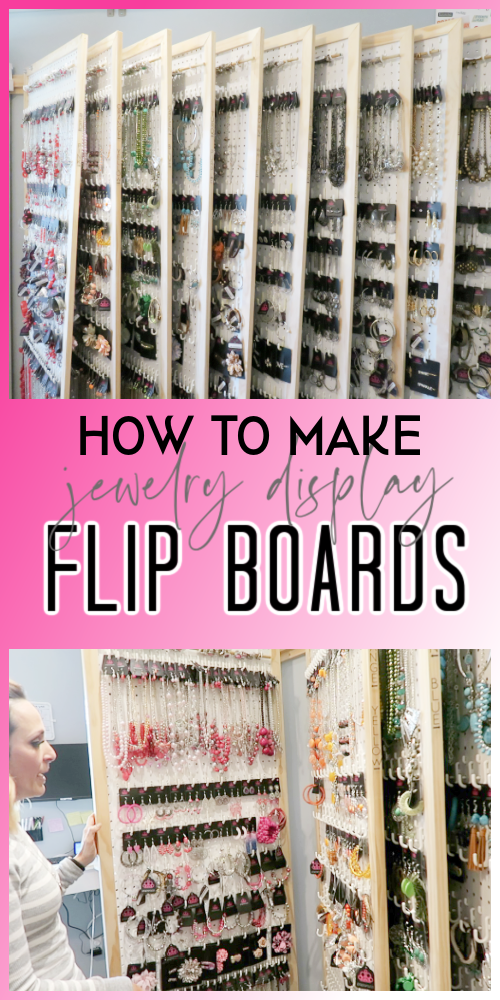
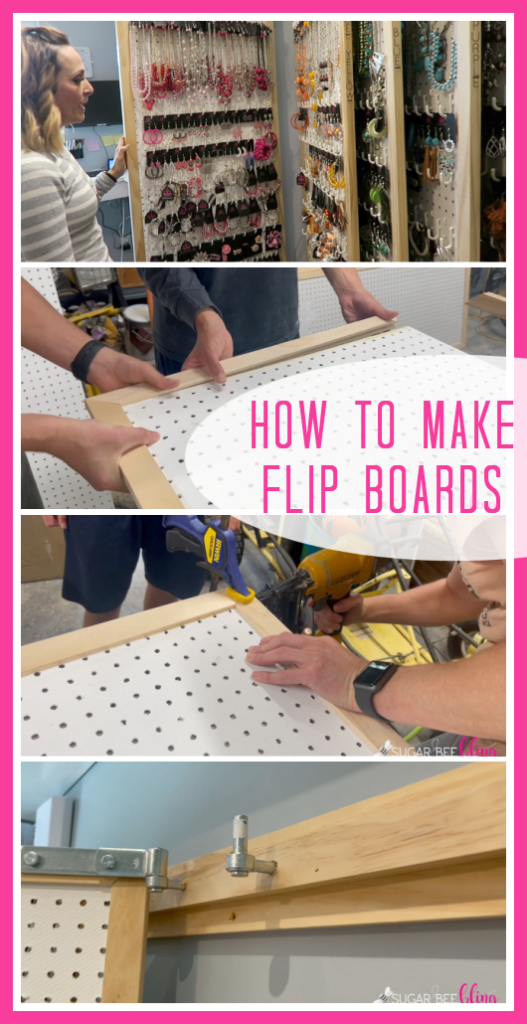
How To Make Jewelry Flip Boards
You’ll need:
–pegboard, cut into the size you’d like your boards to be
–1×2 pine boards for trim
—wood glue
—dado blade to cut grove
—gate hinges
I have a video tutorial below, but here are the quick outline steps:
Cut a groove into the trim boards using a dado blade on a table saw.
Put a generous amount of wood glue into the groove and slide onto the edges of your board.
Tack into place at corners with trim nails.
Attach cleat board to the wall.
Install Gate Hinges.
Slide boards onto the gate hinge peg.
Best to cut trim boards
Trevor’s favorite table saw: https://amzn.to/3p7rff5
Trevor’s favorite sliding compound miter saw: https://amzn.to/3FSKmQ0
Jewelry Flip Board Video Tutorial
This project is probably better described in video, so here you can watch how the boards were put together and attached to the wall:
Flip Board Labels
I simply printed onto clear sticker paper and cut them out and put them on the edges of the flip boards.
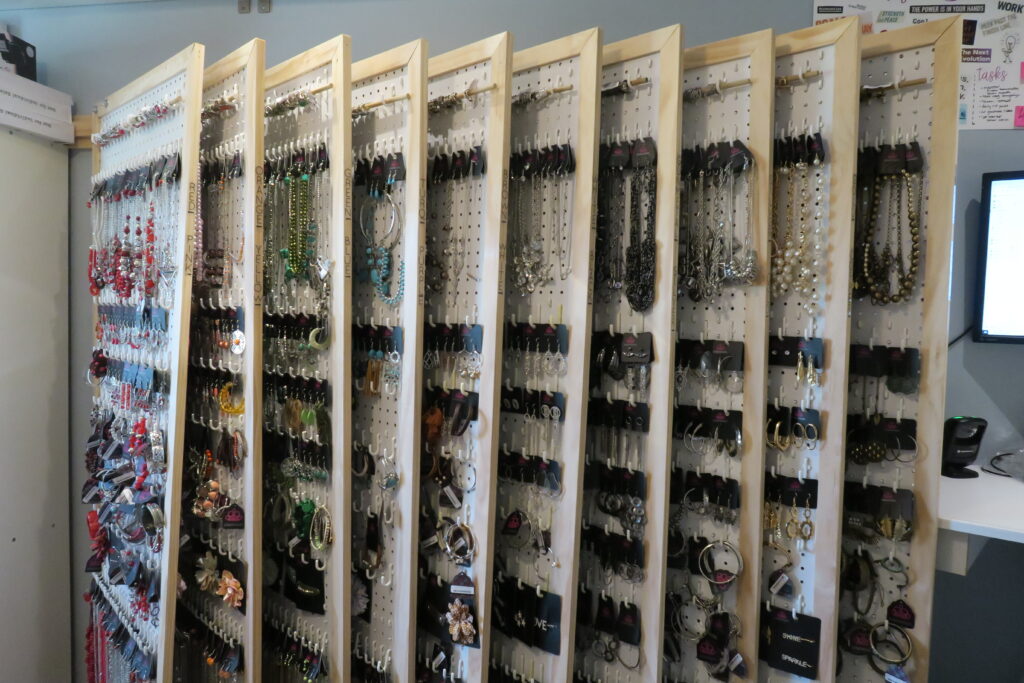
Have fun making your own Jewelry Display Flip Boards!
DIY Jewelry Organization Ideas
If you’re looking for other DIY jewelry organization ideas, be sure to check out these other projects:
Spinning Jewelry Display Rack
Simple Jewelry Organization
Simple Earring Holder
