(find the tutorial on the utility aprons HERE)
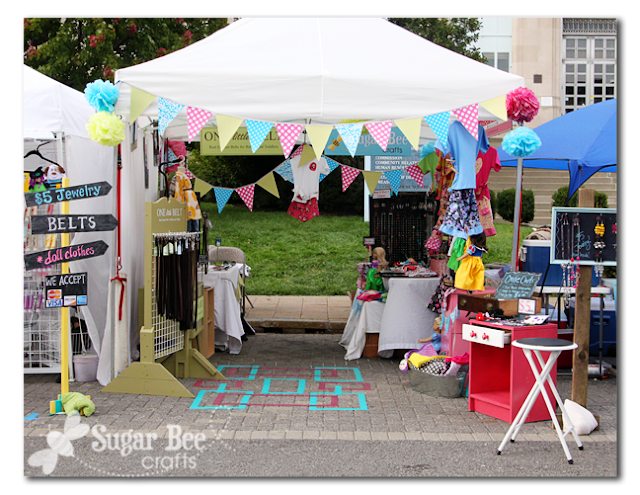
—–We wanted a nice clean, bright look. So we gathered white sheets from various thrift stores/garage sales to use as table cloths and curtain dividers (our tent didn’t have sides). To bring bright colors into the space we did a few things.
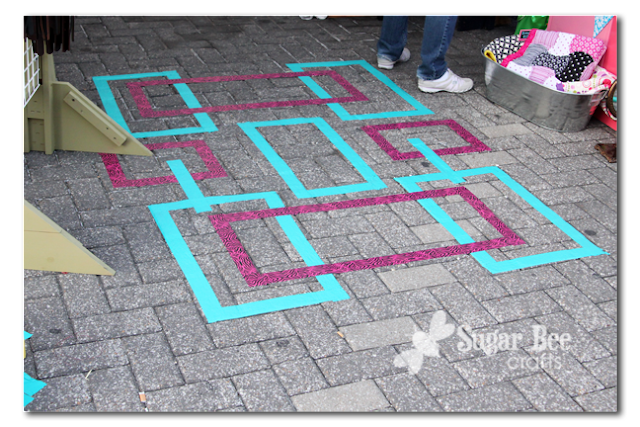
Duct Tape Rug: – – originally we wanted a rug to pull the space together and make it inviting. I wanted to find a discarded rug at a garage sale and stencil it. But I never did. So I bought duct tape, thinking about THIS cool floor. I just bought a couple of rolls of duct tape and taped a pattern to the ground. The faux rug got LOTS of comments.
Pennant Banners: since there were 3 separate shops, we each choose a color as our theme. On our individual tables, we had pennant banners in our color. Across the front and back of the tent, we had larger banners that included each of our colors. I have a tutorial on how to make pennant banners HERE. (and in these first two following pictures, the portable peg board cases have a tutorial HERE.)
Pom Poms: we also had pom poms in our colors hanging on the front of the tent and from the ceiling inside – it really brought our booth a whole new level. Martha Stewart has a great tutorial – they’re super easy to make. They were made ahead of time except for the fluffing out part- that we did as we set up so they were easier to transport.
—–So, moving on from color and brightness, here’s some views of our table displays. I think layering the display on lots of levels is a must – makes for a more interesting setup.
We used stools and small cabinets to get different height levels. The outfit sample display was up and at eye level – it drew in lots of looks.
A bucket on the floor held blankets:
Outfits hung from the bars of the tent – we tried to use all the space the best we could:
A couple other display boards that sat on the ground:
Under one of our main tables we had a shorter table pulled out slighter, to add a lower level to display things on – see the shorter table sticking out:
—–Signs – we had lots of signs all over the tables – little chalkboards on sticks – sorry I forgot to take pictures of them, but we got the idea HERE.
In addition to that, we had a big arrow sign out front to bring people in – we kept with the chalkboard theme. I just had Trevor cut some scrap wood and I spraypainted it with chalkboard paint – I’ll hopefully have a tutorial on how he built the bottom of the stand coming soon. (update: tutorial HERE)
We each also printed our logo at OfficeMax (it cost about $10, mine is 1 ft by 2ft). Then I sprayed the back with spray glue and stuck it to a foam-core board. These hung in the back and side of our display.
Also kind of in the “sign section” – we each had business cards on the tables and passed them out to anyone who seemed remotely interested in the products. The other gals put discount codes to their etsy shops on the back of their cards, so they can track how much traffic they get in future sales because of the craft booth.
—–A few more Tips and Hints about Craft Fair Booths from the other gals (keep in mind, this was our first one, so we’re not experts!)——-
Holly, from HollyberrysDolls Etsy shop – she sells cute clothes for 18in (American Girl) Dolls, doll princess outfits, matching girl and dolls outfits and jammies, and the cutest doll sleeping bags.

Her hints:
–Taking credit cards is a must…2/3 of my sales were credit cards.
–Presentation obviously to draw them in.
–I would also say to know what type of audience the event will cater to. That way you know if they are willing to pay your price or not.
Kilee, from One little Belt – she sells baby and toddler belts, which, if you’ve ever tried to look for one, are next to impossible to find. She was telling me about how they make them – it involves a whole hide of a cow, and they cut it into strips – who knew!

Her hints:


So glad one of us took pictures! Looks awesome! I had so much fun!
love this post! makes me want to do a craft show!
LOVE this! I am so glad that I stumbled upon it. I am getting ready to do a show and this gave me lots of ideas. I too picked up white sheets from the thrift store just the other day. Amazing how you can gather things pretty inexpensibly by shopping thrift stores and yard sales for something like this. Love!
Forgot that I wanted to ask a couple of questions. On your jewelry boards, what are their sizes? Also what size sheet did you find worked the best for the tables and the partitions hanging from the sides of the canopy. I bought a king sized sheet with sweet lace trim on the bottom yesterday. I was so excited. Love the whimsical pennant idea too.
Thanks for all the great tips. I can use all the help I can get. Your booth looked great!
I love everything about this post…and your booth! Very inspiring!
Vanessa
https://daily-dilly.blogspot.com
I am SO jealous of your amazing booth! I love all the colors, I would have totally visited your booth (and probably bought everything). Thanks for the great tips, I wish I had this to reference earlier! I did a craft fair this past weekend too, I linked to your post at the bottom to point others to your great tips! https://jensownroad.blogspot.com/2011/10/craft-fair.html
Wow! It must have taken you a while to put all that together. I’m going in with a friend on our very first craft fair booth! Can’t wait but I’m a little nervous! How did you break up the money? Did you keep it separate or separate it later?
how do you do the whole credit card thing? using a fancy phone? or computer? do you have to register to do that?
While I will never participate in a craft fair, I still enjoyed reading this post. Everything looked so colorful. I would have definitely stopped at your booth.
Thanks so much for the tips ladies! Your booth looked so bright and fun!
Wow! How adorable. I love it and it looks so inviting. One day I’d like to do a craft booth and will use some of this for inspiration. Thanks!
Found this post on Pinterest! Great ideas!!! Good Work Ladies.
This is fantastic! I’ve been debating doing my first craft show with a friend and you’ve convinced me! Thanks for the fantastic tips. I’m doing my first show this fall.
If you are still feeling the need to do something to your hair.
Try hair extensions that add length or volume, highlights that accenthair tinsel
your hair and are NOT candy colored or a whole new color or a cut the bob is the style of the moment.
Even a subltle change will give your look a lift.
So beautiful Mandy! How did you manage the credit cards, and did you have to preorder the signs from OfficeMax? I’m going to my first show this weekend, so it might be too late for a lot of things, but gonna keep truckin until the last minute! I’ll be using a few of your great ideas!
Thank you for this, what a beautiful set up and I love all of your tips. I am anxiously preparing for my first boutique and this is so helpful!
Where did u get the credit card device and how does that method work exactly. I’m doing a craft fair in Oct 2013 and would like to be set up with one by thhen.
Where did u get the credit card device and how does that method work exactly. I’m doing a craft fair in Oct 2013 and would like to be set up with one by thhen.
Where did u get the credit card device and how does that method work exactly. I’m doing a craft fair in Oct 2013 and would like to be set up with one by thhen.
Hi Sarah – – it’s from squareup.com and it’s free – – you put in into the headphone jack of your phone and it’ll swipe cards. You’ll love it.
This comment has been removed by the author.
This is a really great tutorial on how to set up an attractive booth! Love the multicoloured theme drawing together three separate vendors under one roof! It all looks so inviting and very doable. Thanks so much!
ps, I found this via a link on pinterest