


We love road trips! Whether you are going solo or have the family in tow, there is something magical about loading up and hitting the highway. When Mandy announced that we had a conference to attend in Fabulous Las Vegas, my mind immediately began plotting the Best Southwest Family Road Trip Itinerary.
With a family of six, we would be looking for opportunities to travel on the cheap. I had also long dreamed of the chance to take the family on a camping tour of several National Parks, and this trip checks all those boxes and more!
If you want a short version of this itinerary, check out my overview post here. For a more detailed overview, keep reading.
Southwest Family Road Trip Itinerary
We were leaving from the Kansas City area, so our travel times will reflect departing from that location. This Southwest family road trip itinerary is great for anyone who is coming from somewhere east of Colorado, so if you live from Dallas to St. Louis to Chicago, or further east, this is the roadtrip for you!
We had about 2 weeks of time available to us, though 5 days were dedicated to a work convention in Las Vegas, so you could do this roadtrip in 7-9 days, depending on how long you want to stay at each location. Drive times are approximate, since it will depend on your speed and how many stops you make.
Day 1
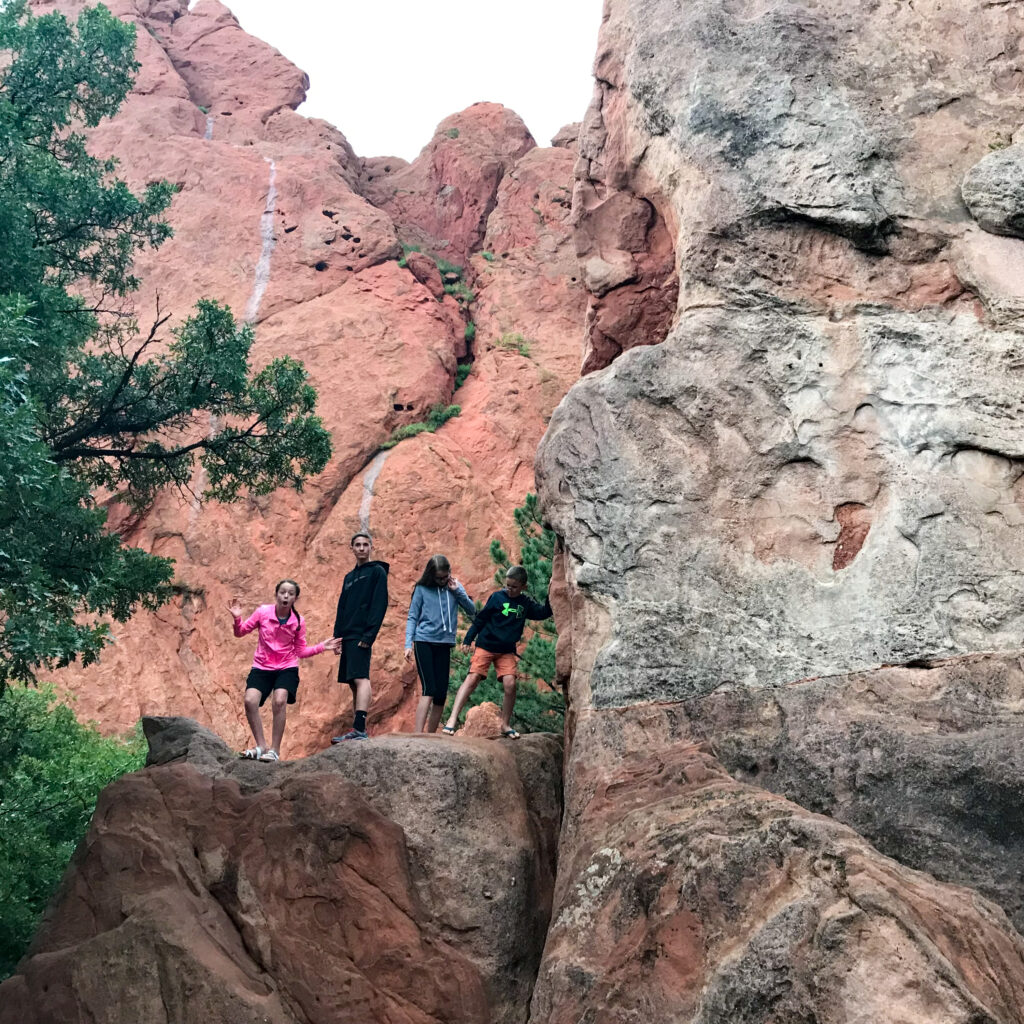
Your first day of your Southwest family road trip itinerary is dedicated to getting you to your starting city: Colorado Springs. Get an early site; the sooner you get there, the sooner you can start exploring the Garden of the Gods!
Travel to Colorado Springs, CO
Travel for this leg: 9 hrs, 600 miles
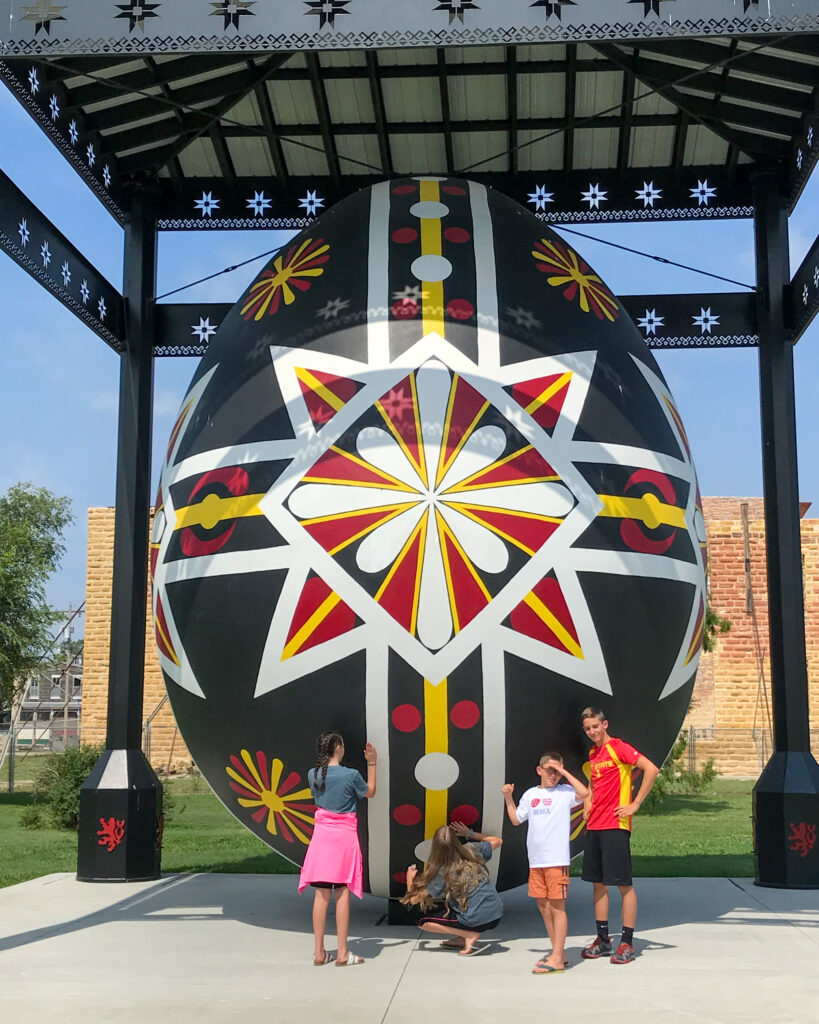
Coming from Kansas City, we had to cross Kansas, which is a LONG state to drive across. If you’re coming from the Midwest, you’ll have a similar trek. We opted for speed over content for this leg of the trip, since there is not much to see in much of the drive across Kansas. Fun “leg stretch” stops were found using our Roadside America app at the World’s Largest Easel and the World’s Largest Czech Egg. Both stops were fun chances to stretch our legs and get a few photo ops.

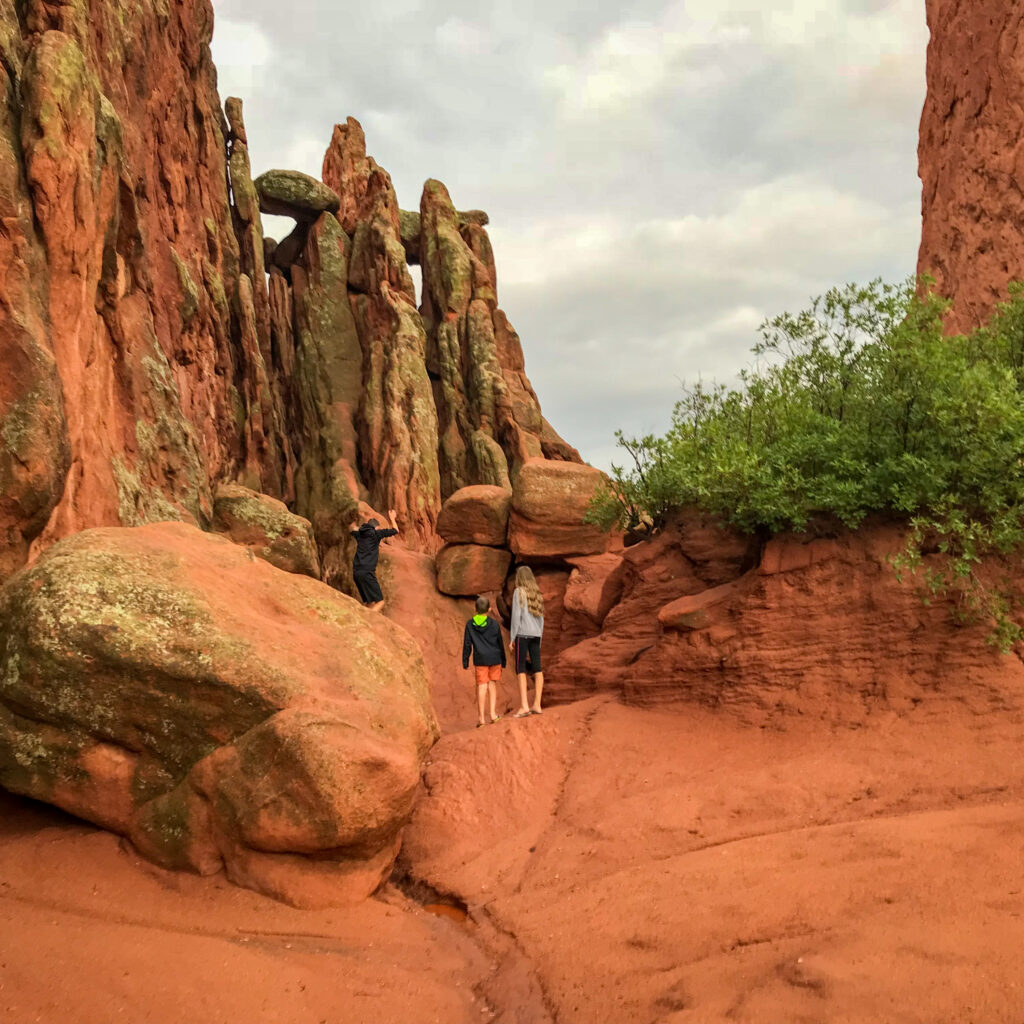
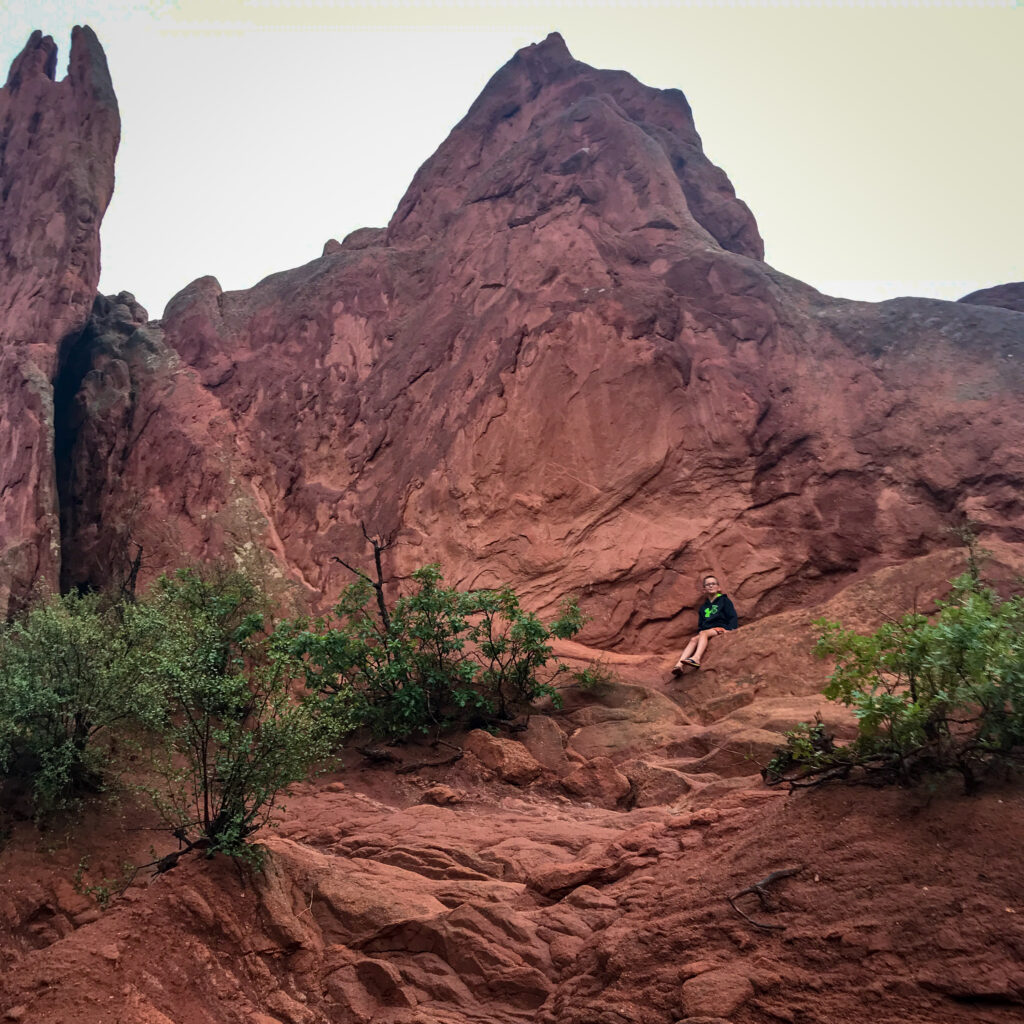
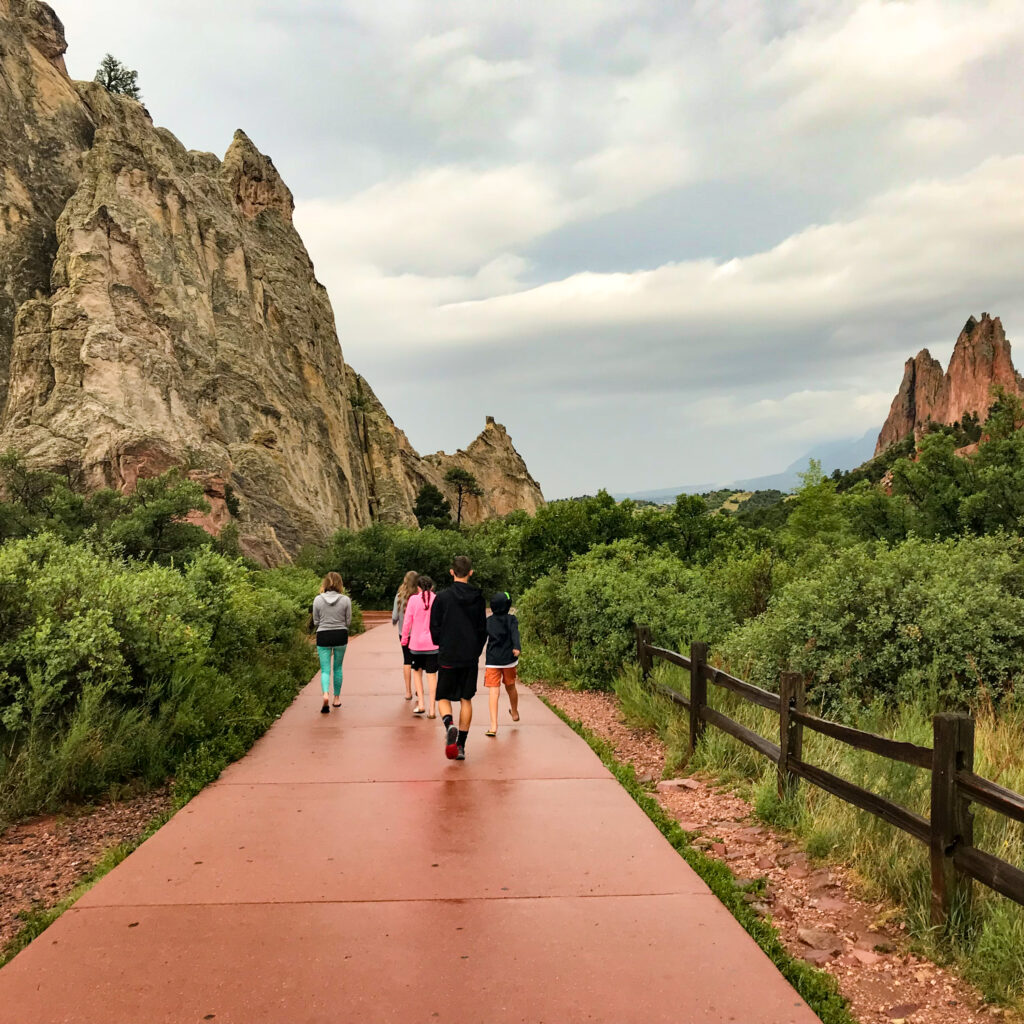
Garden of the Gods
We arrived in Colorado Springs at around 3:00 PM and headed straight to the Garden of the Gods (after waiting out a freak hail storm). This amazing park contains beautiful red rock formations interwoven with hiking trails. There is no charge to enjoy the park and hike the trails. We spent about 2 hours hiking and taking pictures, though you could spend anywhere from 1-4 hrs here and have an enjoyable time.
We stayed with friends in Colorado Springs, but there are several great campgrounds in the area, as well as the usual collection of hotels.
Day 2
Day 2 of your Southwest family road trip itinerary has amazing views from a 14,000 ft peak, a scenic drive through a national forest, and camping in a place that has over 5,000 documented sites of ancient habitation.
Pikes Peak
Aim to leave Colorado Springs around 8:30 so you can arrive at the gate to Pikes Peak at 9:00 AM. It’s best to be there early both to avoid the crowds as well as the afternoon thunderstorms (and clouds) that are common during late summer. The long-time train at Pikes Peak is out of service after having reached the end of its useful life after almost 100 years.
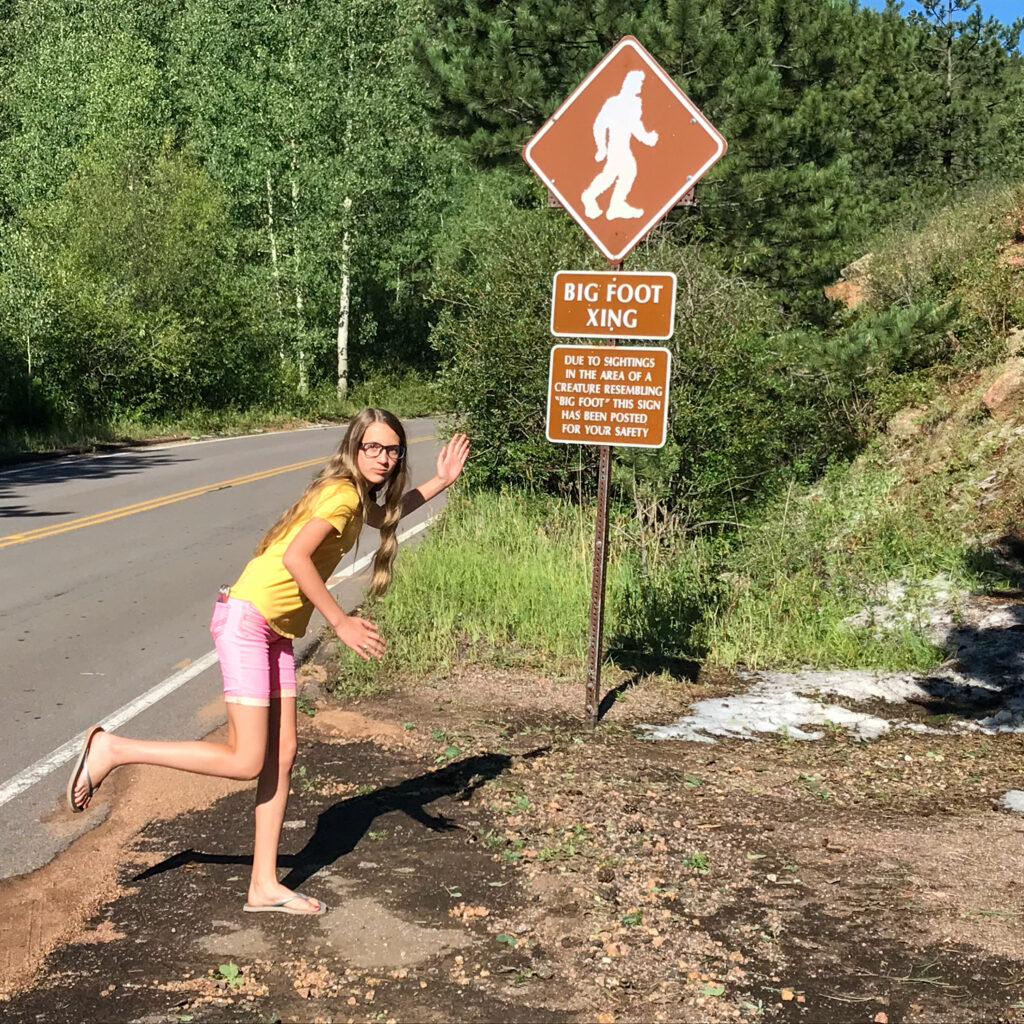
You now have the option of driving all the way to the top or taking a shuttle bus. If you have pets or kids in car seats, you will most likely drive to the top, otherwise don’t be surprised if you’re asked to ride the shuttle from one of several stops along the way. As you head up, look for the Bigfoot Crossing sign for a great photo op!
We drove about halfway up the mountain and then rode the shuttle the rest of the way. I thought this was a good mix, giving me the opportunity to drive on the winding road as well as the chance to look out the window at the amazing scenery. Watch for bighorn mountain sheep along the way! Once at the top, grab a famous donut at the small cafe; they have a special recipe to allow the dough to rise at such a high elevation.
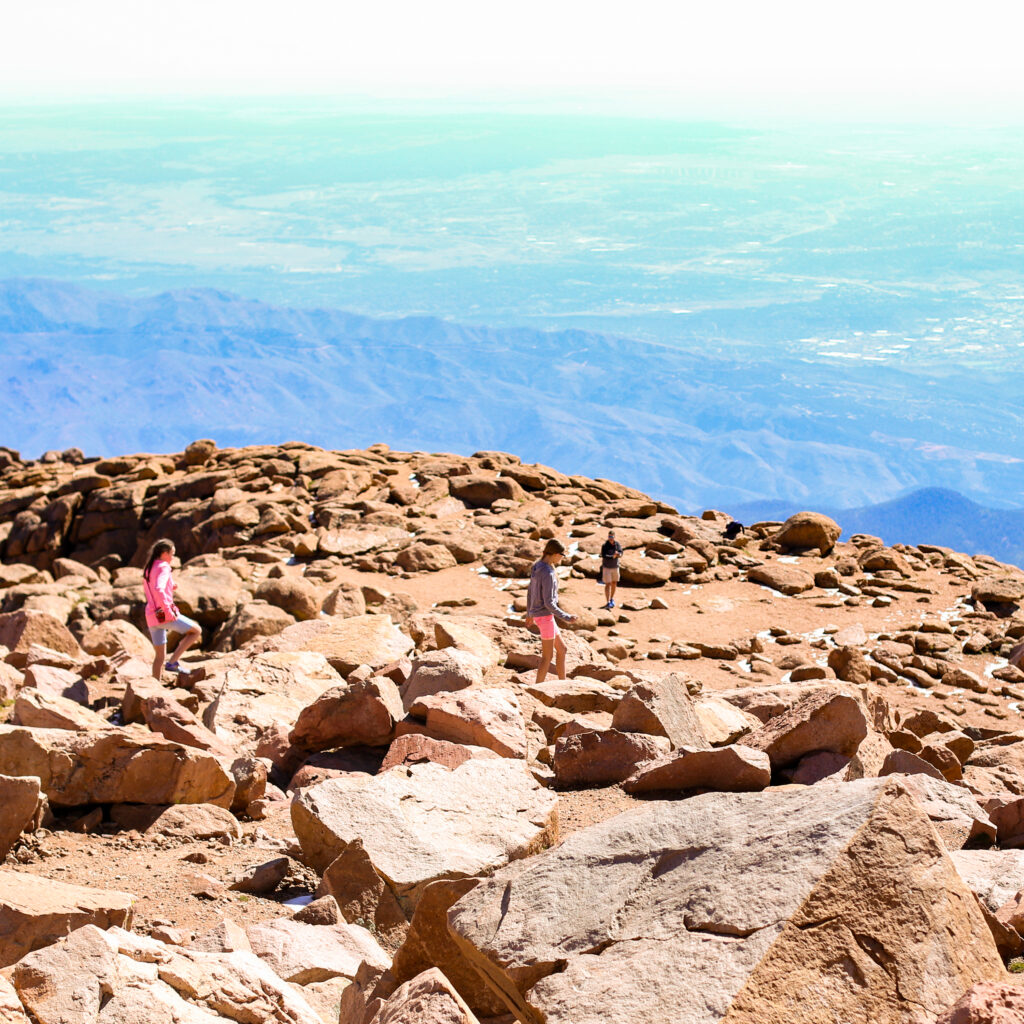

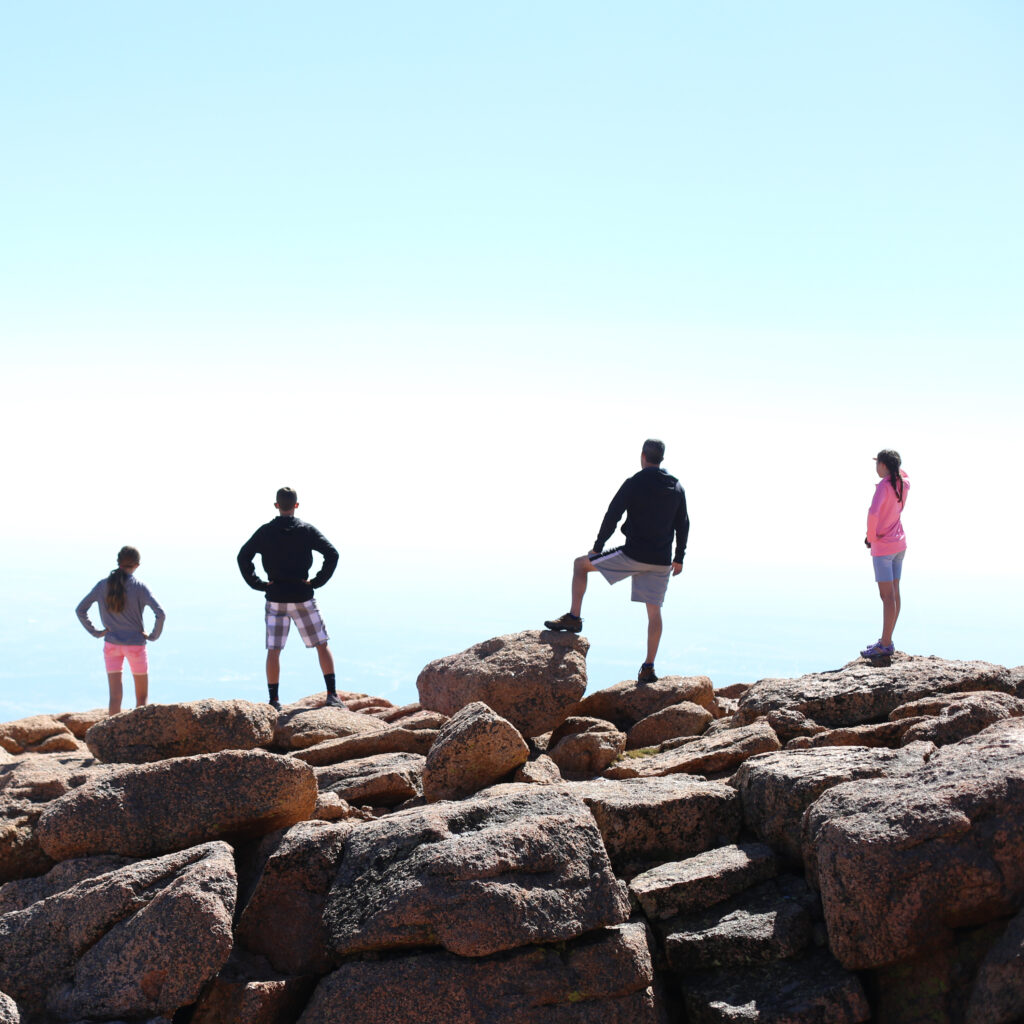

We spent about 45 minutes hiking around the rocks at the peak and enjoying the amazing views. If it’s a clear day, you’ll be able to see for miles and miles in all directions.
The Drive: Pikes Peak and Travel from Colorado Springs, CO to Mesa Verde National Park, CO
Travel for this leg: 7 hrs, 350 miles
BONUS: San Juan National Forest
Pikes Peak took about 4 hours total, and we were on the road by 11:00 AM, heading for Mesa Verde National Park. There are a few different options to go from Pikes Peak to Mesa Verde; I recommend taking the northern loop using Highway 24. It is about 9 minutes longer but has incredible mountain views along the way. The best part is driving through the San Juan National Forest.
Day 3
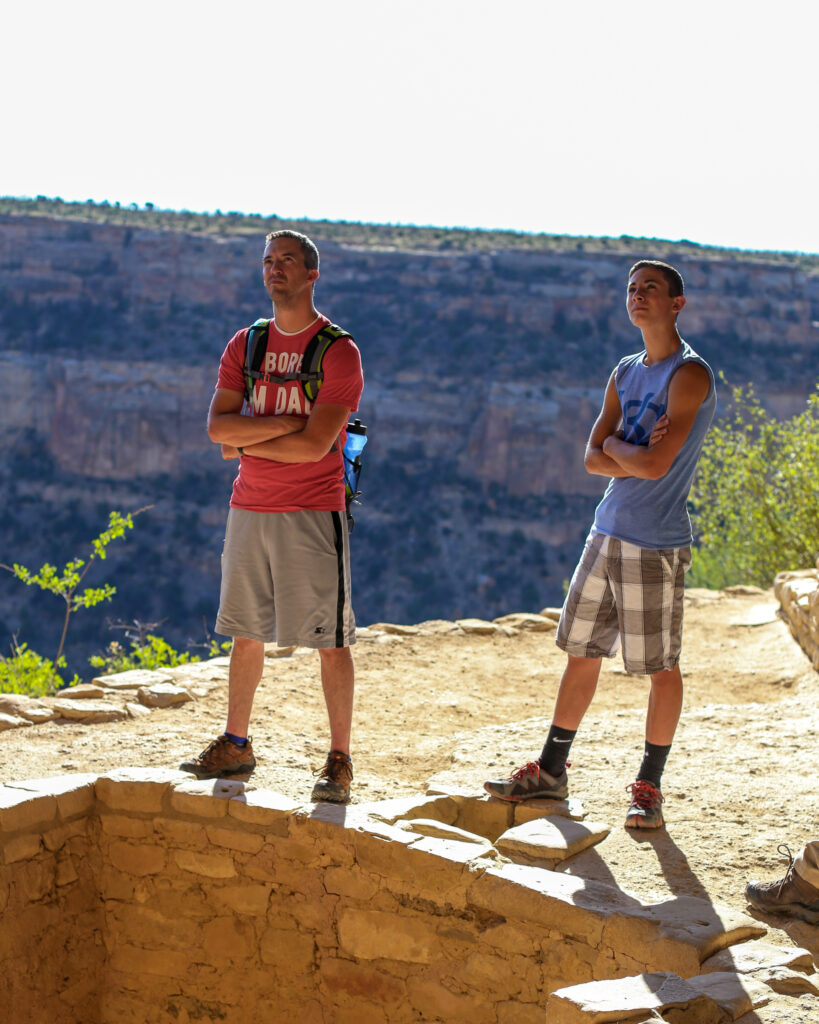
Day 3 of your Southwest family road trip itinerary is packed! You’ll start with a tour of ancient cliff dwellings, stop at the only place in the United States where you can be in four states at the same time, stand on top of one of the tallest bridges in the country, and watch the sunset. Whew!
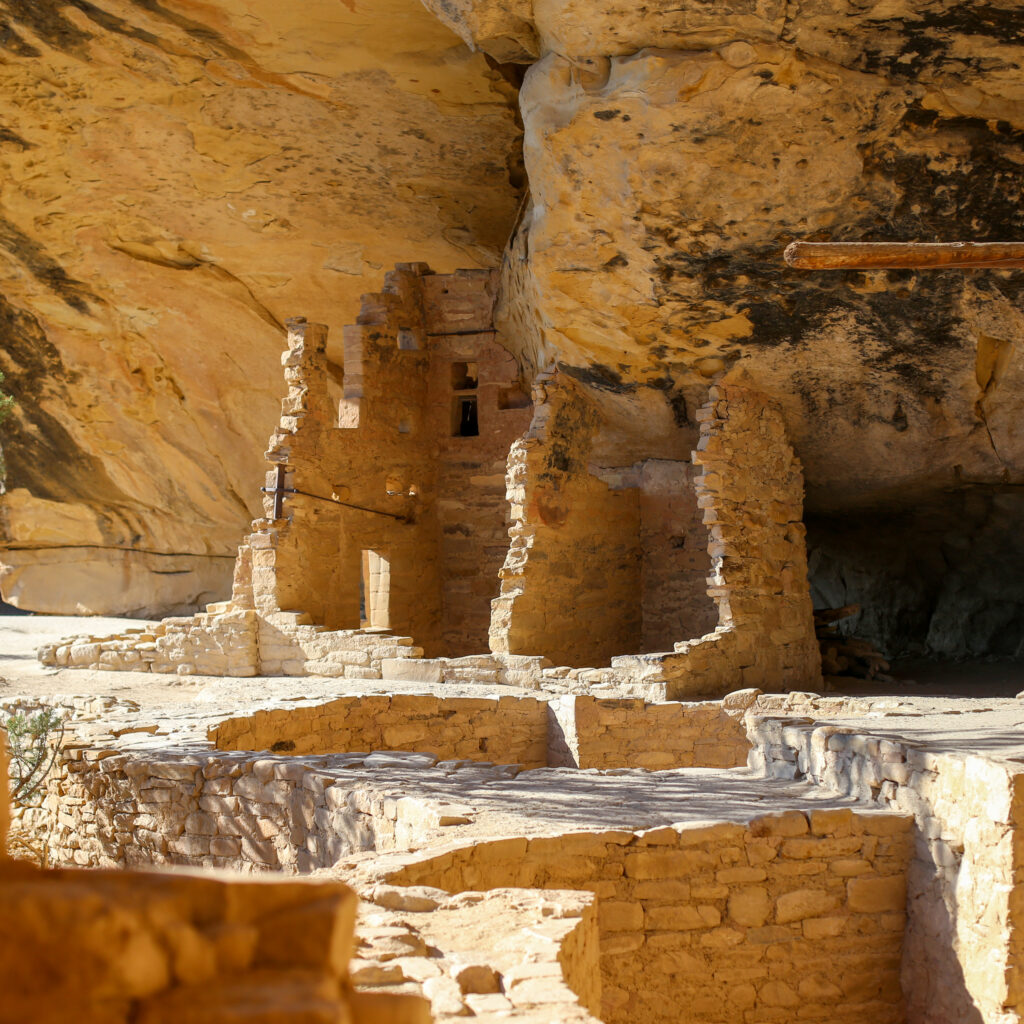
Mesa Verde National Park, CO
We arrived at Mesa Verde National Park around 6:00 PM and headed to Morefield Campground. Morefield is a wonderful campground located about 10 minutes inside the park. It has 267 sites and very rarely fills up.
Despite arriving in the evening, we still had plenty of sites to choose from. There are several loops, including some for tent-only campers, so just drive the loops until you find on that suits you. Keep an eye out for sites that will provide a bit of shade.

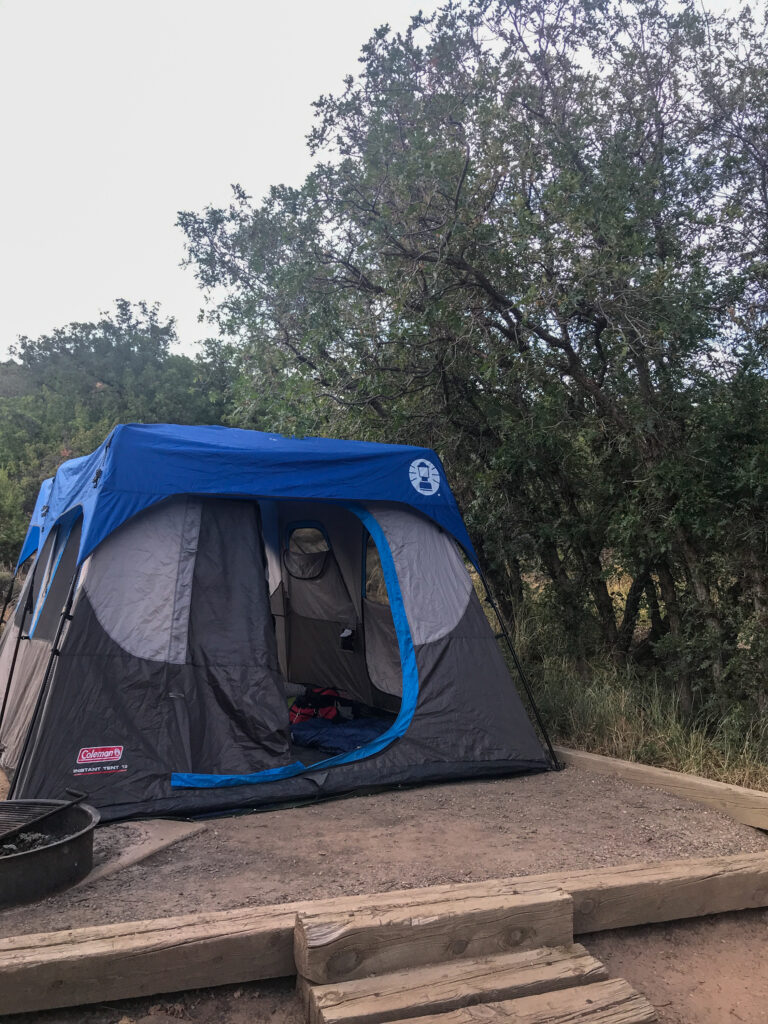
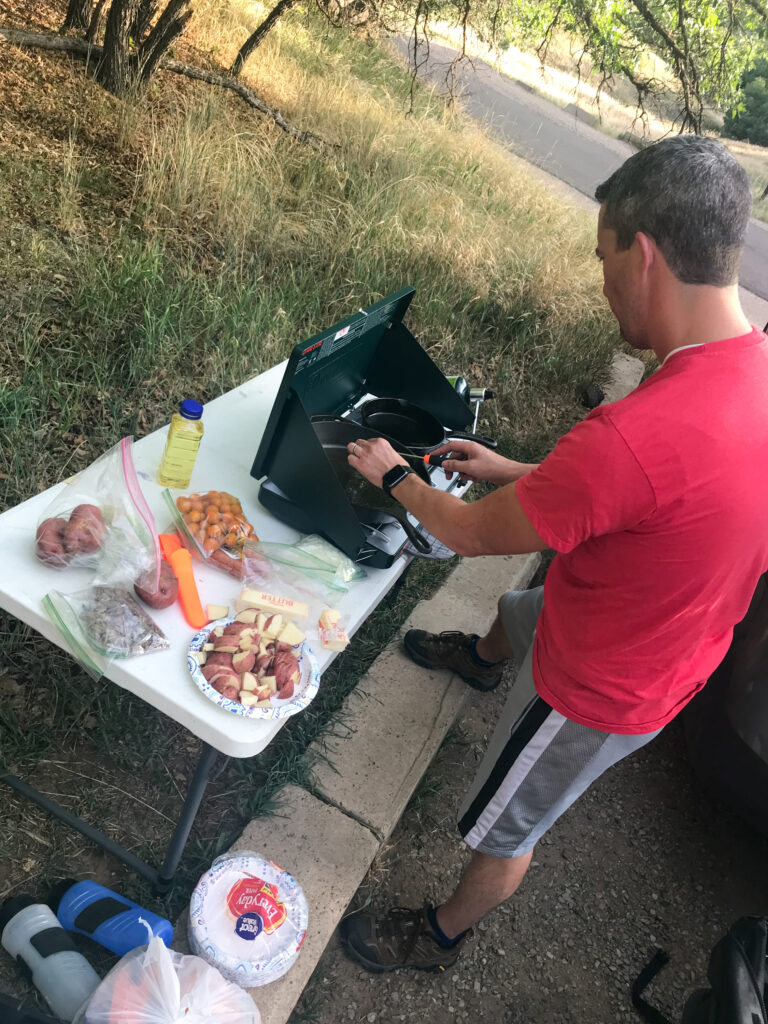
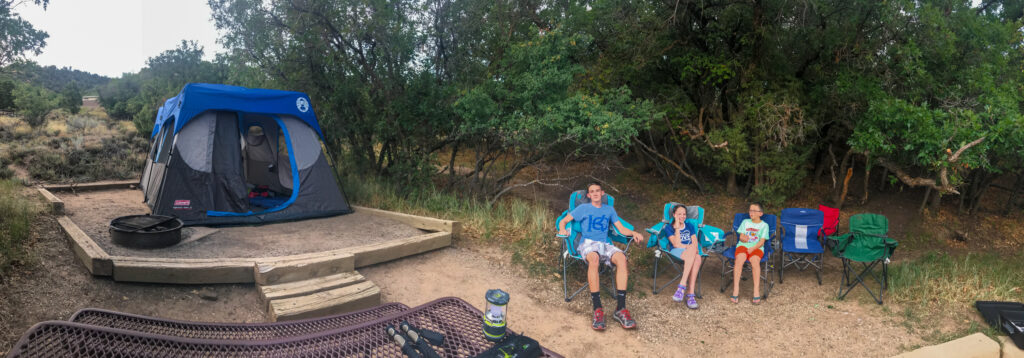
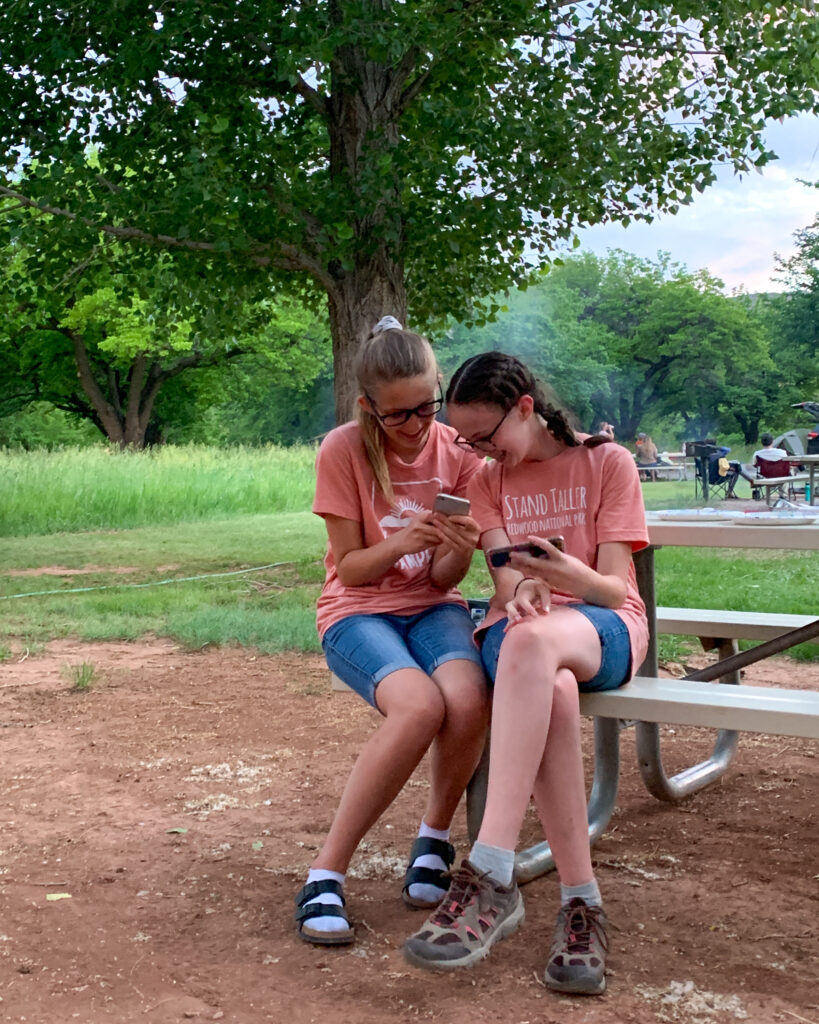
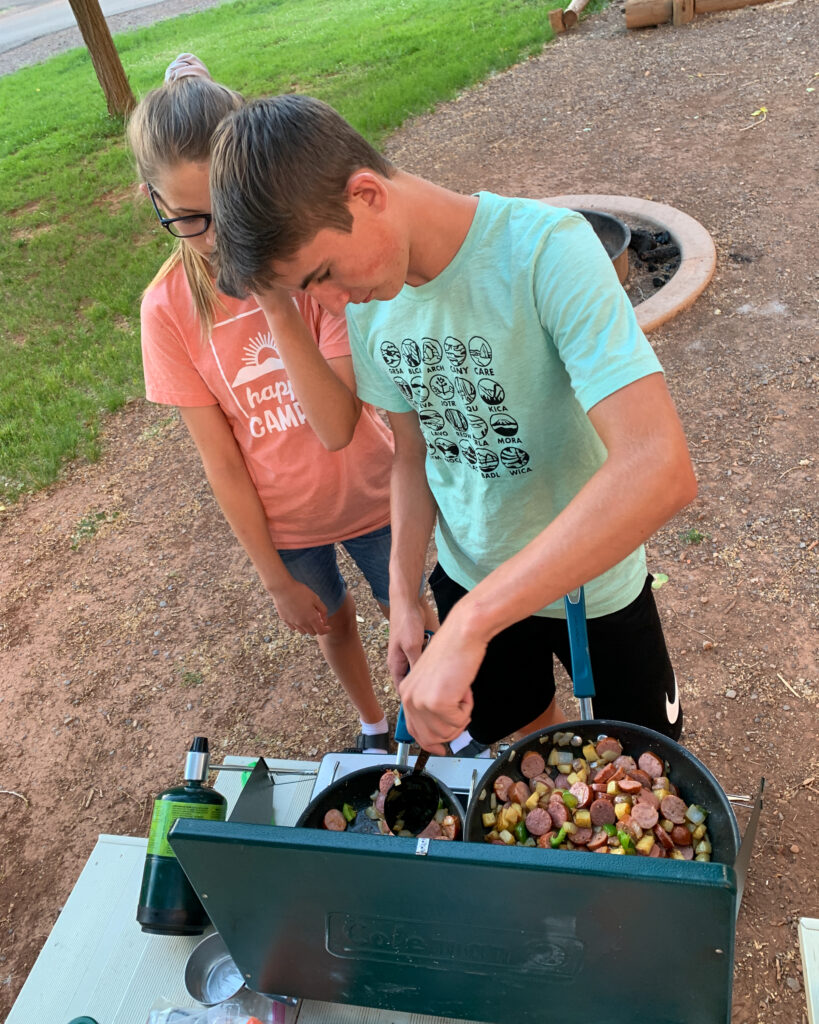
Morefield Campground also features an excellent shower facility (the only free showers on our trip) as well as a great camp store and cafe. The campsites have fire pits and picnic tables, and preparing dinner was every enjoyable in the near perfect late summer weather; be sure to check with the rangers to see if campfires are allowed due to periodic fire risk. Camping at Mesa Verde during the late summer for us meant excellent camping weather with lows in the high 50’s and highs in the mid-80’s.
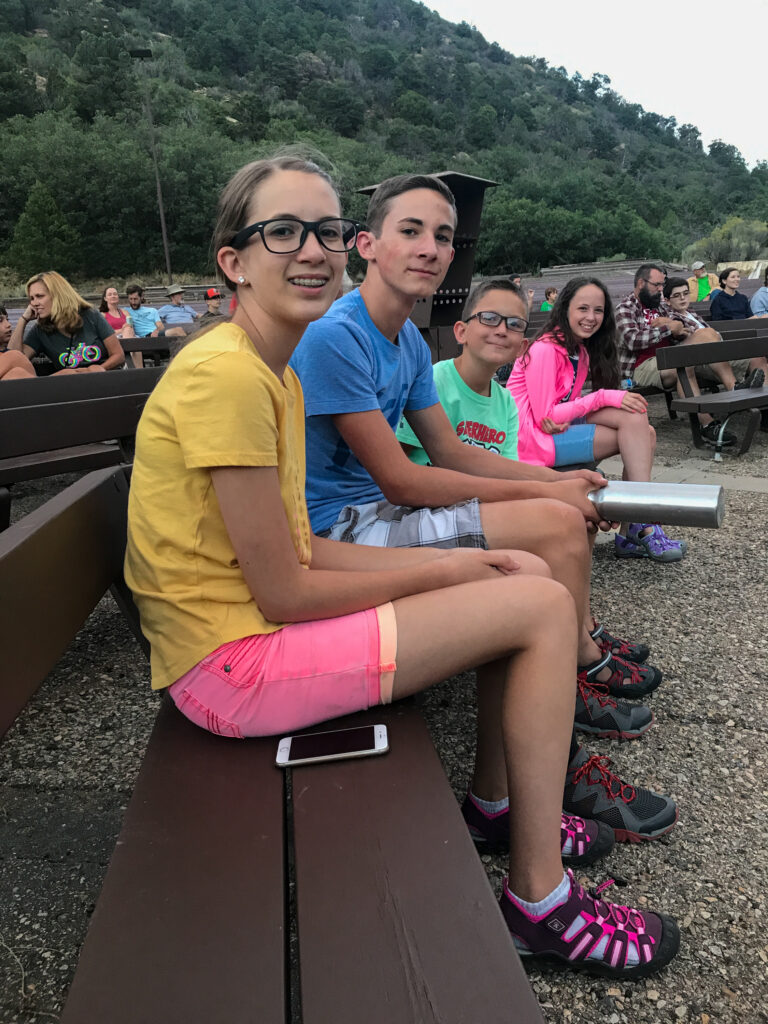
After dinner we headed to the ranger-led evening program, which is hosted from late May to early September. These campfire talks started in 1907 and have been a Mesa Verde tradition ever since; in fact, this tradition has spread to several other National Parks. Our campfire talk was led by Ranger Alex, a geology graduate who shared some interesting facts about the geology of the area that contributed to the ancient civilizations reasons for settling there. It was interrupted by a couple deer who wandered through the amphitheater as well as a large (rare, according to Ranger Alex) owl that flew right over our heads during the presentation and perched on a tree nearby.
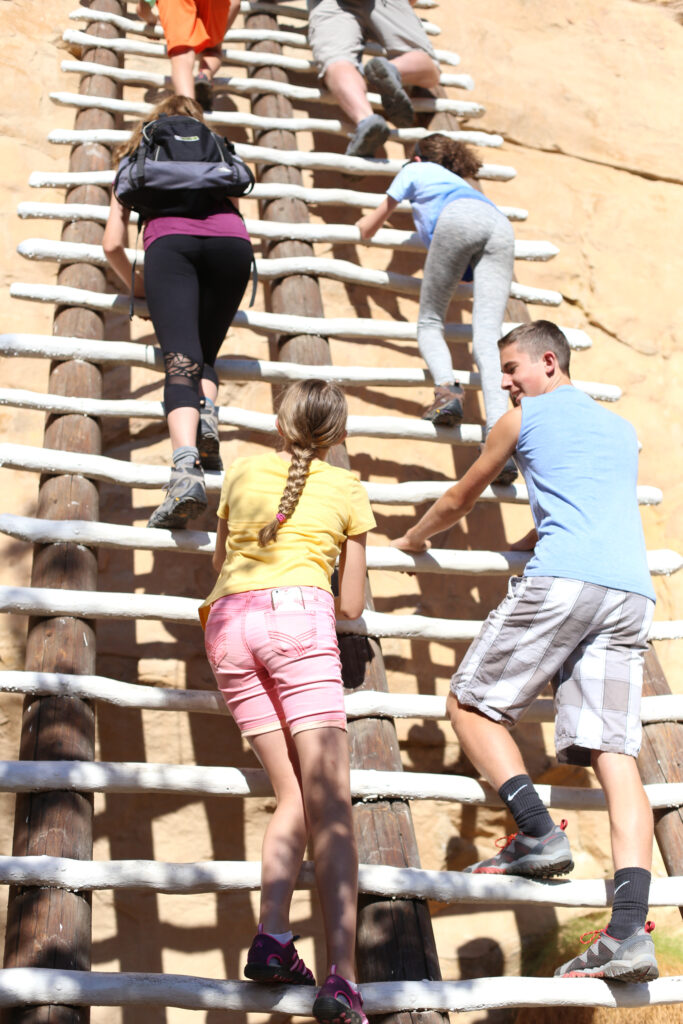
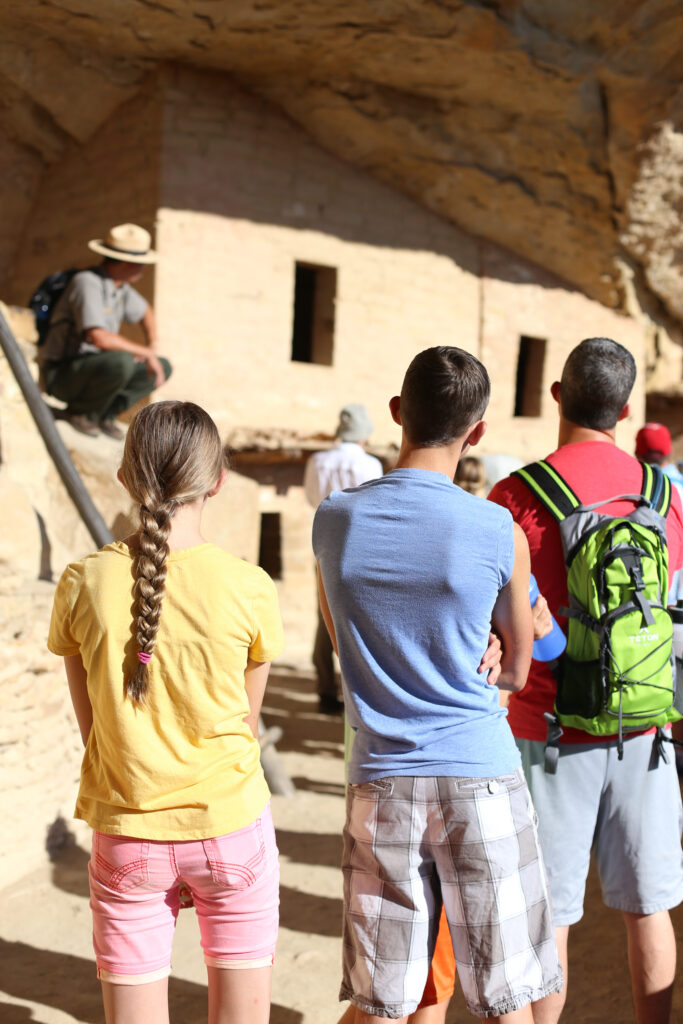
Of course, we were at Mesa Verde to visit a cliff dwelling, and the park did not disappoint! There are a few dwellings that are open to the public for tours, including the Cliff Palace, Balcony House, and Long House. You can plan your visit one of these sites at the park’s website.
When we were there, only these three ranger-led tours were open, though their website does advertise self-guided tours of the Step House. The ranger-led tours require tickets, which can be purchased in person at the visitors center or in advance online. We opted for the Balcony House early-bird tour, which started at 8:00 AM. We LOVED it!

The Balcony House was about a 40 minute drive from the Morefield Campground, which meant we had to get up on time, but it was well worth it. The ranger who led the tour was fun and knowledgeable and did a good job of giving an informative and entertaining tour. Our kids (ages 9-15) all had a blast and especially enjoyed the ladders and tunnels on the tour.
Be aware that you’ll need to climb a 30 ft wooden pole ladder to access the Balcony House and climb through a small tunnel (hands and knees) to exit the tunnel, so if those physical activities will be difficult you may want to consider the Cliff Palace tour.


The tour lasted about 90 minutes. Since it was the first tour of the morning, the temperatures remained pleasant and we avoided the mid-day heat (which still isn’t too bad). We took several liters of water with is (per the tour description’s direction) but did not need most of it; your mileage may vary!
The Drive: Drive to North Rim of the Grand Canyon
Travel for this leg: 6 hrs, 350 miles
Finishing the Early-Bird Balcony Tour by mid-morning will give you enough time to get back to Morefield Campground and break camp by 11:00 AM or so. Hit the showers and cafe for some refreshing and then hit the road! Be excited, because there are two fabulous bonus stops along the way.
BONUS: Four Corners Monument
The drive from Mesa Verde National Park to the North Rim of the Grand Canyon is an amazing event in and of itself. After about an hour on the road, you’ll want to stop at the Four Corners Monument; the only place in the United States where you can stand in four different states at once: Colorado, Utah, Arizona and New Mexico. It’s just a few minutes off the route and is worth doing since you’re there.
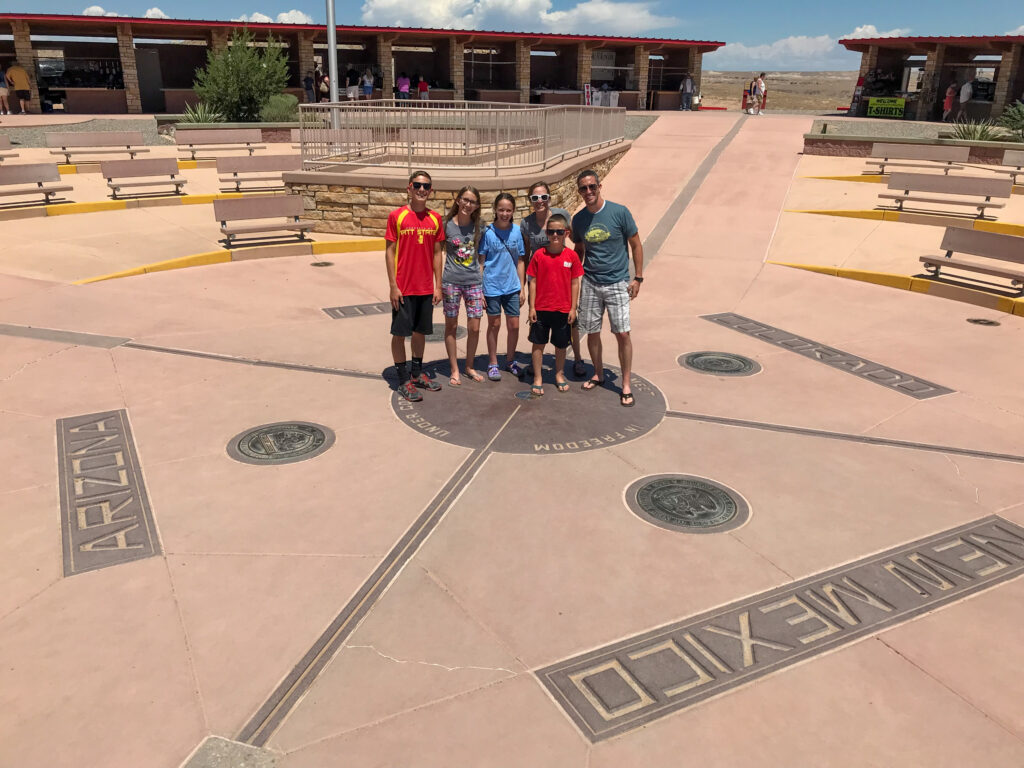
However, the monument itself is not much: four rows of local/native shops surround a courtyard with an inlaid metal plaque commemorating the location. Expect a line of tourists waiting to get their picture taken on the plaque; we waited around 30 minutes. I’d suggest having part of your group wait in line while the others explore the shops. When it’s your turn in line, hand your camera to the people behind you and get a group photo on the plaque. If you’re quick and considerate, you might also snap a few shots of yourself laying on the monument, with each arm and leg in four different states!

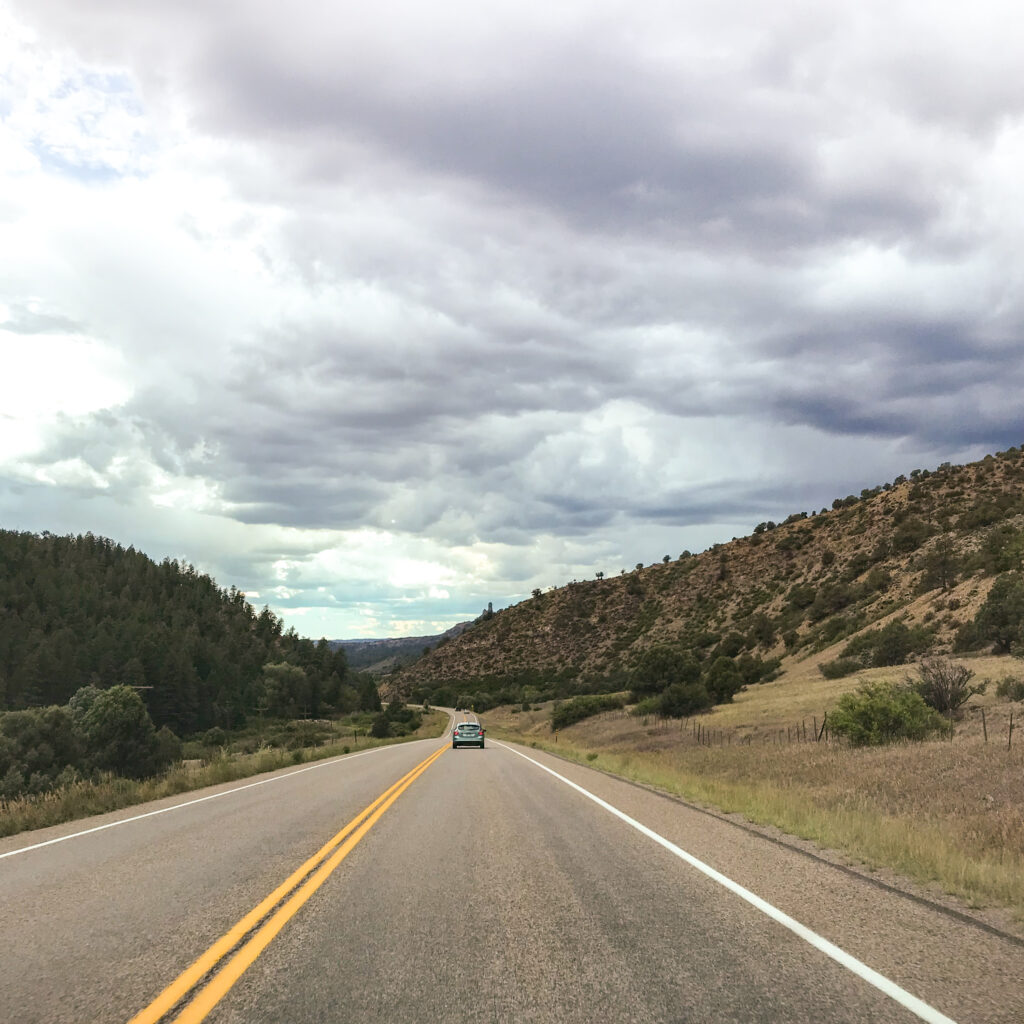
After leaving Four Corners, expect about 3 1/2 hours before your next stop. This route is through barren desert, with red mesas, dry canyons, and beautiful solitude. It’s also hot and lonely, so make sure your vehicle is gassed up and ready for the trek.
BONUS: Navajo Bridge
After about 3 hours you’ll reach Highway 89 and head south; at this point, be ready for some amazing views! The road heads south and then drops over 1,000 feet along a sheer red cliff face as you leave one high desert plateau for the Colorado River. In many places the road will be passing through red rock on both sides with just enough space for the two lane highway.

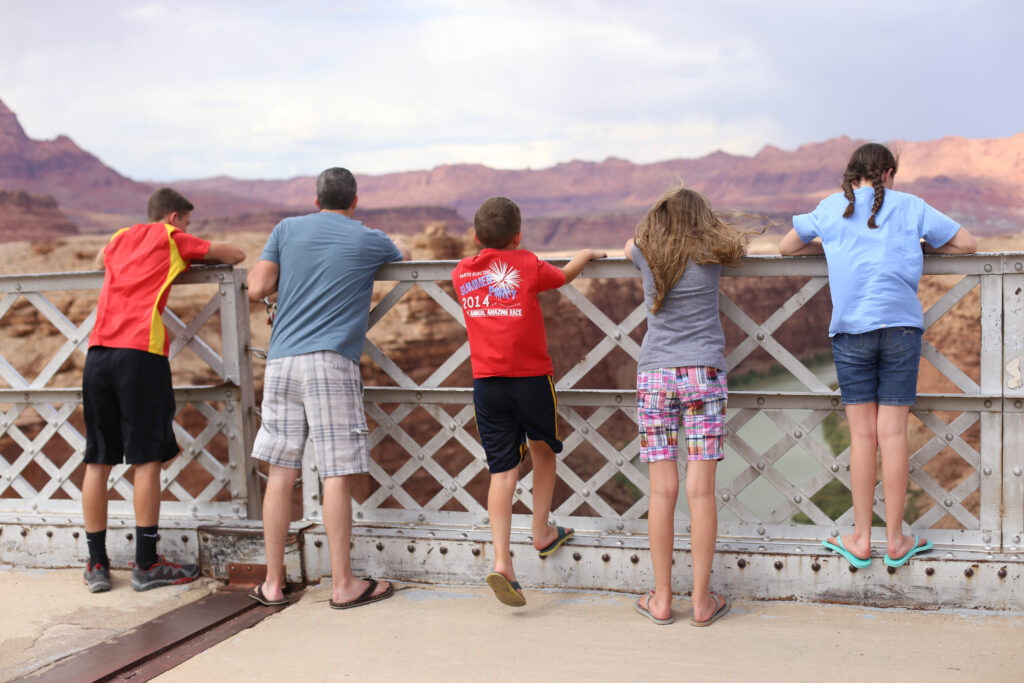
Once you reach the bottom, you’ll zig back north on Highway 89A to cross the Colorado River. The point of crossing is another destination worthy of a stop: Navajo Bridge.
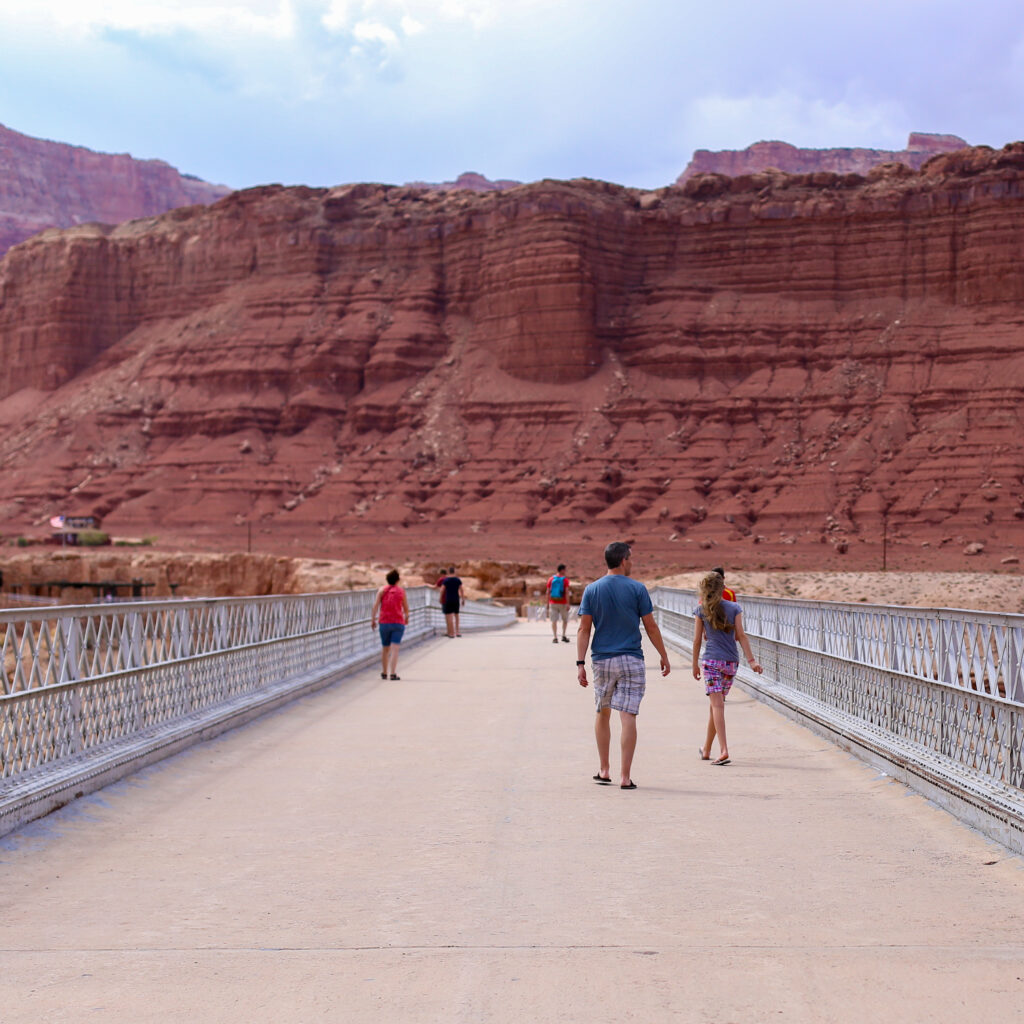
Originally built in 1929 to replace the dangerous ferry crossing of the Colorado River some 500 feet below, the Navajo Bridge was joined by a second bridge in 1995. The second bridge is dedicated to vehicular traffic, leaving the original bridge open only to pedestrians.

What a thrill it is to stand on the 9th highest bridge in the United States and peer over the edge at the river below. Kids and adults alike will enjoy the chance to stop and stretch their legs while they walk across the bridge. Hint: be careful with your hat; the wind can be pretty stiff out on the bridge.
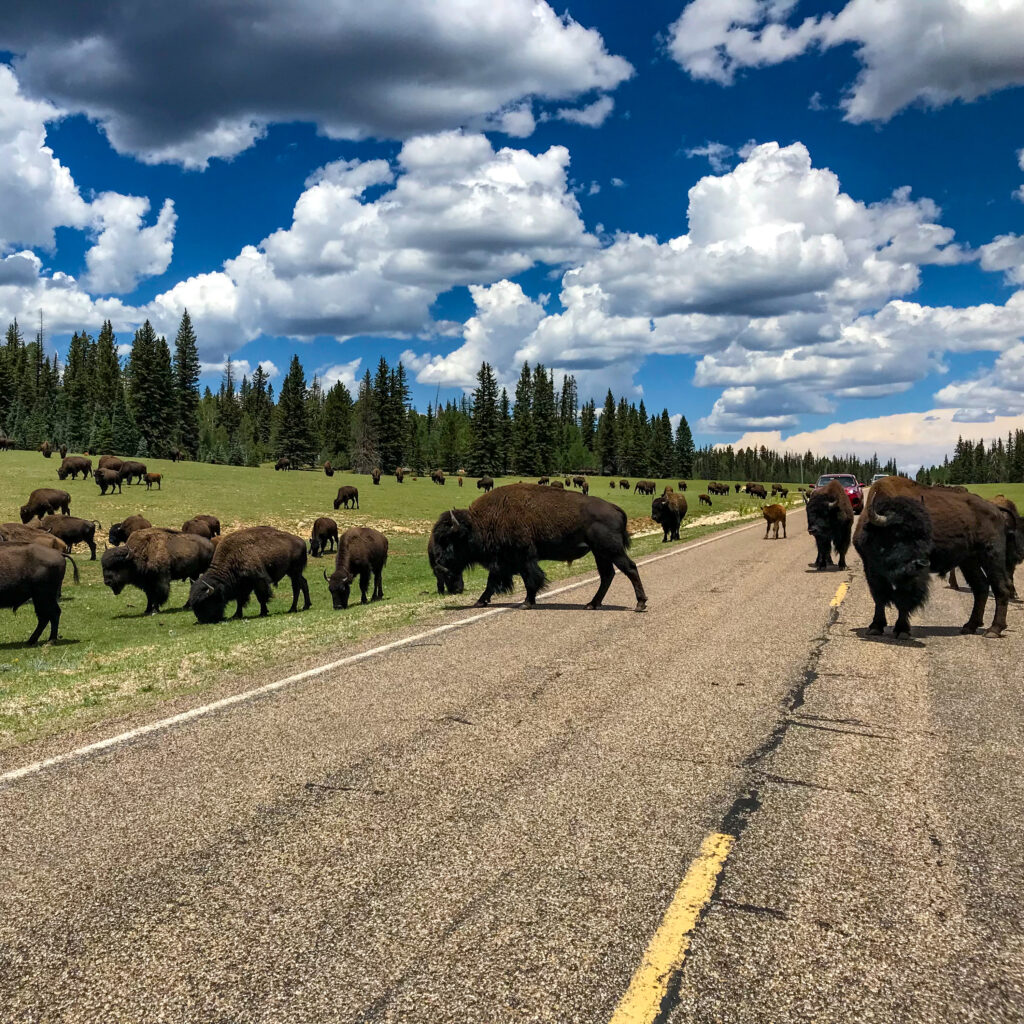
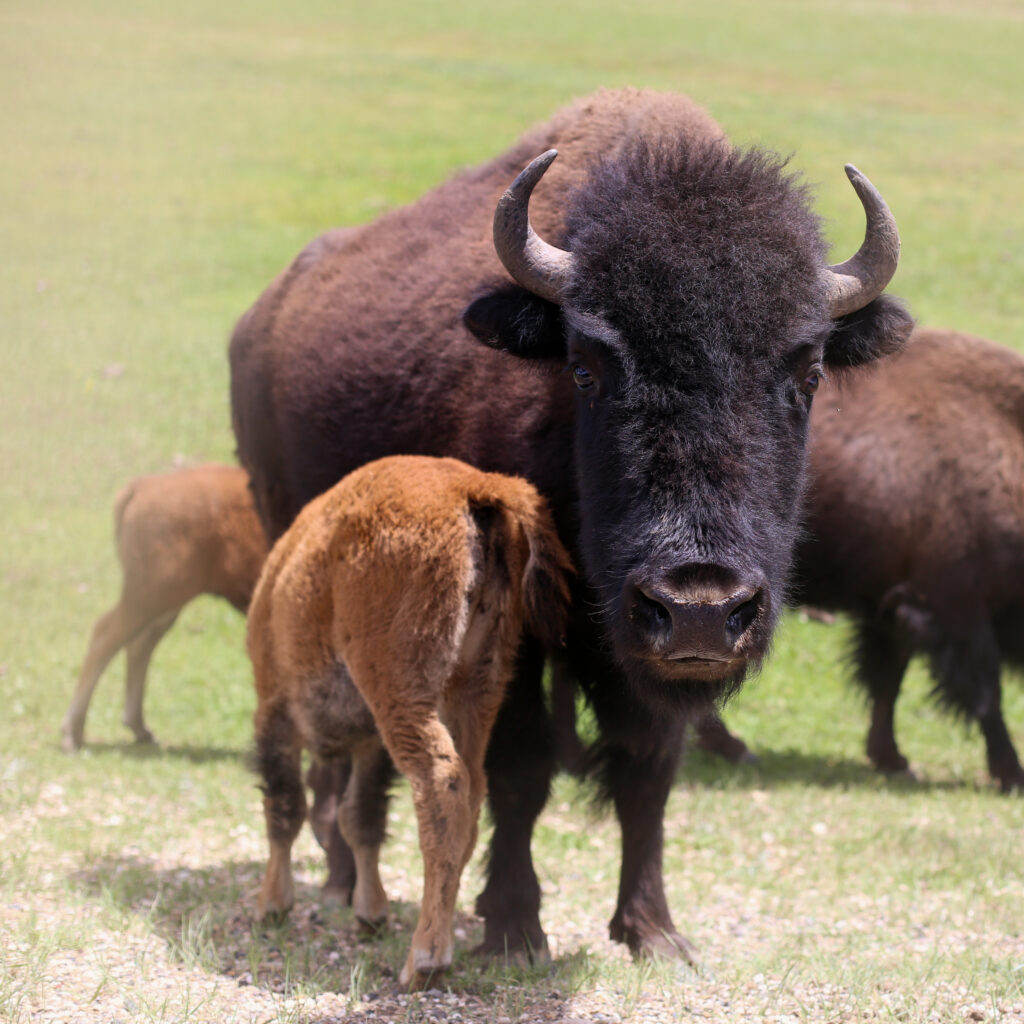
After the bridge, be prepared for more amazing scenery during the next 1 hr 45 min to the North Rim of the Grand Canyon. You’ll experience some diverse change of ecosystem as you leave the desert floor and climb about 4,000 feet in elevation up to the Kaibab Plateau. You’ll pass Jacob Lake (which has a great campground in its own right), where you’ll head south on Highway 67. The rest of the drive is amazing as you pass through pine forest and a couple of awesome grass meadows. Be on the look out for wildlife; we had to stop while a bison herd lazily crossed the road.
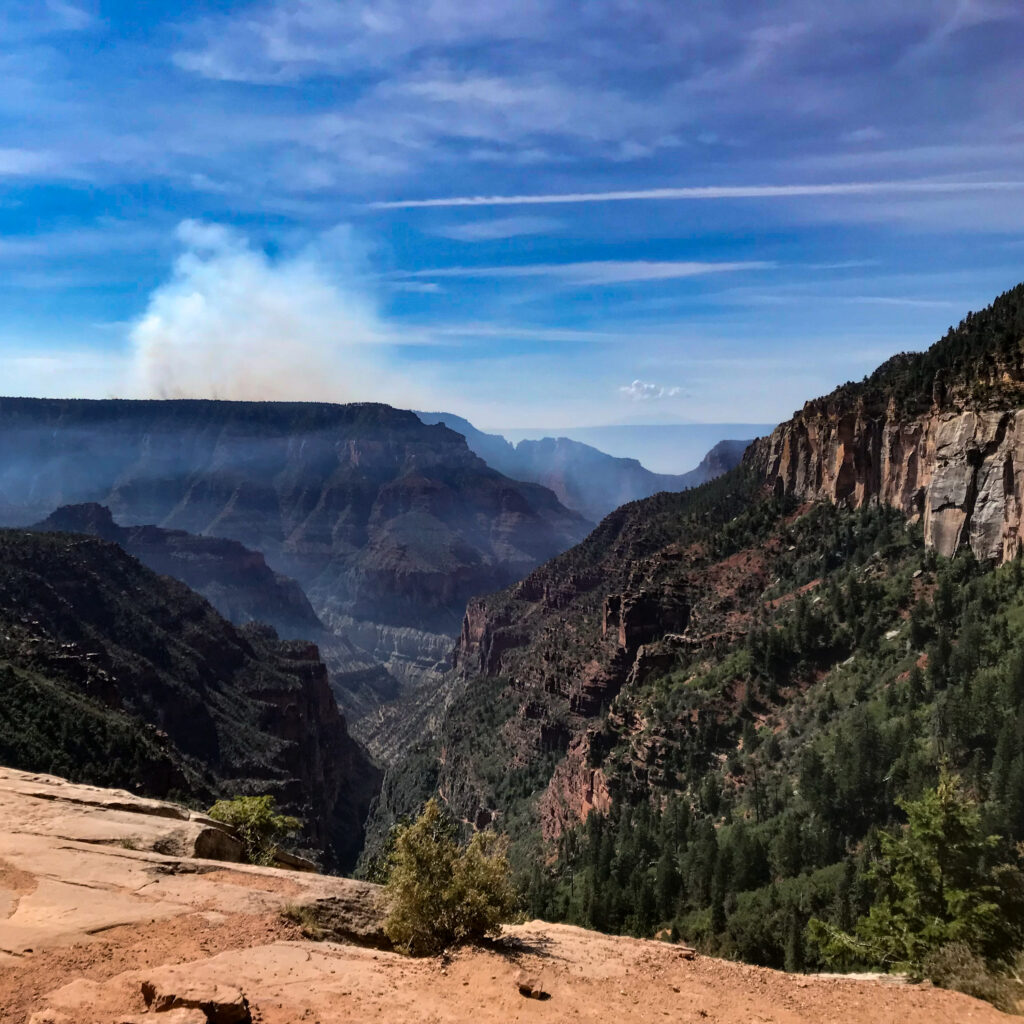
Arrive at Grand Canyon North Rim
We arrived at the North Rim of the Grand Canyon around 5:00 PM and set up camp at the North Rim Campground. This campground was one of our favorites from the entire trip. At over 8,000 ft in elevation, it is nice and cool in the summer (low 80’s when we were there) and has a good mix of campsites for both RVs and tents. Some of the sites even back up to the canyon and have amazing views.
If you’re like us, you won’t be able to wait to see the Grand Canyon; as soon as we found our campsite we took the very short hike to the Rim Trail to catch the views and a few obligatory pics.
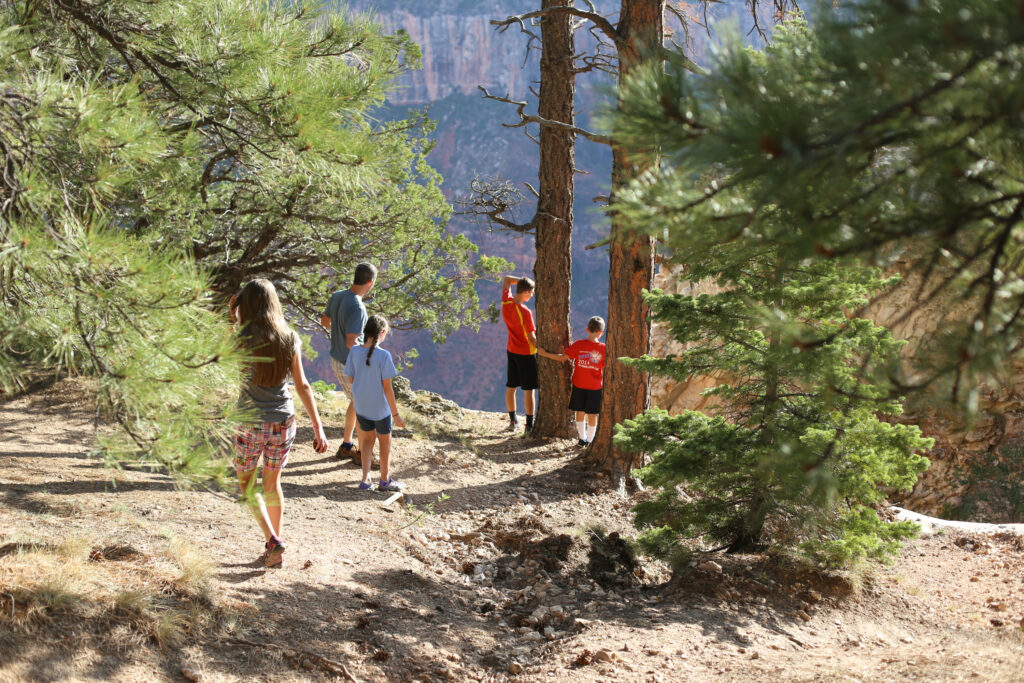
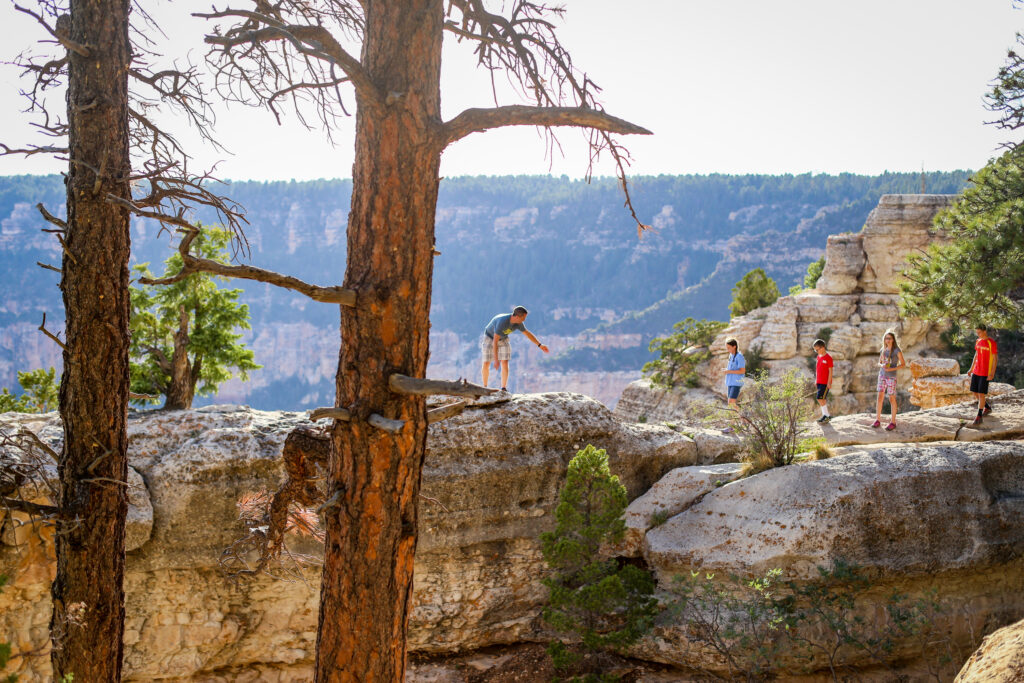

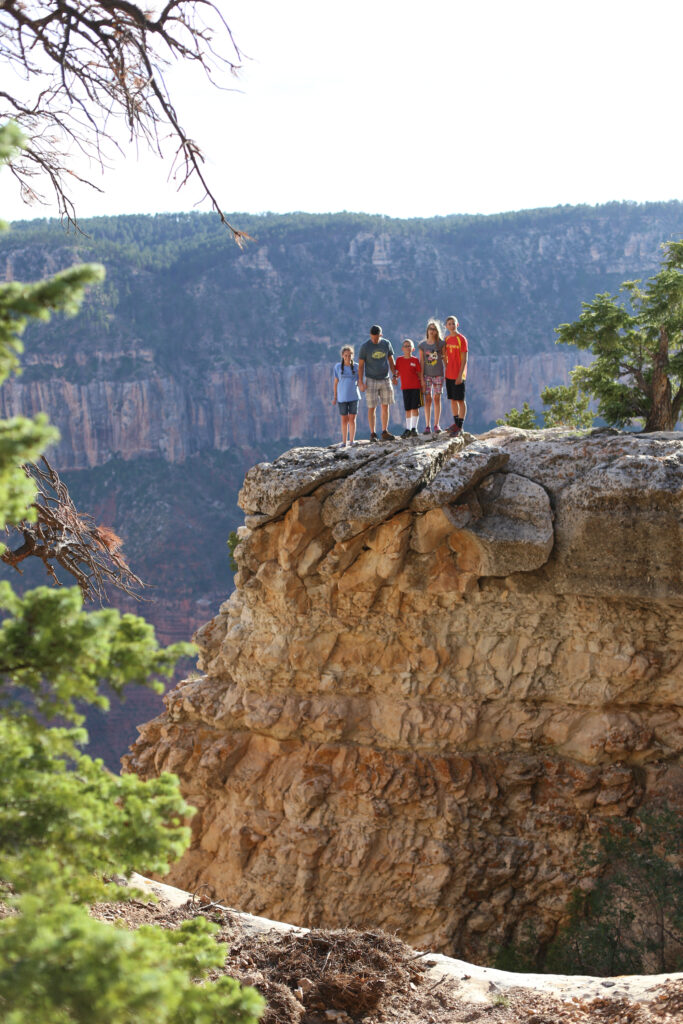
If you have time, I recommend following the Rim Trail south to the Lodge, which has a cafe, restaurant and gift shop. We visited the Lodge just in time for sunset and were pleasantly surprised to find plenty of viewing space to settle in and watch the sun go down. This lack of crowds is one of the benefits of visiting the North Rim, which receives only 10% of the 6 million plus annual visitors to the Grand Canyon (the other 90% go to the more accessible but more crowded South Rim).
It’s worth noting that reservations for North Rim Campground campsites fill up quickly, so be sure to book months in advance. We booked about 3 months in advance and got the very last site available, and considered ourselves super lucky! Rain had greened up the vegetation and lowered the fire risk, so campfires were allowed while we were there, but be sure to check upon arrival to make sure it’s safe to burn if that’s your plan.
Day 4
Day 4 of your Southwest family road trip itinerary has you checking off a bucket list item for many adventurers: hiking in the Grand Canyon.
Grand Canyon National Park, North Rim
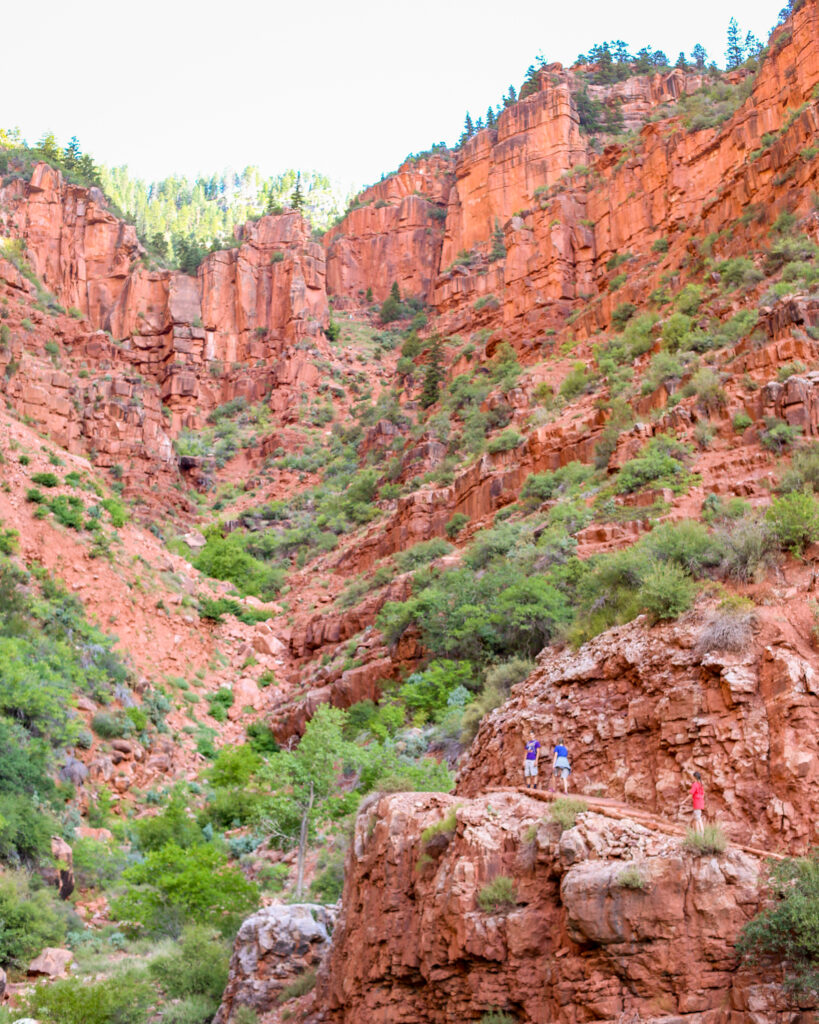
Only about 1% of visitors actually hike any real distance down into the canyon itself; the rest just stay on the surface and take pictures. We were determined to be part of the minority and ventured down the North Rim’s only trail into the canyon: the North Kaibab Trail.
It’s about an 14 mile hike from the trailhead to the Colorado River, and since we only had a half-day to spend, we hiked about 3 miles down. Get up early and head out before the sun is up if you can, because once you leave the rim and the sun comes up, the cool temps of the rim will increase more and more as you descend.

We got up around 5:00 AM and hit the trail by 5:43 AM, which was great timing. There are plenty of parking spaces at the trailhead if you’re early, as well as water spigots for filling up before you head down. We had about 2 liters per person, and used it all in our 5.2 mile total hike. I recommend a good hydration backpack, such as the highly rated Teton Sports 2L pack that we used. I also had 1L water bottles in each of the side pockets, and still had room for snacks and a small first aid kit in the pack.
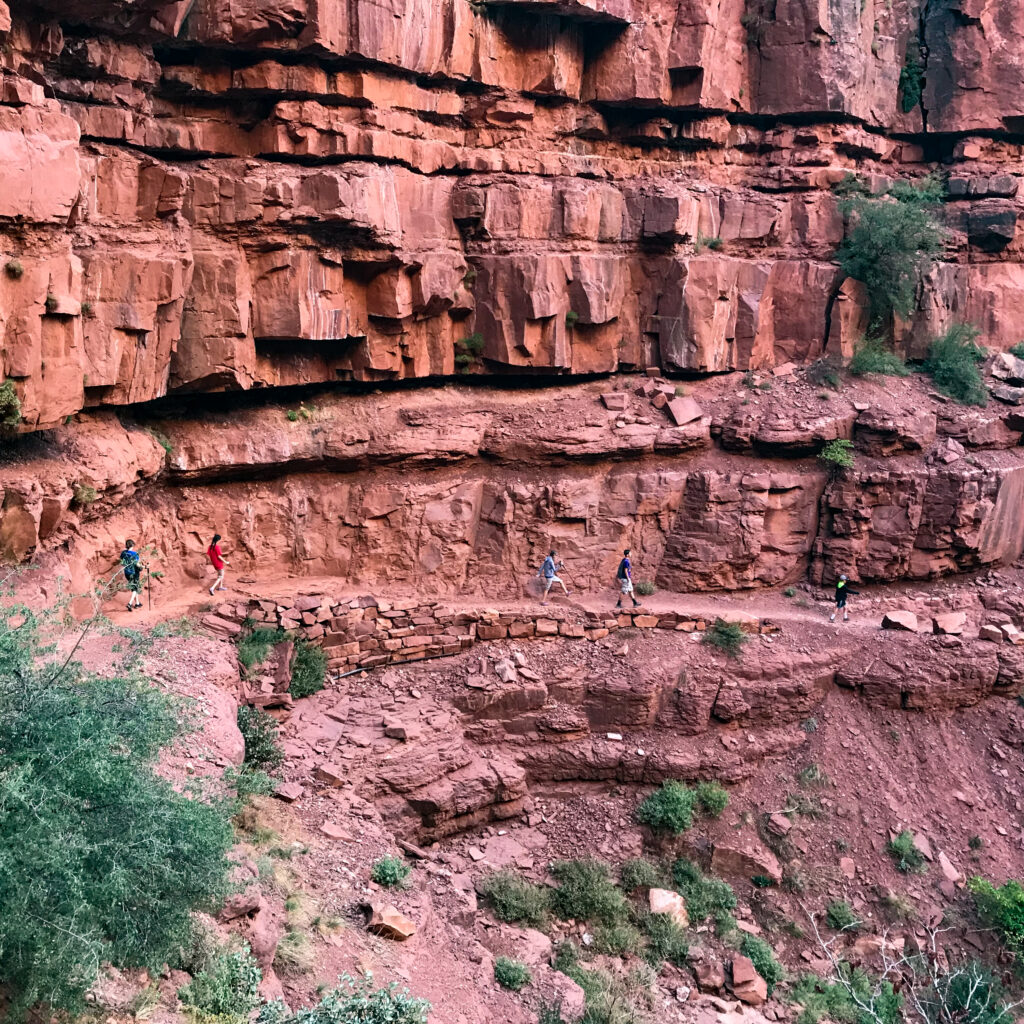
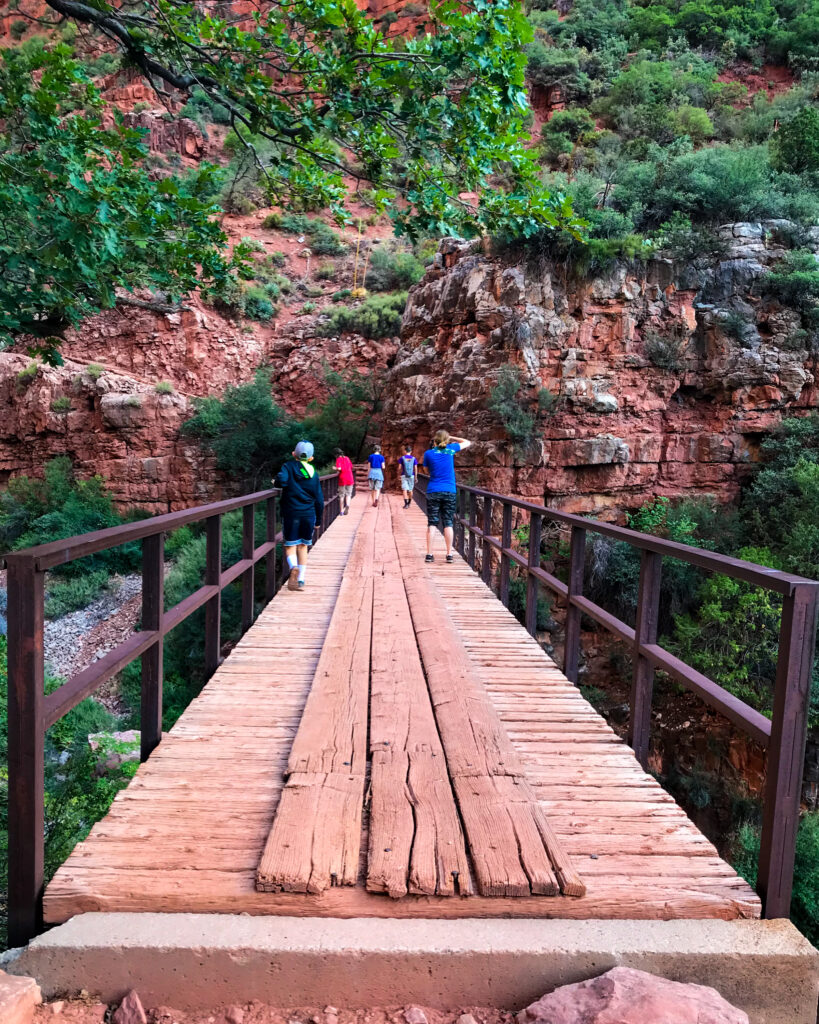
In contrast to the crowds that I’m sure were stalking the South Rim, we only passed 4-5 other groups on our trek on the North Kaibab Trail. We hiked 2.6 miles down to the Redwall Bridge. One of the best things about starting early was that we got to watch the sun creep down the canyon walls all during our descent. The only drawback to this was realizing that the sun would eventually catch us as we made the much harder ascent back up the trail.
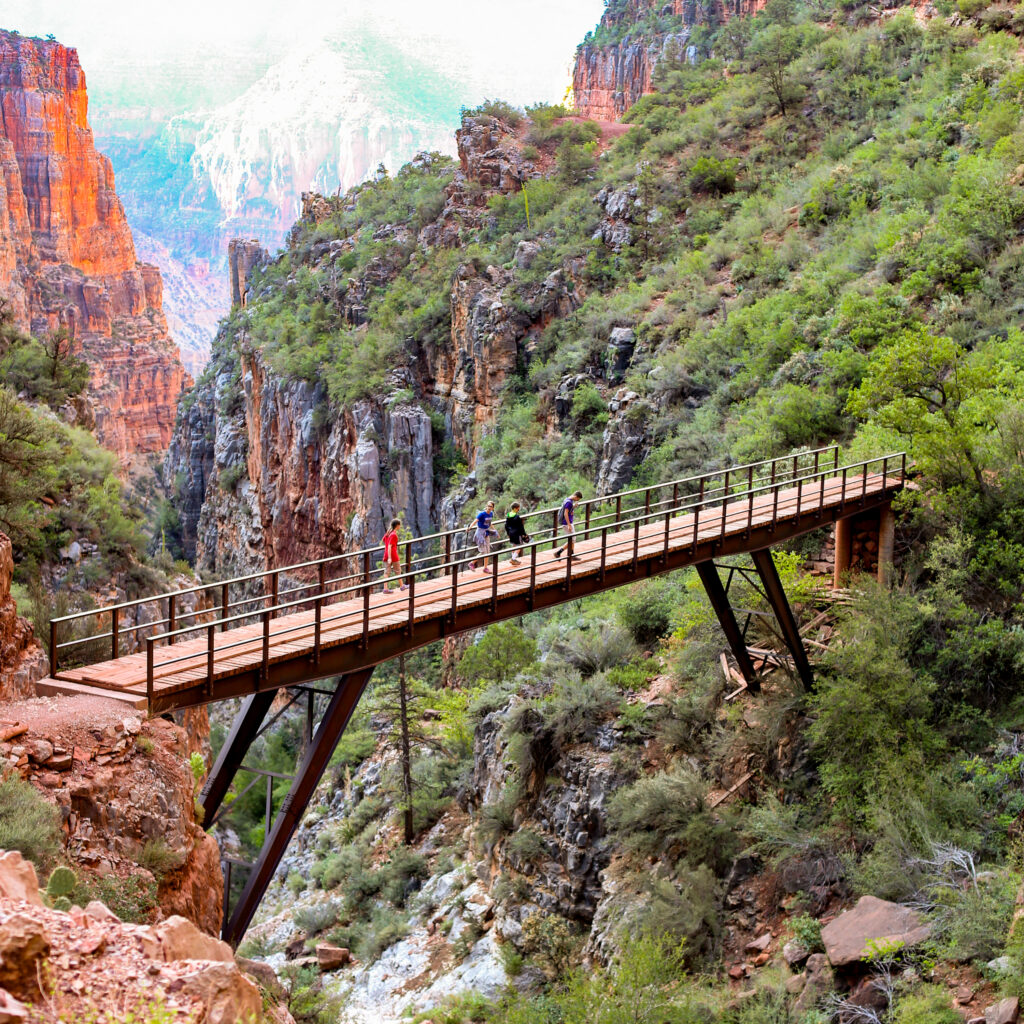
The views from Redwall Bridge are incredible, and there as a nice spot next to the bridge with some shade where we took a 20 minute break for a snack and water before heading back up. Keep track of how much time you spend coming down, as you can plan on about twice that for the ascent.
Our total trip was 4 hr 30 minutes on the dot. The 2.6 miles down took about 1 hr 40 minutes, while the 2.6 miles back up took about 3 hours total. The elevation dropped 2,234 ft according to my GPS. We made it back up the climb and to the campground in time to break camp and be out of our campsite by the required 11:00 AM. Our only regret was that we didn’t have more than one night at the North Rim!
The Drive: Bryce Canyon National Park
Travel for this leg: 156 miles, 3 hr
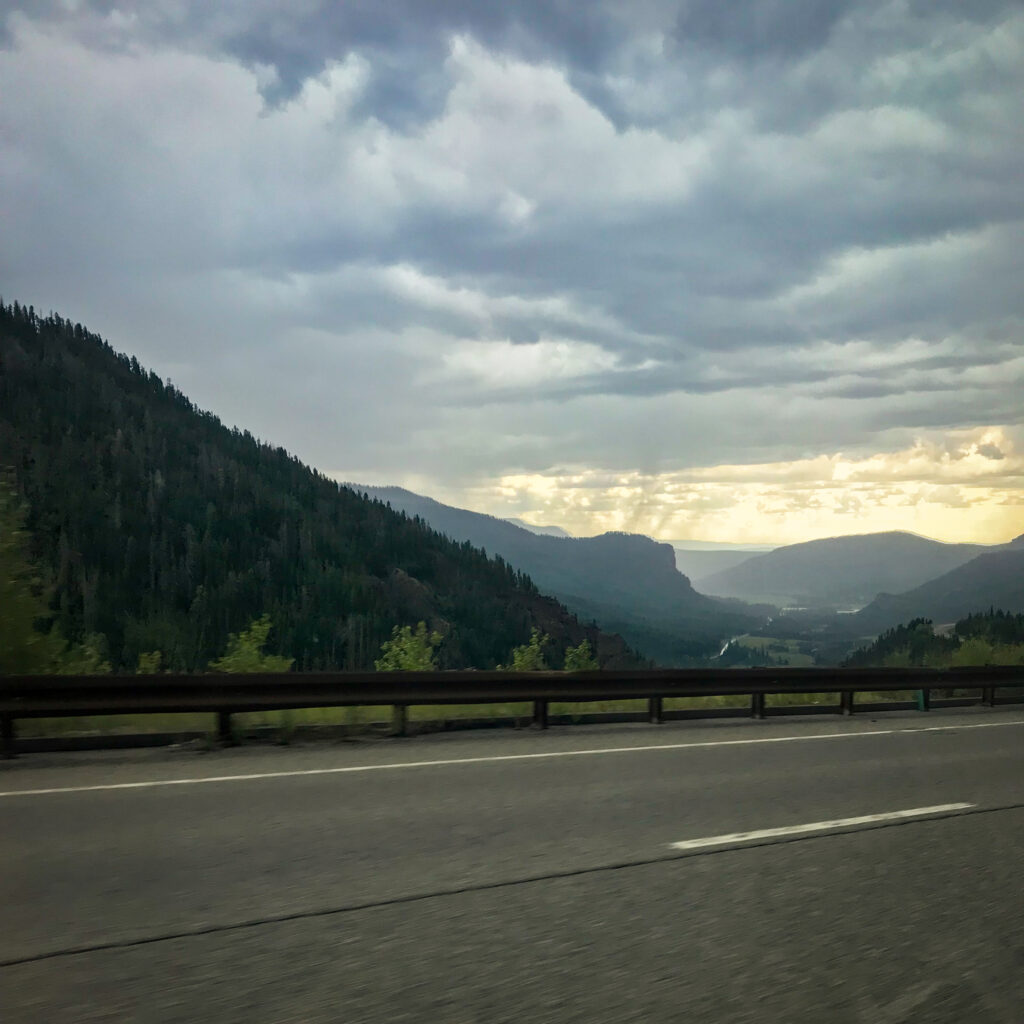
The drive from the North Rim to Bryce Canyon is another treat. First, you get to drive back through the Kaibab Plateau, past the green pines and through the grass meadows. We ended up in a traffic jam with American Bison! It was amazing to see them crossing the road, eyeing the cars like they owned the place (which they did).
Then you’ll descend back into red rock desert, through Fredonia and cross the Arizona/Utah border. We opted to stop in Kanab for a grocery run to restock our cooler for the next few days at Bryce Canyon. After Kanab, expect about a half hour of more desert driving before the scenery will start to change as Highway 89 heads north through a classic Utah canyon road. Once you hit Highway 12, you’re almost there!
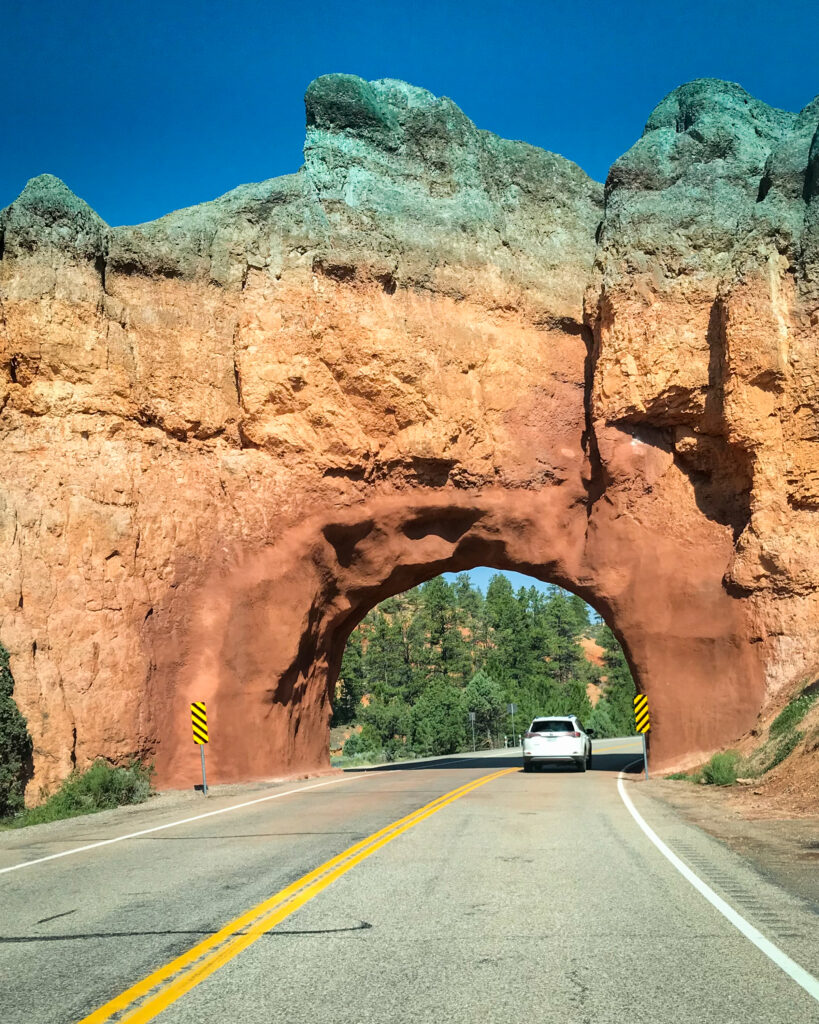
BONUS: Red Canyon on Dixie National Forest
Highway 12 is an amazing drive in and of itself and is listed as an All American Road and was one of my favorite all-time drives. Soon after you turn on to Highway 12, you’ll be at the Red Canyon Visitor Center. Open Memorial Day through Labor Day, this center has information on area hikes, campgrounds, and scenic views. There are several trails near the center that offer some fun short hikes.
As you drive through this area, red rock formations surround you on both sides, complete with the famous twin red rock bridges that you drive under. Be sure to stop for a picture at one of the bridges!
Arrive at Bryce Canyon
Bryce Canyon has two campgrounds, but neither accept online reservations and we were worried that we might not get a site since we’d be arriving in the afternoon. We were pumped to find about 10 sites open at Sunset Campground and quickly found one to our liking. Bryce Canyon also features the North Campground, which is larger and closer to the Visitor Center. We opted for Sunset since it’s a bit quieter and closer to the Sunrise and Sunset points. The North Campground does have some amazing campsites with views of the canyon, so you can’t go wrong with either campground.
Resting at around 8,000 ft elevation, Bryce Canyon National Park is pleasant even in later summer (low 80’s when we were there in early August). Of course, it gets a bit warmer once you descend into the canyon and are in direct sunlight, but it’s definitely not the soaring desert temps you typically think of when picturing southern Utah.
Day 5
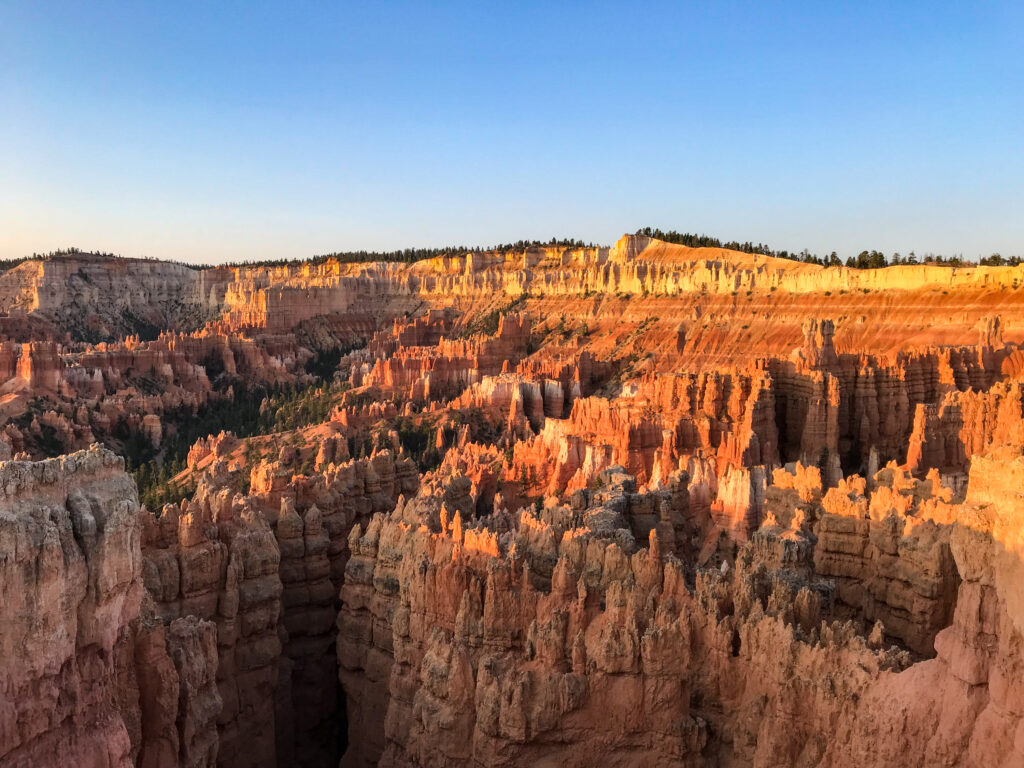
Day 5 of your Southwest family road trip itinerary has you exploring one of the most underappreciated parks in the nation: Bryce Canyon National Park.
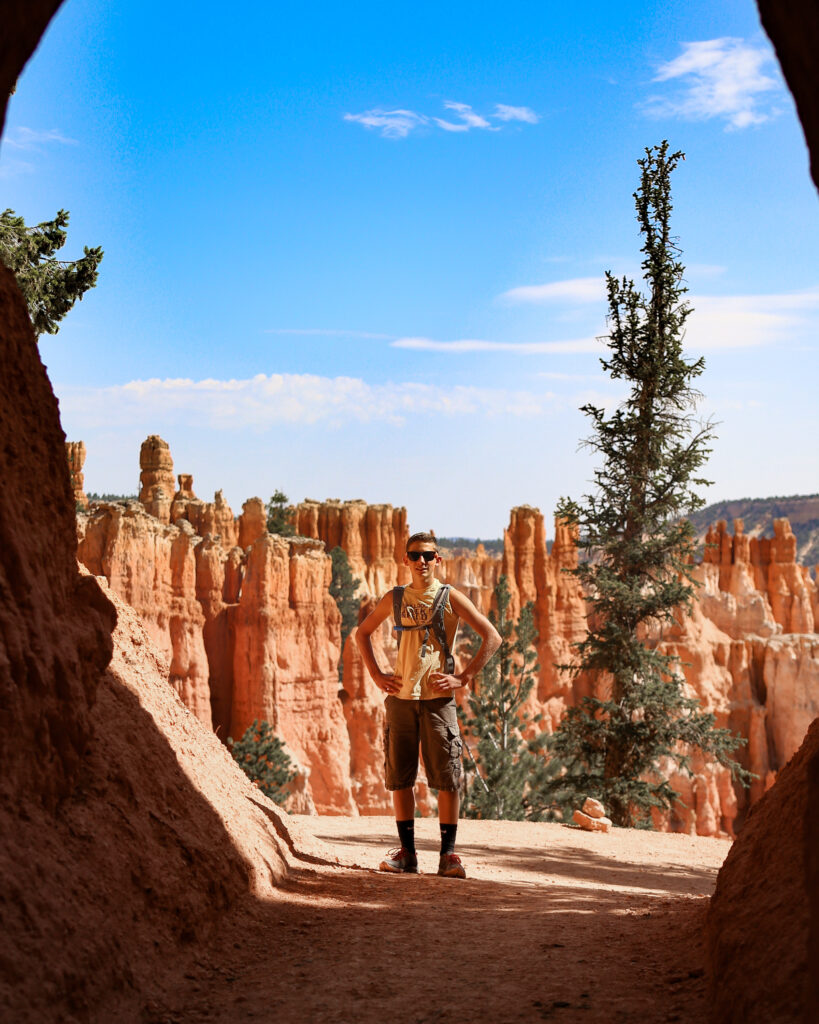
Hiking at Bryce Canyon
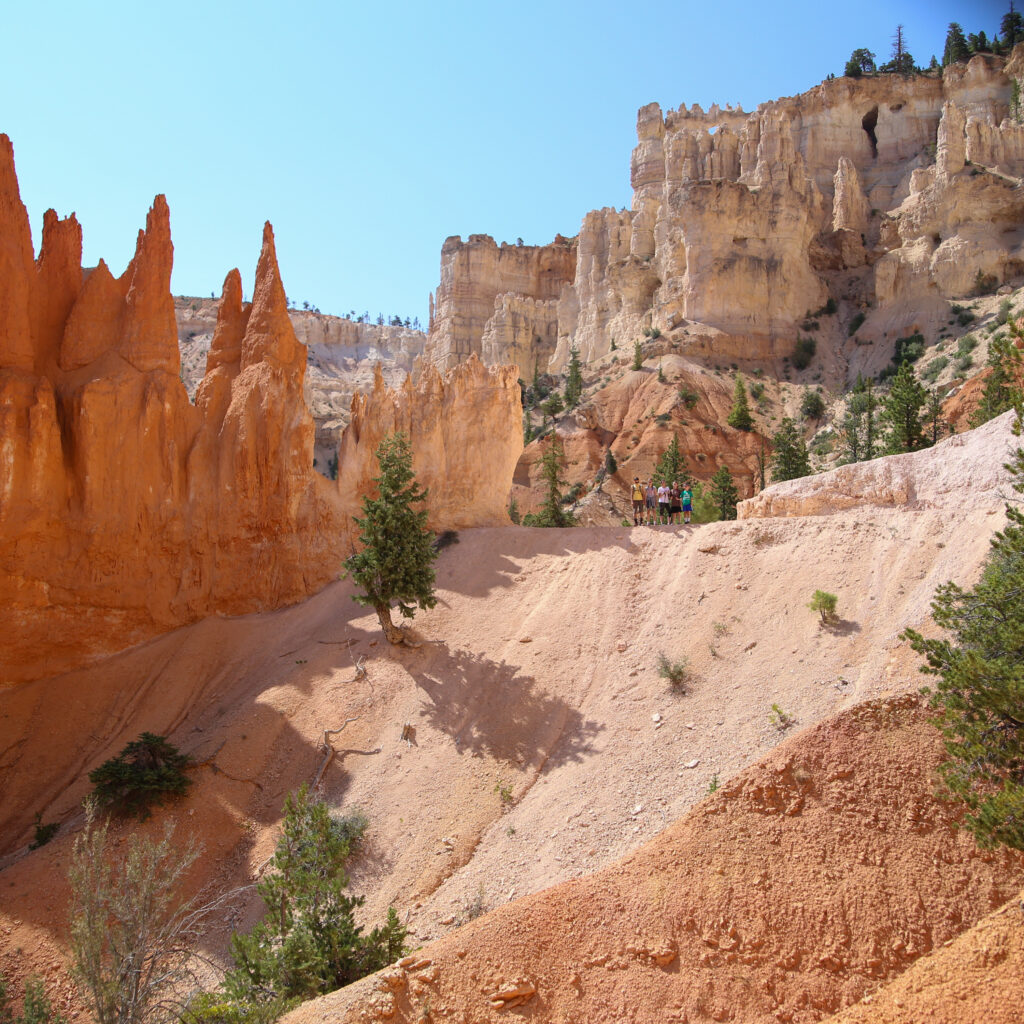
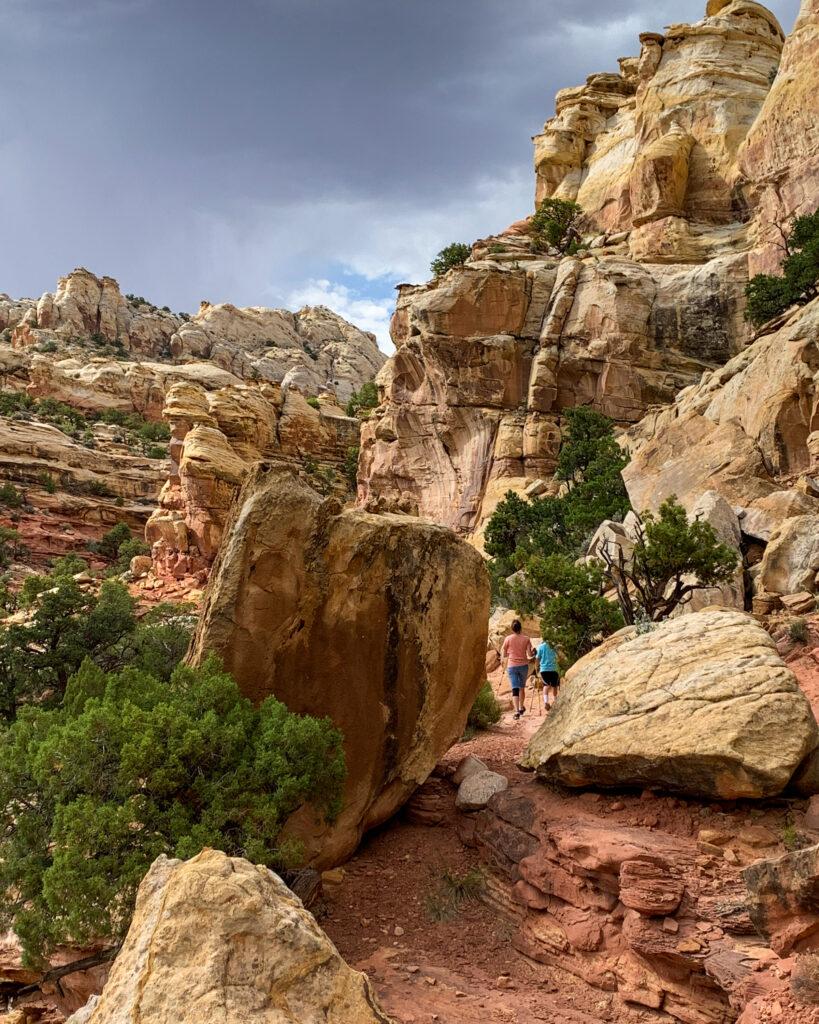
The amazing rock formations at Bryce Canyon are called hoodoos. They are formed by thousands of years of erosion, and are technically still changing slightly each year. One of our favorite things about Bryce Canyon is that you can hike down among the hoodoos themselves. An amazing network of trails descend down into the canyon from the rim and weave among the hoodoos.
There is a great network of trails at Bryce Canyon. Check out the NPS map to plan the best route for your family.
There is also a free shuttle system at Bryce Canyon that stops along the rim drive. This shuttle means you can descend down into the canyon from one point along the rim, hike through the canyon, and ascend up at another point along the rim. You can then take the shuttle back to your original location. It’s a tremendous benefit.

We opted for the Navajo / Peekaboo Combination trail. We started at Sunset Point (shuttle stop) and descended into the canyon via the Navajo Loop trail. This part of the trail is amazing as you weave in and out of the hoodoos.


You’ll get to pass Thor’s Hammer and Two Bridges. After about a half-mile you’ll come to the intersection of Peekaboo Loop Trail. You’ll join this trail; pay attention to the signs so that you do the trail clockwise as required. You’ll follow it for about 1.3 miles.


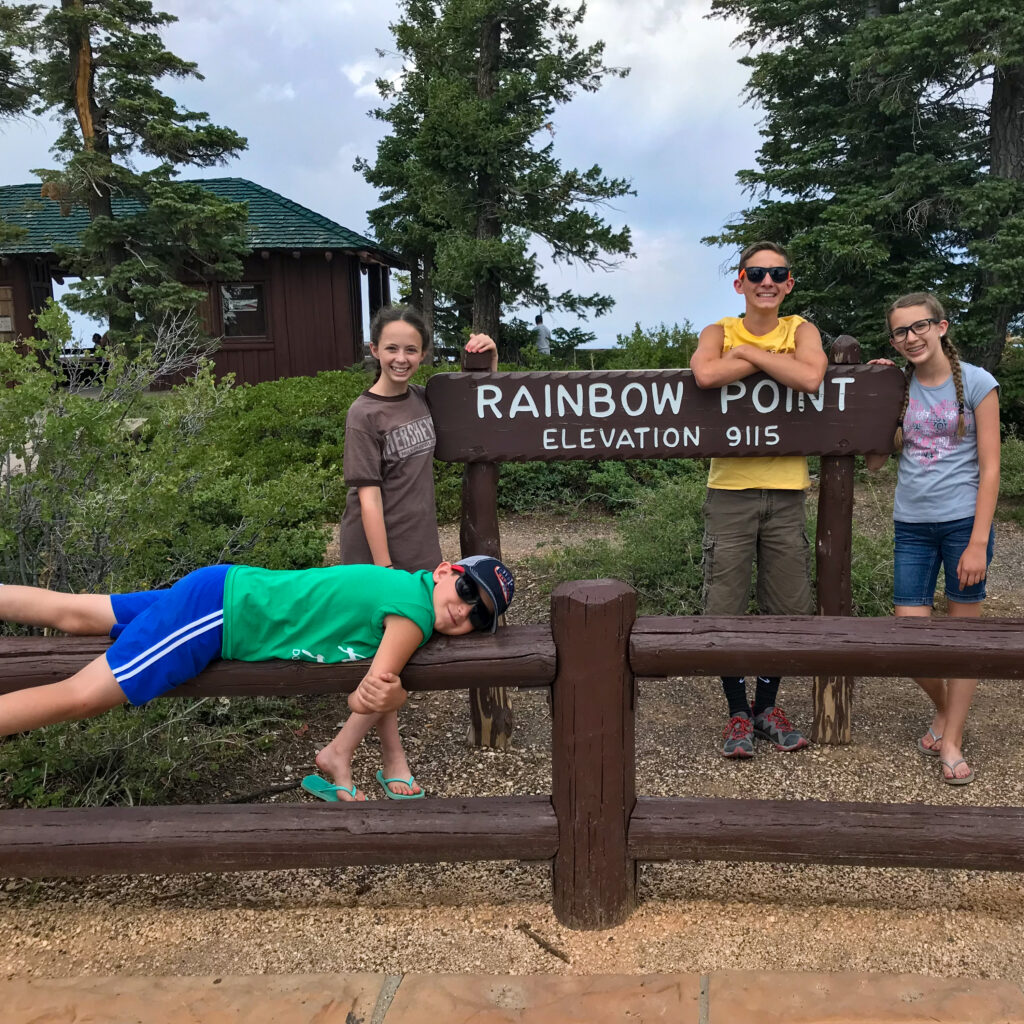
Next you’ll ascend out of the canyon towards Bryce Point and Rainbow Point. It’s a steep ascent adding 1.1 miles and takes a little bit of energy! It was also later in the day, so it was a bit hotter and the sun was out if full force. Still, it was doable and offered amazing views!
You’ll come out at the Bryce Point shuttle stop. Take a few minutes to enjoy the view and then jump on the shuttle back to Sunset Point where you started. All told, plan on around 3 miles for this route and 3-4 hours, allowing for plenty of stops for pictures.
Day 6
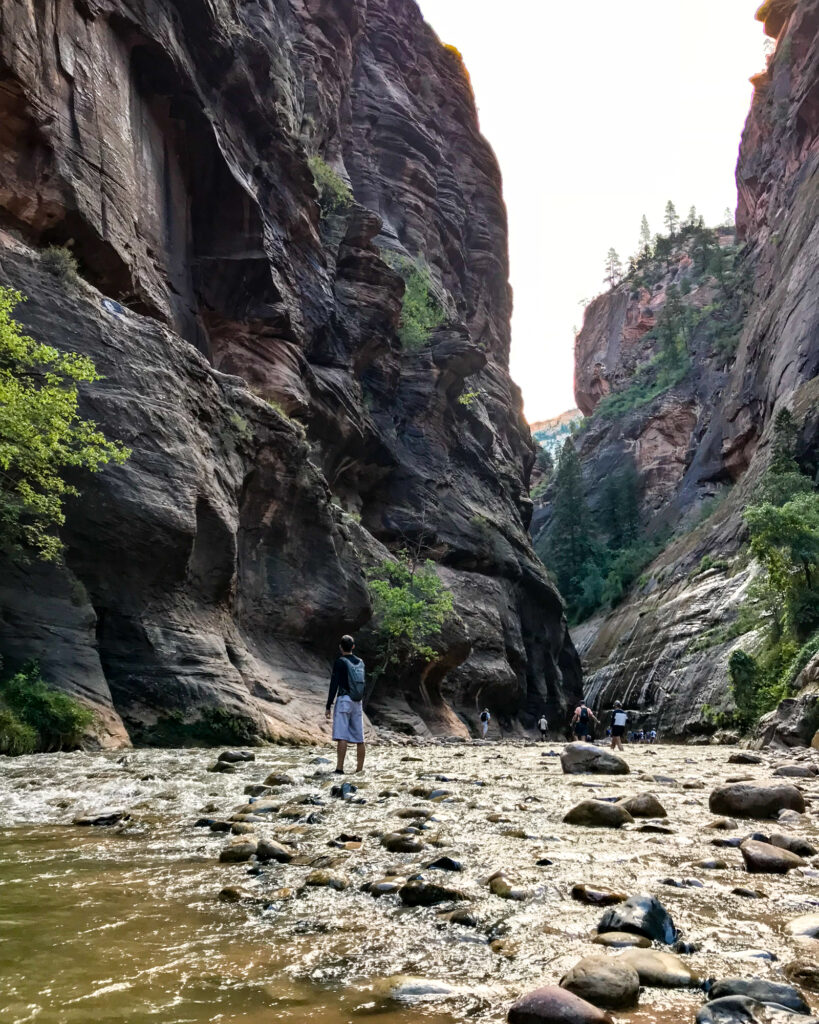
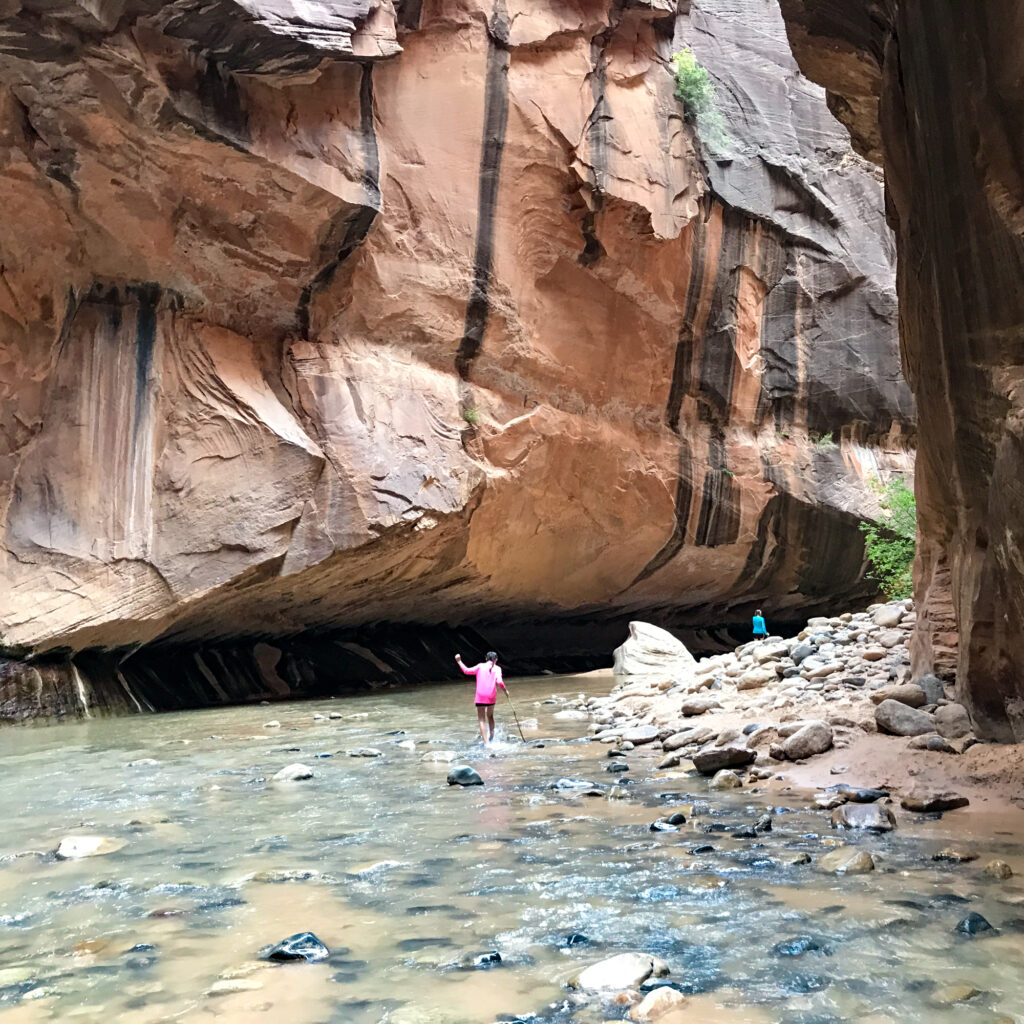
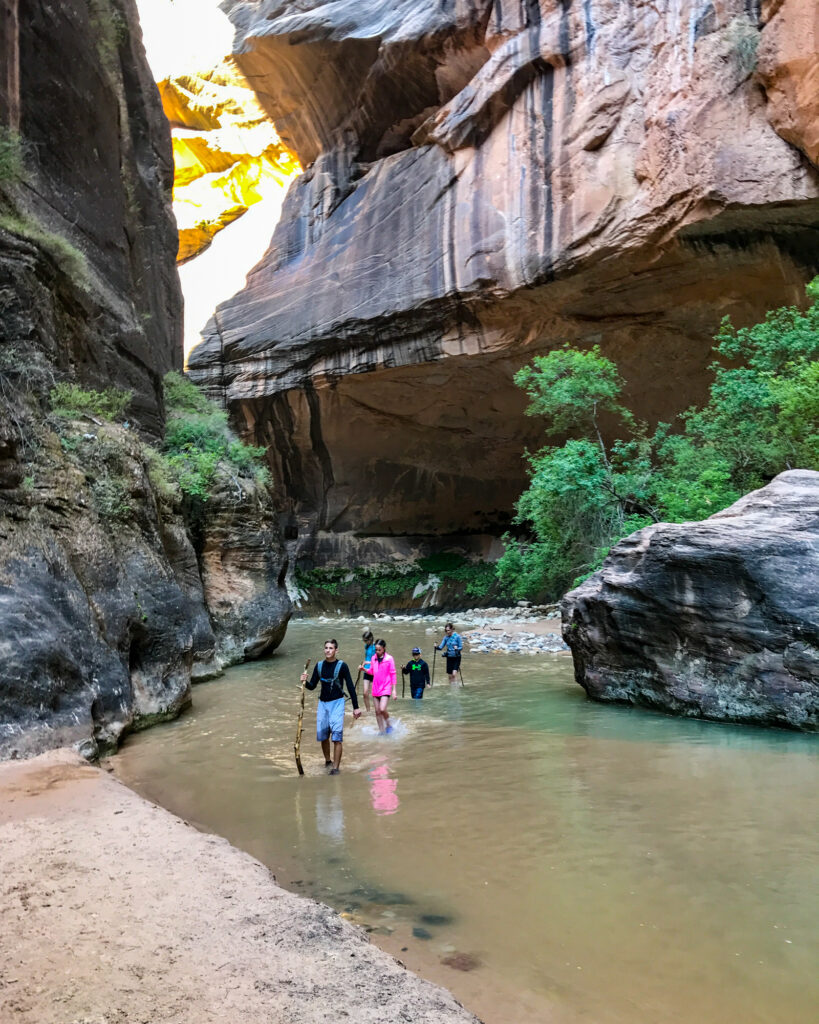
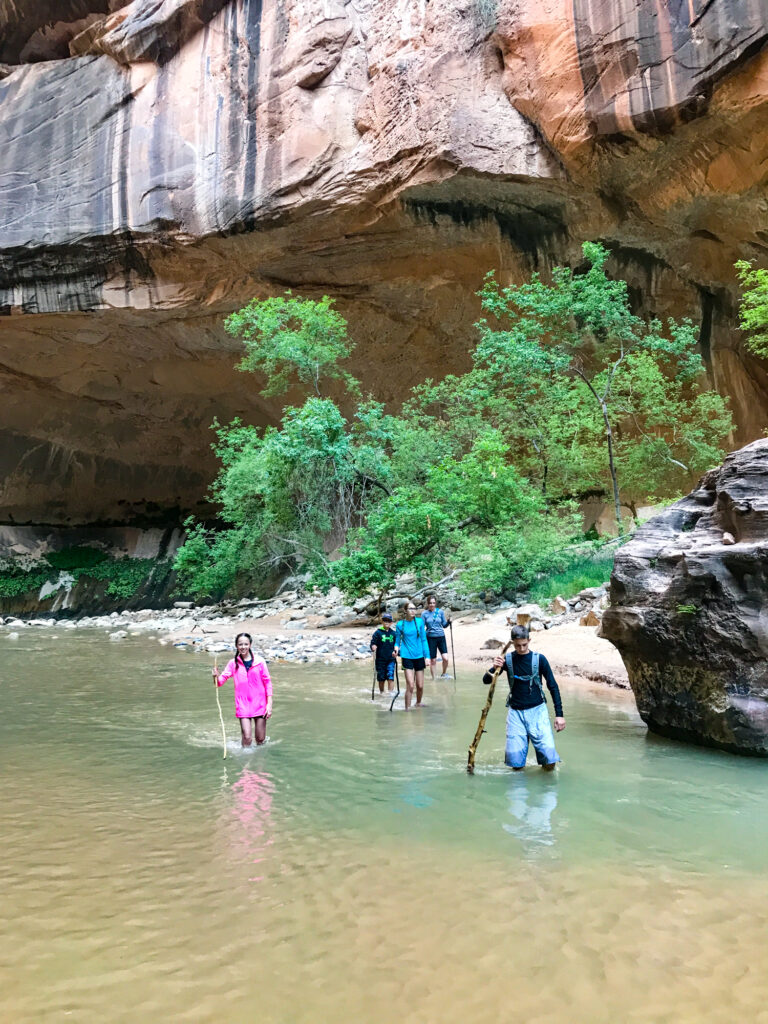
Hike The Narrows at Zion National Park
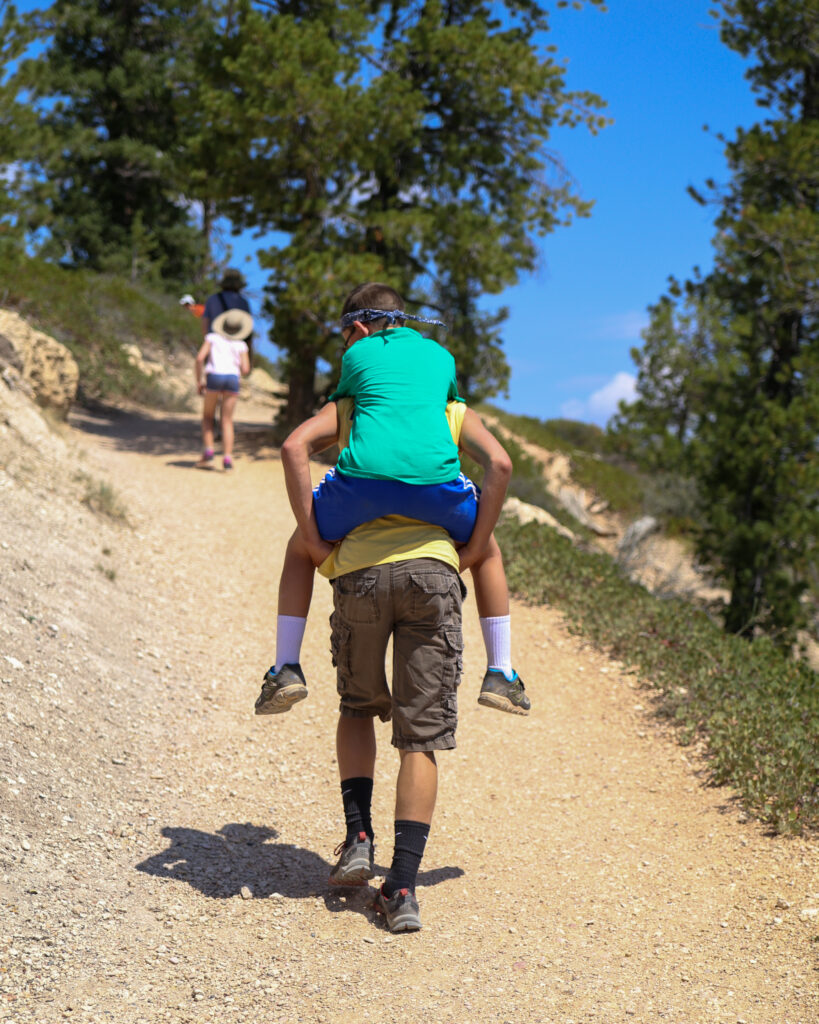
We spent a total of three nights of our Southwest family road trip itinerary at Bryce Canyon, with full one day dedicated to hiking at Bryce and the second full day dedicated to Zion National Park. We camped at Bryce instead of Zion since all the campsites at Zion filled up before we made reservations. If you plan to stay at Zion (which we recommend!) then be sure to book your campsite six months in advance.
The drive from Bryce Canyon to Zion National Park took us just under 2 hours. We got up at 4:00 am and quietly left the campground by 4:30 am. We arrived at Zion in the twilight hours before the sun rose. The drive on Highway 9 through the East Gate was beautiful and calm.
We managed to beat the crowds to the Visitors Center and were on the first shuttle of the day. Catching the first shuttle of the day is a huge benefit when hiking the Narrows as you’ll beat the crowds and be able to experience a better atmosphere as you hike.
Hiking The Narrows at Zion National Park is one of our all-time favorite hikes as a family. Since it is a bottom-up out-and-back hike, you can go as long or as short as you’d like. We suggest getting up early and hiking about 3 miles in before turning around, which will take about 5-6 hours total. You can read our detailed description of hiking The Narrows here. Also check out our article about what shoes we recommend for The Narrows.
Day 7
Drive to Capitol Reef National Park
Travel time for this leg: 3 hrs, 125 miles
BONUS: Scenic Highway 12
At this point we actually took a 5-day break from our Southwest family road trip itinerary to attend a work conference in Las Vegas. However, most likely you’ll want to continue to your next stop on your Southwest family road trip itinerary and head straight to Capitol Reef National Park.
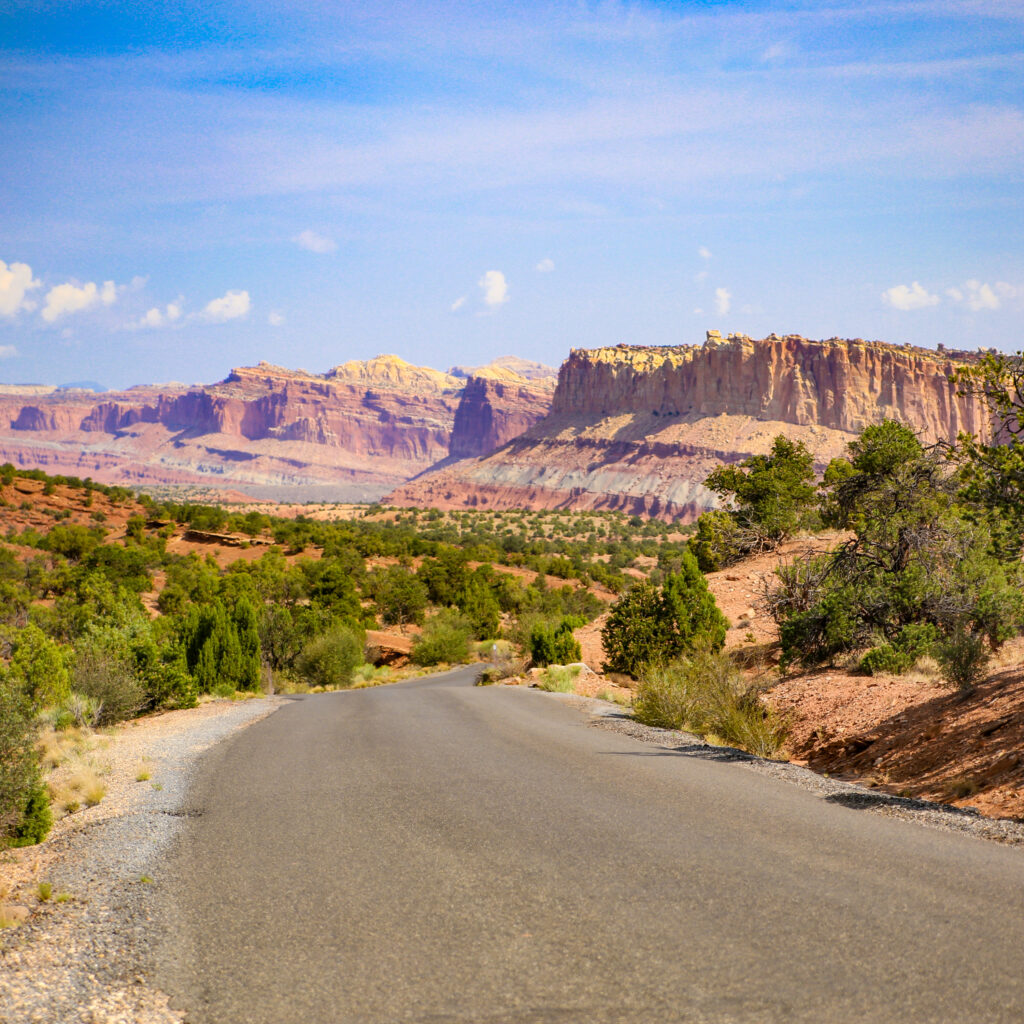
The drive from Bryce Canyon to Capitol Reef is one of the most beautiful drives in the country as it follows All-American Highway 12 through Tropic, Escalante and Boulder before reaching Capitol Reef. Even though you can make the drive in under 3 hours, plan additional time for the trip so that you can pull over and enjoy the many scenic overlooks along the way.
Capitol Reef Fruita Campground
Once you reach Capitol Reed, check into the campground at Fruita. This campground is one of the nicest in the park system, with plenty of shade, good bathrooms, and lots of wildlife. When fruit is in season, you can pick free fruit to eat on the spot from the pioneer-era groves.
The campsites are adequately sized, though you will likely feel close to your neighbors since there is not a lot of undergrowth. There are lots of shade trees, but while they provide plenty of shade they don’t shield you from the campers next door.


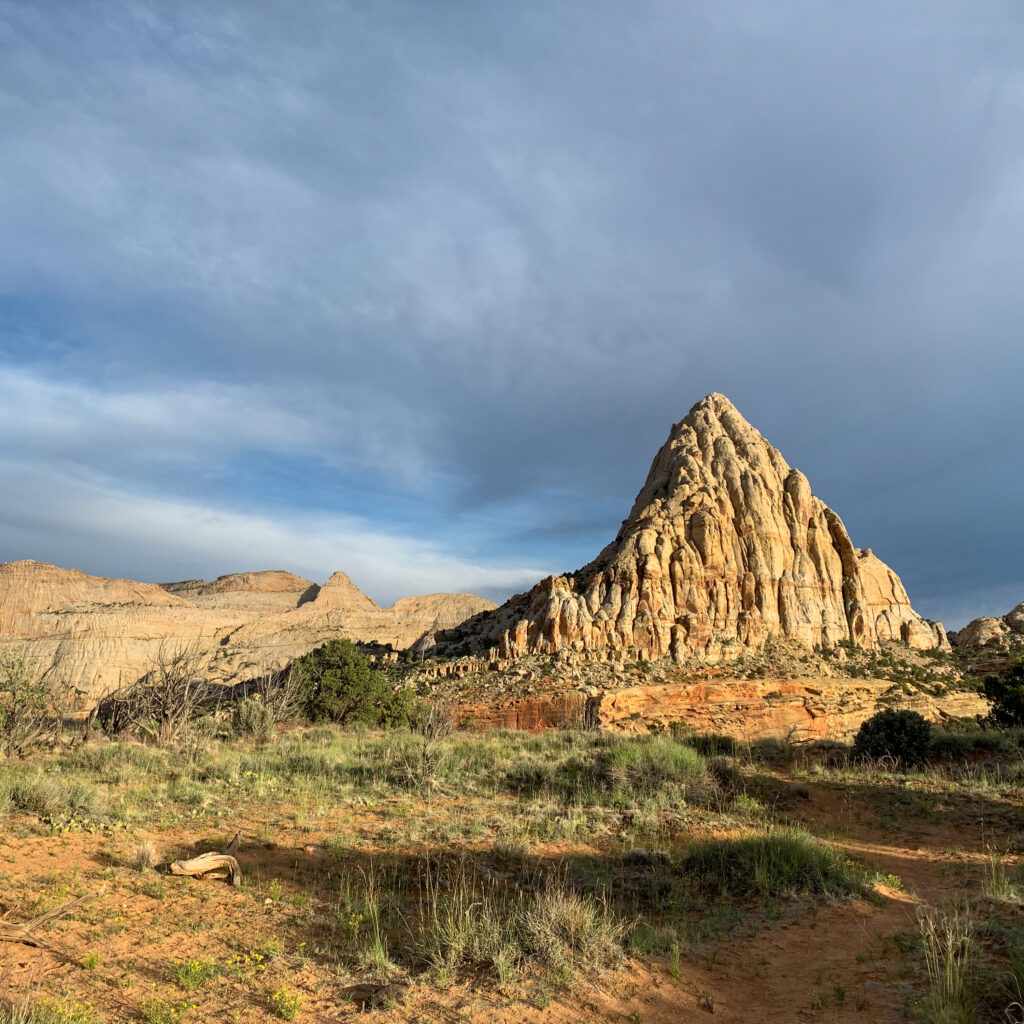
Explore Capitol Reef
With two nights at Capitol Reef Fruita Campground, you’ll have an entire day to spend exploring the park.
Since the drive is likely only going to take a half-day or so, you should have some time for some exploring at Capitol Reef. There are several great ways to spend a few hours here:
- Drive the Scenic Road into the park for amazing views
- Check out the Visitor Center
- Attend the nightly Ranger Program at Fruita Campground
- Explore the petroglyphs
- Complete a short hike: Cassidy Arch (3.4 mile round trip) and Hickman Bridge (2 miles) are our favorite
Day 8
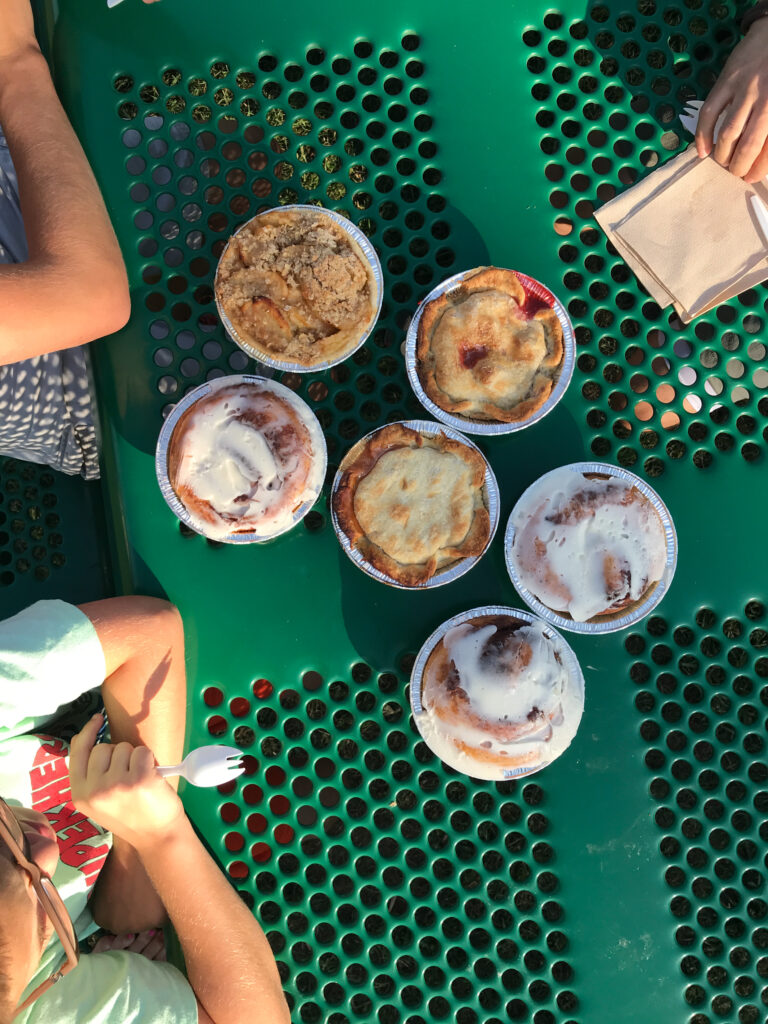
Pie for Breakfast at Gifford House
To start Day 8 of your Southwest family road trip itinerary, get up and head to the Gifford House next to the campground. They serve fresh pie daily and open at 8:00 am. Be there early and have pie for breakfast, because if you come back later in the afternoon it might be sold out! The cinnamon rolls are also excellent, so grab a variety and sit down at one of the shaded picnic tables for a delicious meal.
Hiking Sulfur Creek at Capitol Reef
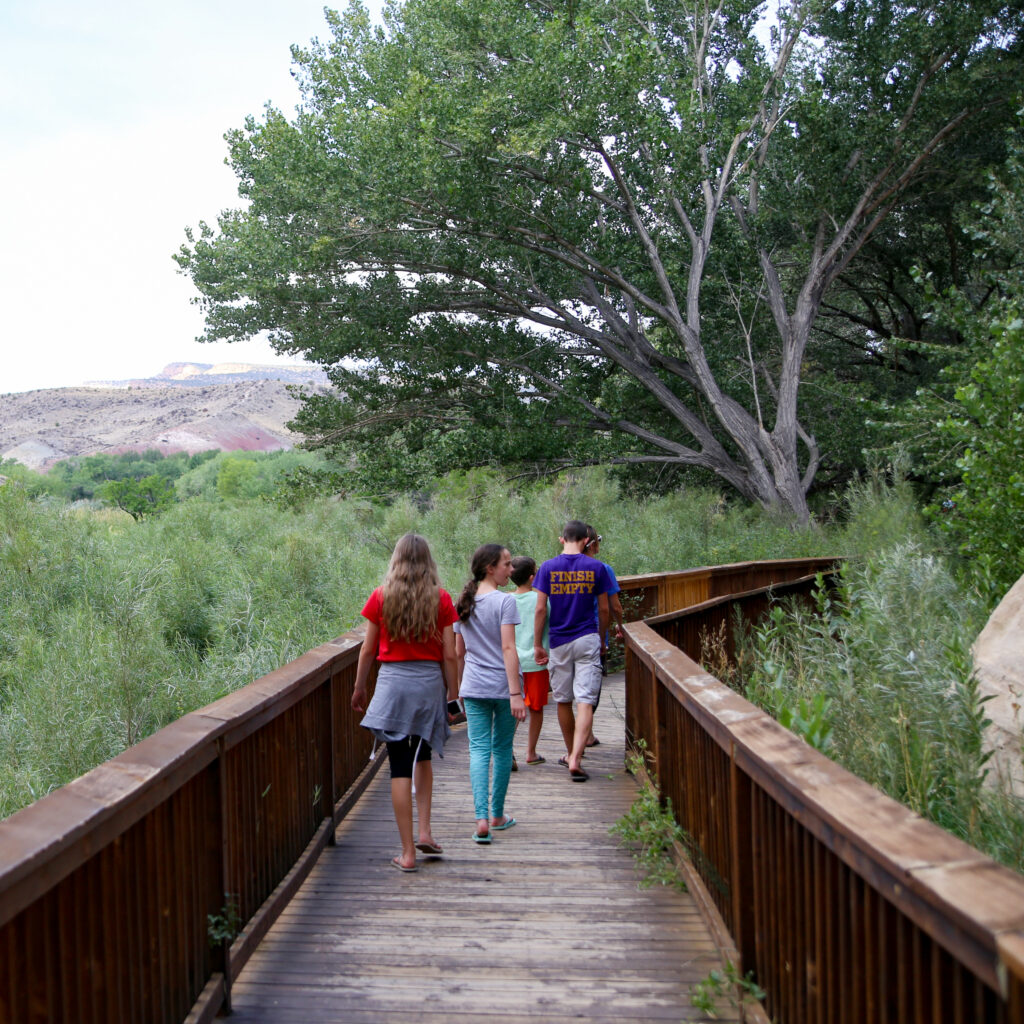
The hike for the day is Sulfur Creek. This hike follows a perennial stream from your starting place on Highway 24 and ends at the Visitor Center. It passes through beautiful, narrow canyons carved into the rock and descends down three waterfalls. We hiked it the same trip as we hiked The Narrows at Zion, and we enjoyed it just as much! It’s not as grandeur as The Narrows, but it is much more intimate and relaxed, and much less crowded.
This hike is not an official, well maintained trail, and conditions are greatly affected by weather. Be sure to check with the Visitor Center before starting the hike, and do not attempt it if there is a chance of rain due to real flash flood risk.
The highlight of the trail are the three waterfalls that you traverse. The third waterfall (or first, if you’re doing bottom-up) has a small pool at the bottom where you can swim if you’d like.


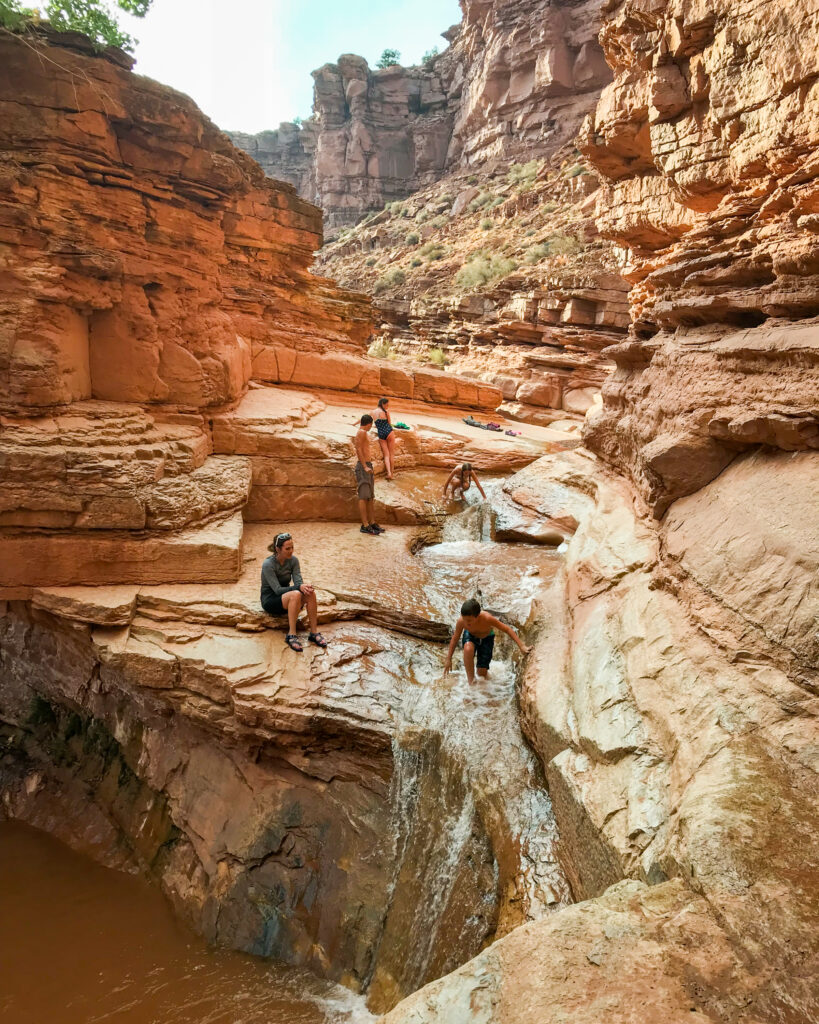
Plan on 5.5 miles of hiking and 6-8 hours, depending on your pace. You’ll also need a shuttle vehicle to get back to the trail head from the Visitor Center.
The NPS also has a great short description of this hike here.
After the hike, make the 15 minutes drive to Torrey for showers and a well-deserved meal.
Day 9
Concluding Your Southwest Family Road Trip Itinerary
By this point, you are probably worn out and ready to head home. If you’re like us and home is in the Midwest, it is either one very long day of driving or two medium days of driving, depending on where you live. If you’re heading back on I70, stopping in Denver is a good half-way point.
On the way back, there are several amazing sights that you can check out if you have time:
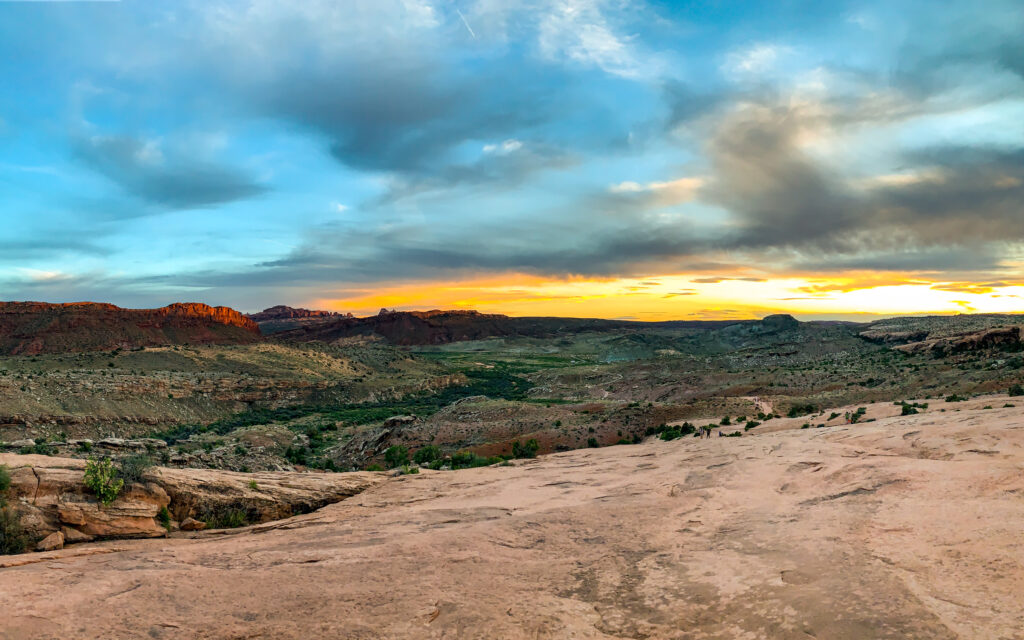
- Goblin Valley State Park in Utah
- Arches National Park
- Colorado National Monument
- Grays Peak

More Family Adventure Ideas
Looking for more amazing hikes and road trips for your family?
- 31-day, 21-park National Park Road Trip
- Arches National Park 2-Day Itinerary
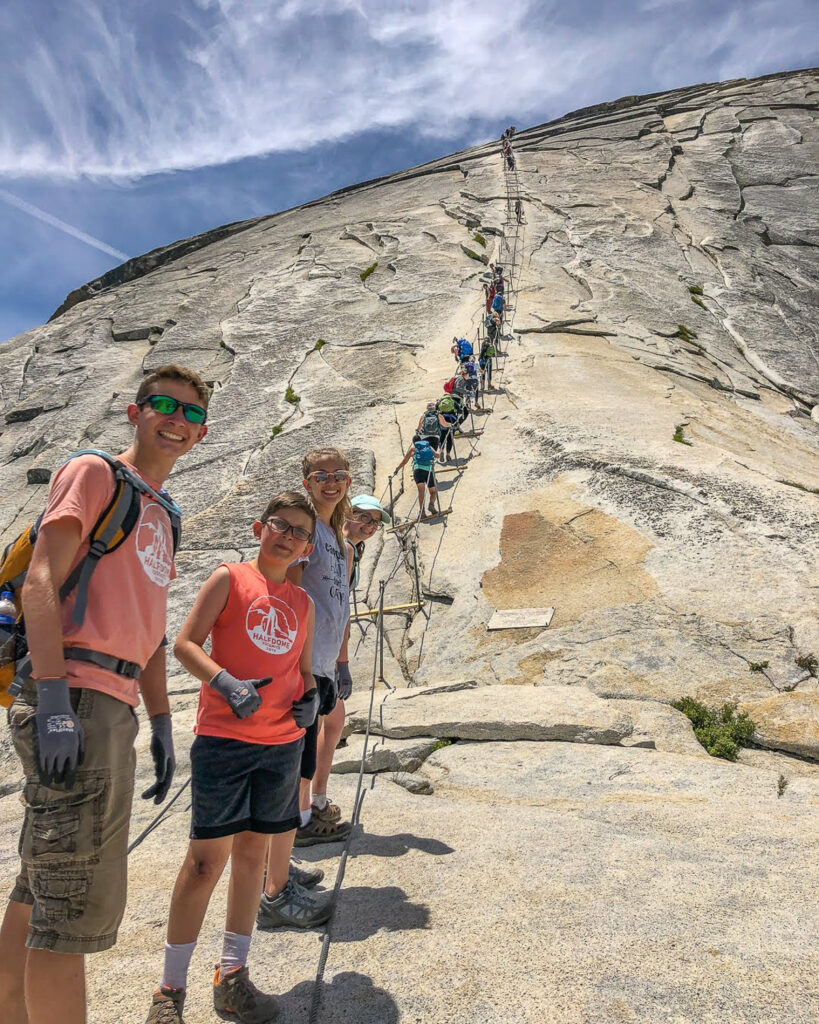
- Half Dome at Yosemite National Park
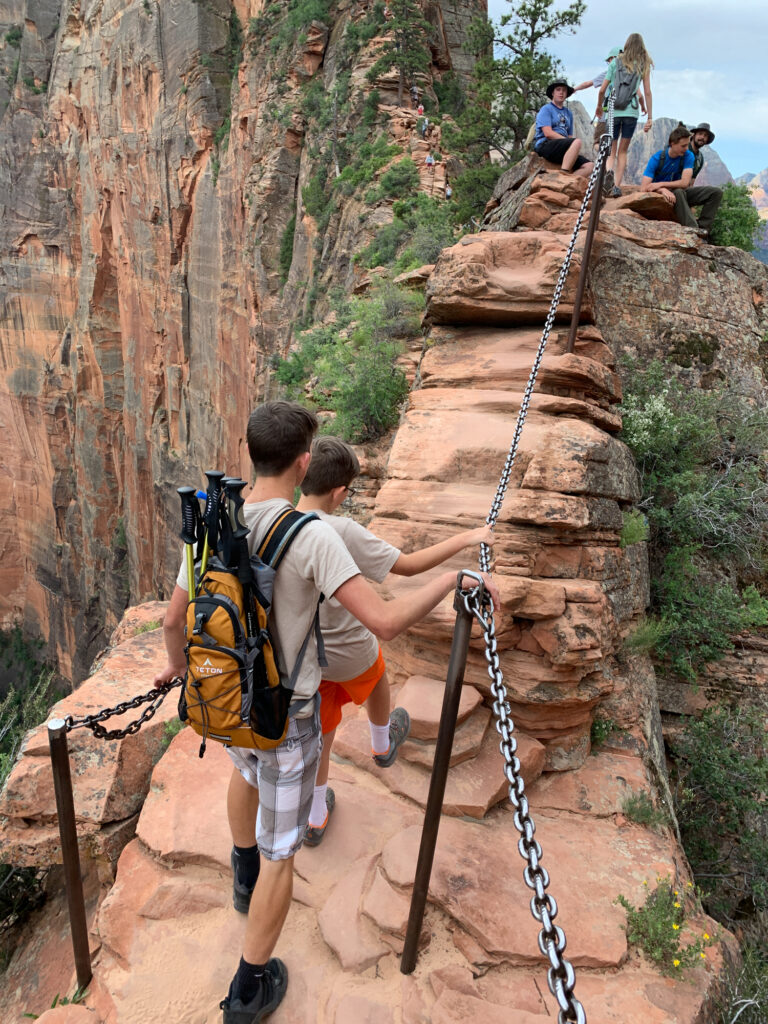
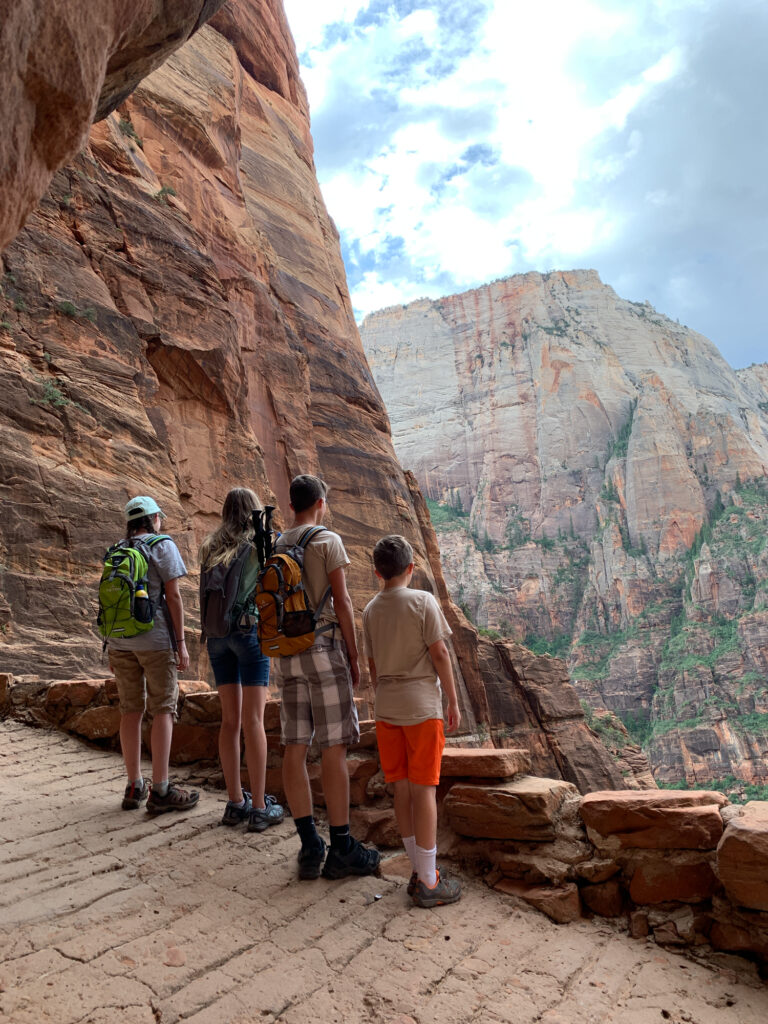
- Angels Landing at Zion National Park
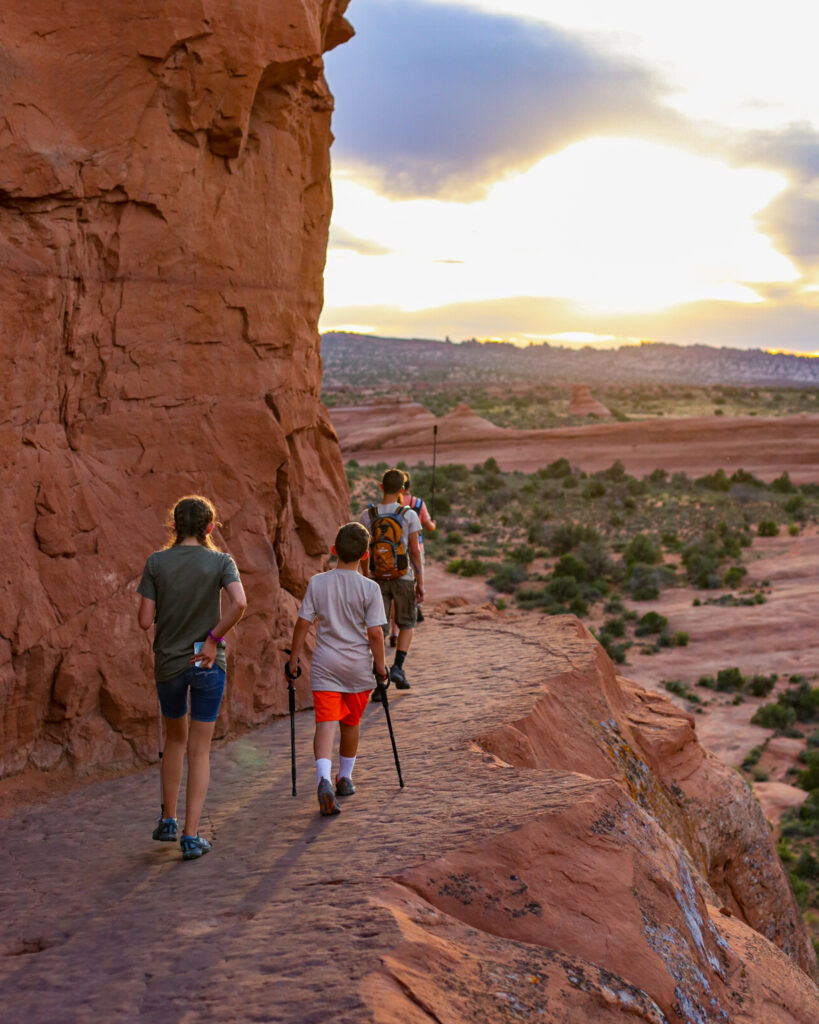
- Fiery Furnace at Arches National Park


Half Dome
- What Gear to Take for Hiking The Narrows - April 5, 2022
- Zoom Games for Kids and Students - April 23, 2020
- Zoom Virtual Backgrounds National Parks - April 22, 2020
- Zion National Park: 2 Day Itinerary - March 4, 2020
- Best Southwest Family Road Trip Itinerary - February 26, 2020
- Best Shoes for Hiking The Narrows - February 21, 2020
- Why The Narrows is the Best Family Hike at Zion National Park - February 19, 2020
- 9-Day Southwestern National Park Road Trip Itinerary - February 18, 2020
- Should You Hike Angels Landing with kids? - February 17, 2020
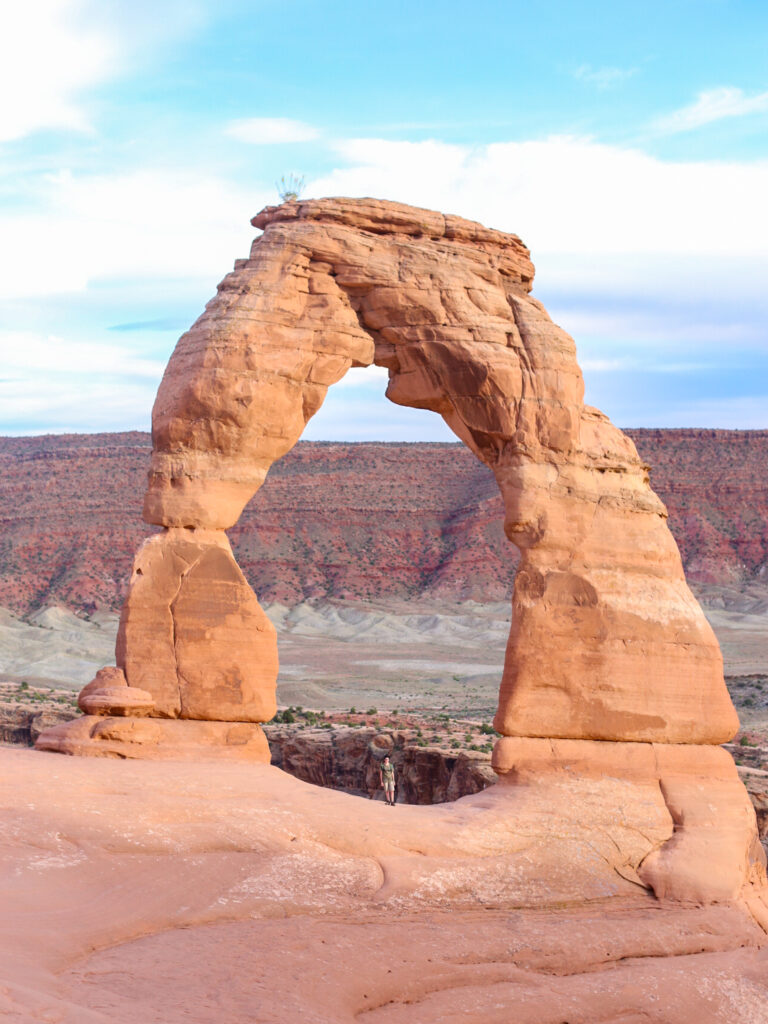
- Family Sunset Hike to Delicate Arch - February 12, 2020
Wow looks like you had a wonderful adventure! I’d like to repeat it with my family
Guiltfree recently posted…The Best Spots For Raw Food In NYC
Lovely, Thanks for sharing this great experience. photos are amazing.
Great post, Appreciation.