Later today I’ll be showing off a super-cute Thanksgiving Banner – perfect fall decor. BUT, I need to preface it with this post, on how to use grommet pliers. Because later I’ll say “put in grommets” and if you haven’t done it, you’ll want a how-to, so here’s that…
So, I actually thought it’d be easier to just talk you through it in a video, so I had one of my kids film a quick (like one minute!) video of the process – here’s that (just ignore the really bad lighting…)
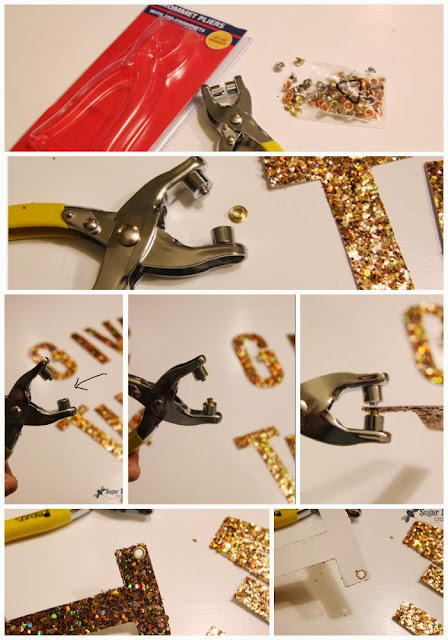
Now, grab your pliers – the trickiest part is figuring out which side to put the grommet on – and it’s counter-intuitive. There is a side with a nub that sticks out and you’ll want to put your grommet on that, but it actually goes on the other side, the side with the hole. It just sits on the side with the hole with the bump in the grommet facing up. Put it where the arrow is pointing – the picture on the right show it in place:
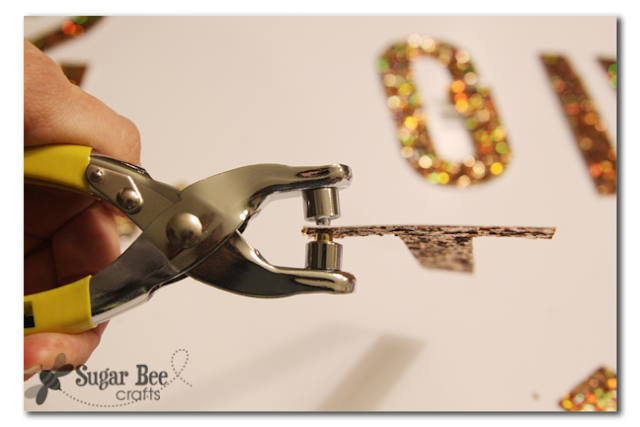
Now, place your paper on top of the grommet – you’ll want the “right” side of the paper facing the grommet. Squeeze the pliers until they are all the way together:
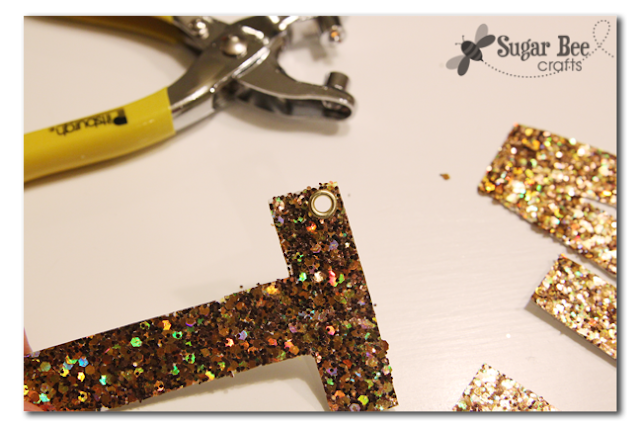
Then open then up and your grommet should be set. And looking awesome:
You can see how it bends around the back side of the paper:
Now that you know how to set a grommet into cardstock using grommet pliers, you’re ready to tackle The Give Thanks Banner Project (follow link for that tutorial)


Love this “Give Thanks” DIY.. You make it look super easy to do!!
fun tool! Are the steps for fabric different?
there are different types of grommets for fabric, so that it seals the edge of the hole in better, but basically the same concept