


I finished my Circle Pocket Book Slings this weekend – I love when I cross things off my want-to-make list!

Our girls have bunk beds which I really love. My sister-in-law’s neighbor was getting rid of them since she has all boys – they are so cute and unique, of course I was happy to give the bunk beds a home! You can also head here if you are looking for a variety of bunk beds.
The downfall of bunk beds is that there isn’t really a feasible way to give each girl a nightstand to keep stuff on. And books – they need a home close to bed. When I kept seeing Book Slings pop up, I knew they were the perfect solution.

There are several tutorials out there, so feel free to look those up – I won’t be doing a full tutorial on the actual sling. I enjoy the tutorial at Penny Carnival because it shows several different examples:
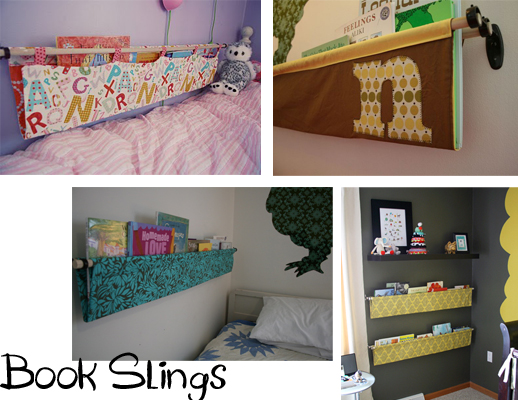
I knew I wanted a pocket on the outside so the girls could keep track of bookmarks and pens and whatever small items they are hoarding. I incorporated a pocket into a circle initial applique, and that’s what I have as tutorial for you. Here we go…
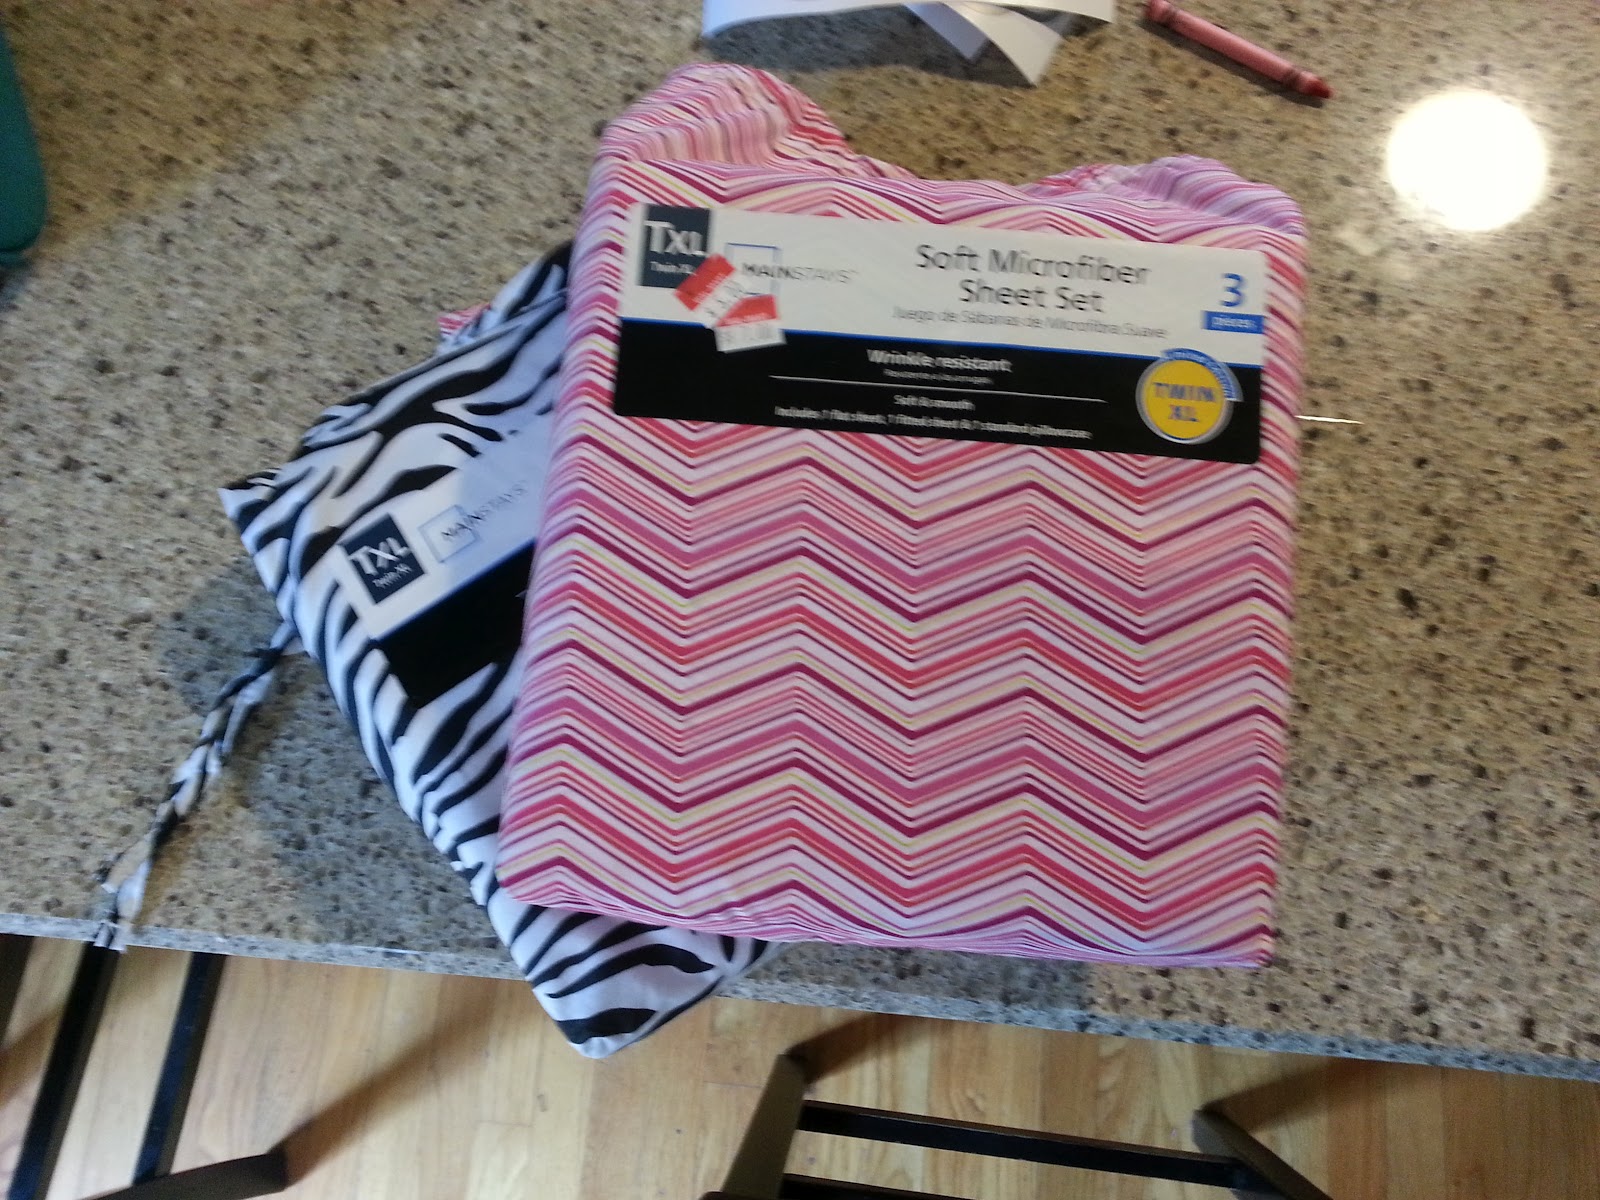
Supplies I needed to get – the bracket (at Lowe’s, $5), dowel rods ($3), fabric (clearance sheet set from Walmart)

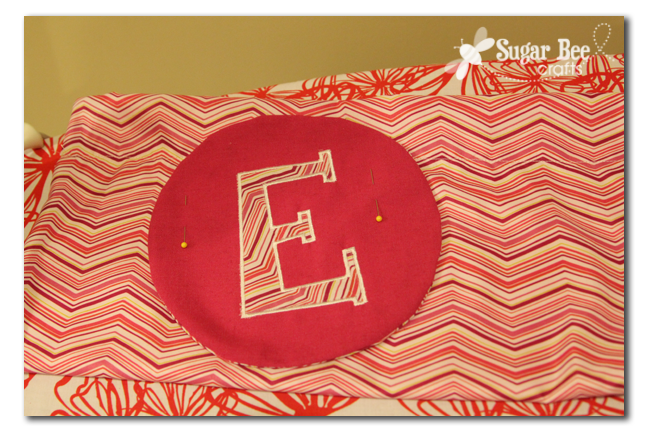
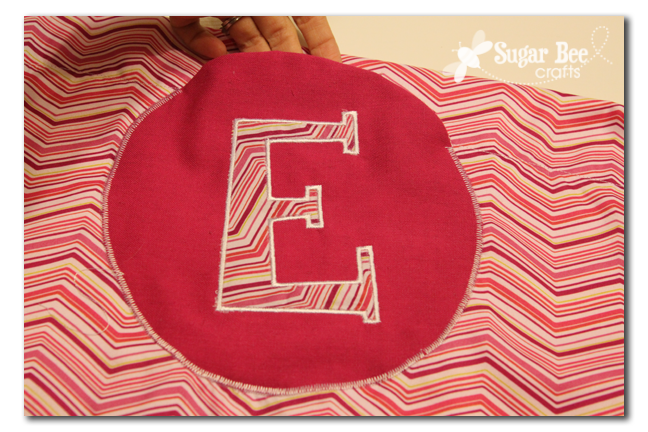
First, if you want a letter on your circle pocket, stitch that on. If you want a blank circle, skip this step. I used my embroidery machine for the letter “E” –
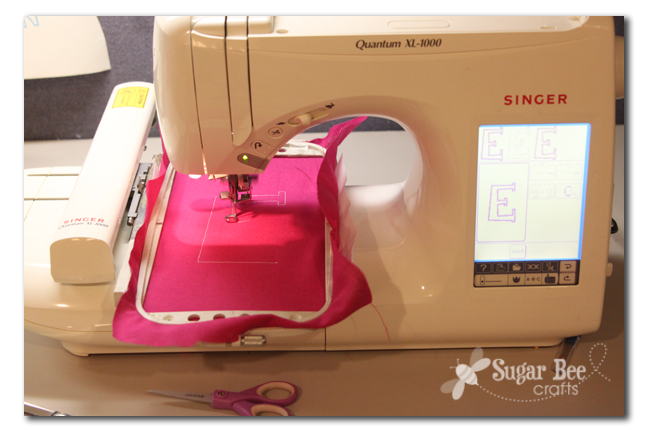
But it kept glitching for the letter “A” so I did that one by hand. As you can see, either way works. If you don’t have an embroidery machine, you’ll hand-cut a letter, then use a tight zig-zag stitch to go around all the edges:

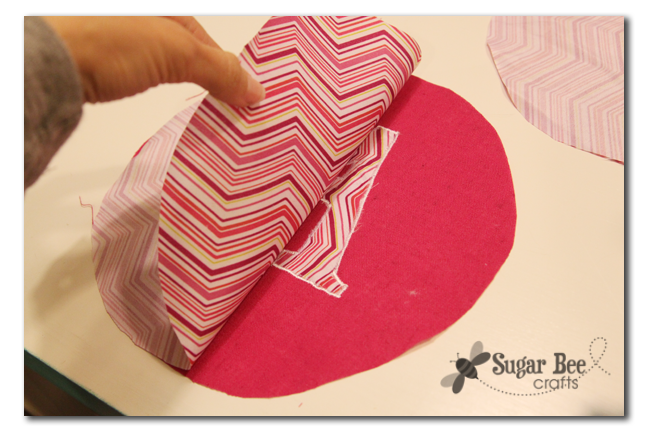
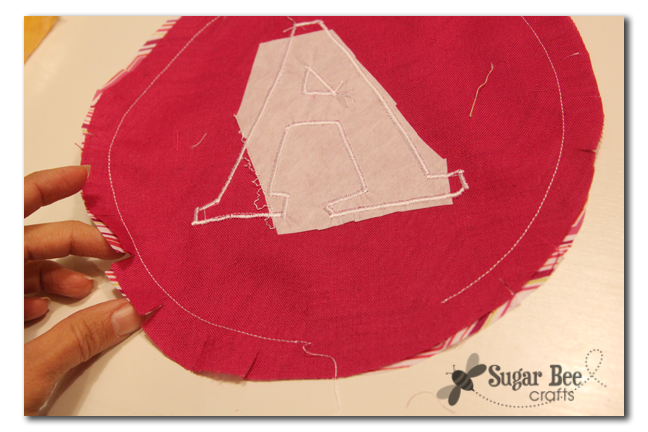
Next cut a circle around the initial. Cut a circle out of the lining fabric as well. Put the two circles facing each other and stitch around the edge.
Be sure to leave an opening (seen at the bottom). After stitching, cut slits about an inch apart all the way around – this will help it lay flat when you turn it right-side out. Turn it right-side out through the opening and iron it for a crisp seam.
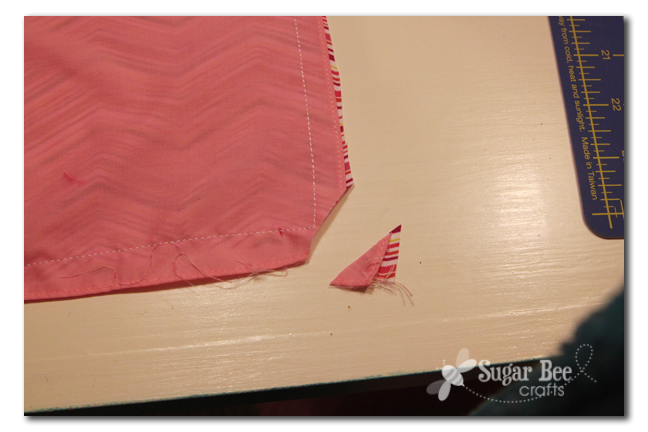
Side note – another helpful way to make things lay flat when you flip them right-side out is to clip any corners. I did this on my sling (the sling is lined – I thought about doing it without lining, but the fabric was pretty thin so I knew lining would help).
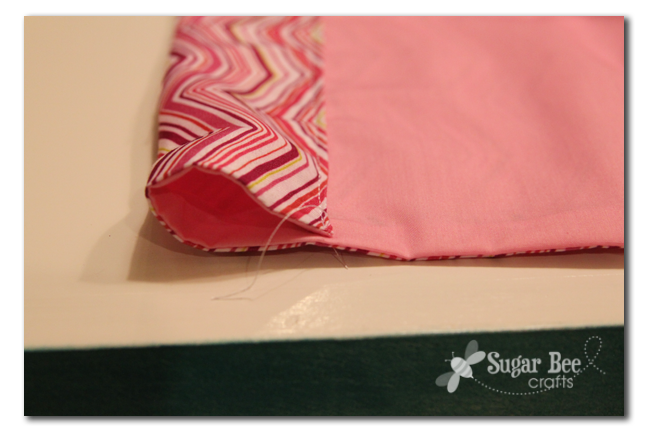
This is my sling when sewing the pocket for the dowel rod:
Lay the sling out and place the pocket where you want it. (Note – if you don’t want stitch lines to show on the inside of the sling from the pocket, sew it on before you assemble the sling. Since my fabric was thin, I wanted to attach the pocket to both the fabric and lining, so I sewed it on after the sling was constructed)
Then zig zag around the circle. This will close the “turning hole” in the pocket. Don’t zig zag the top of the circle- that’s how your pocket will open up.
Put it on the dowel rods, and enjoy!!

My girls are super excited to have a place to put things by their bed. And I told them that there was a “secret pocket” so that’s extra fun.

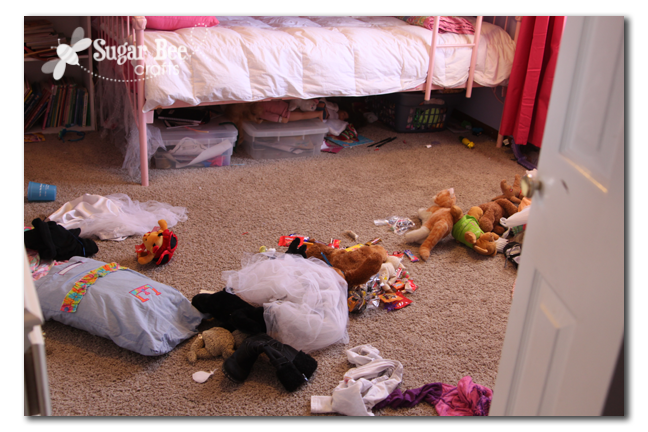
The longest part of this project may have been making the beds so I could get a presentable picture:
And I still forgot to take down the junk they have hanging on their bed – but it’s dark now, so no photo reshoot. And to keep it real, just a glimpse of the things I threw off the beds and pushed aside so I could take a picture…
Do you have book slings at your home?? Do you want one now? Go make one – you can do it!


I pinned a book sling forever ago and it’s still on my to-do list. 🙂
Mandy – this is fabulous! So cute the way you bunk beds are made up with those book slings! I may need to use this idea…but it would probably turn into a stuffed animal sling. HA
This is such a cute idea!
Those worked out perfect!
I’ve been eyeing that same sheet from wm! Love what you’ve done with them.
Very fun! What do the girls use their pockets for?
Absolutely Love this! Will give it a whirl.
I doooo want one now!!!
Awesome book slings, the pocket is a great idea. I hear you with the beds,I was making my boys beds for pics yesterday, they’re the worst. My boys are teens so I expect them to make their own bed but I think I will relax a little now with how they’re made.
These book slings are SEW adorable. I think I’ll make a grown-up version for our den. Thanks for the inspiration. I’m sure your girls must love having their books within reach.
I’m a new follower.
Doreen
altered-artworks.blogspot.com
oh my gosh now that is AWESOME!!
Awesome… I made a couple earlier this year for my son.. so easy, and he loves them. Although he is outgrowing the cute animal fabric I used so I will have redo them sometime next year!
Great solution! I made bookshelves for our bunkbeds, too. Mine are made out of wood, but I love yours too! I’m visiting from OneCreativeMommy.com.
This is awesome, I’d never seen those slings before. What a wonderful idea! I’ll make one for my son’s room – thanks so much for the tutorial 😀