


Do you have someone that is more difficult to shop for on your gift list this year? Maybe a teenager whose style changes weekly, a father-in-law who doesn’t even have a clue of what he wants himself, or possibly a brother that lives in another state (making it harder to mail large packages)? Have no fear, gift cards are always a great choice! However, when I send a gift card (GC) I sometimes feel like I should put a little more effort into the gift…Do you know that feeling? Well, I have a solution for you!
 Hey y’all! I’m Ashley from How Do U Like Them Apples? and I’m super excited to be here at Sugar Bee Crafts to share my Handmade Woven Gift Card Holder with you today…but before we get into that, here is a little bit about me and my story:
- I currently live in Puerto Rico for my handsome Hub’s job…but our roots are in Missouri.
- I recently purchased my first pair of skinny jeans…EVER…and I even wear them
constantlyresponsibly. - My Widget (the cute little thing in the middle) is a pre-teen in a pre-schooler’s body. She even talks so fast that she stutters…mostly to let her mouth catch up with her brain 😉
- I was that
quietsweet cheerleader in High School that never had a breakout (not to be confused with break-up)…and then I grew up and experienced the horror of having the face of a teenager. Although my skin has slowly gotten better over the past few years, my fingers are still crossed that I out grow the entire ‘acne stage’ by 30…wish me luck! - My house is clean all the time! Wait-I never said all of my house is clean at the same time…really there is always one room of my house that is almost spotless, but usually not the same room week to week. A girl has to craft, am I right? And so, what if those crafts get spread throughout the house with no remorse???
- Before moving to Puerto Rico, the Hub traveled about 80% of the week. And while he was gone, I still tried my hand at power tools on a regular basis…and I haven’t lost any digits yet! (free reign over power tools and crafting in every room of the house while he was gone…score!)

Okay, so let’s get crackin’! What I used to make the Handmade Woven Gift Card Holder:
- Scrapbook paper
- Envelope (big enough to fit a standard GC-think credit card size)
- Scrapbook supplies: paper cutter, adhesive, pencil, etc.
- Gift Card (which I will refer to as GC from now on)-can be added later (actually optional-no GC is needed to make this card awesome)
- Smile (also optional, but I find creativity flows better when I have what my Widget calls a ‘happy-with-teeth-showing’ face)
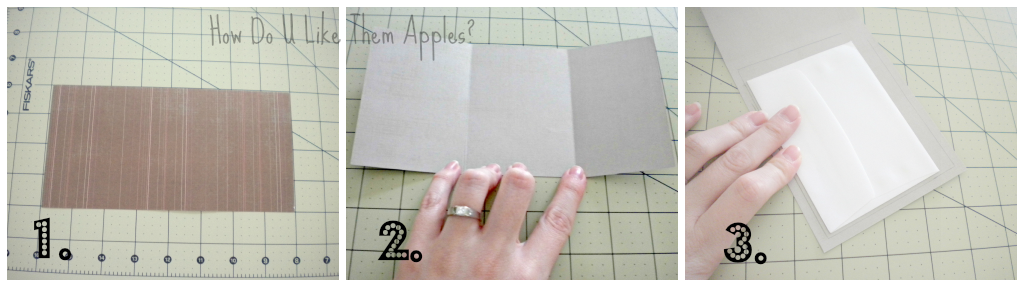
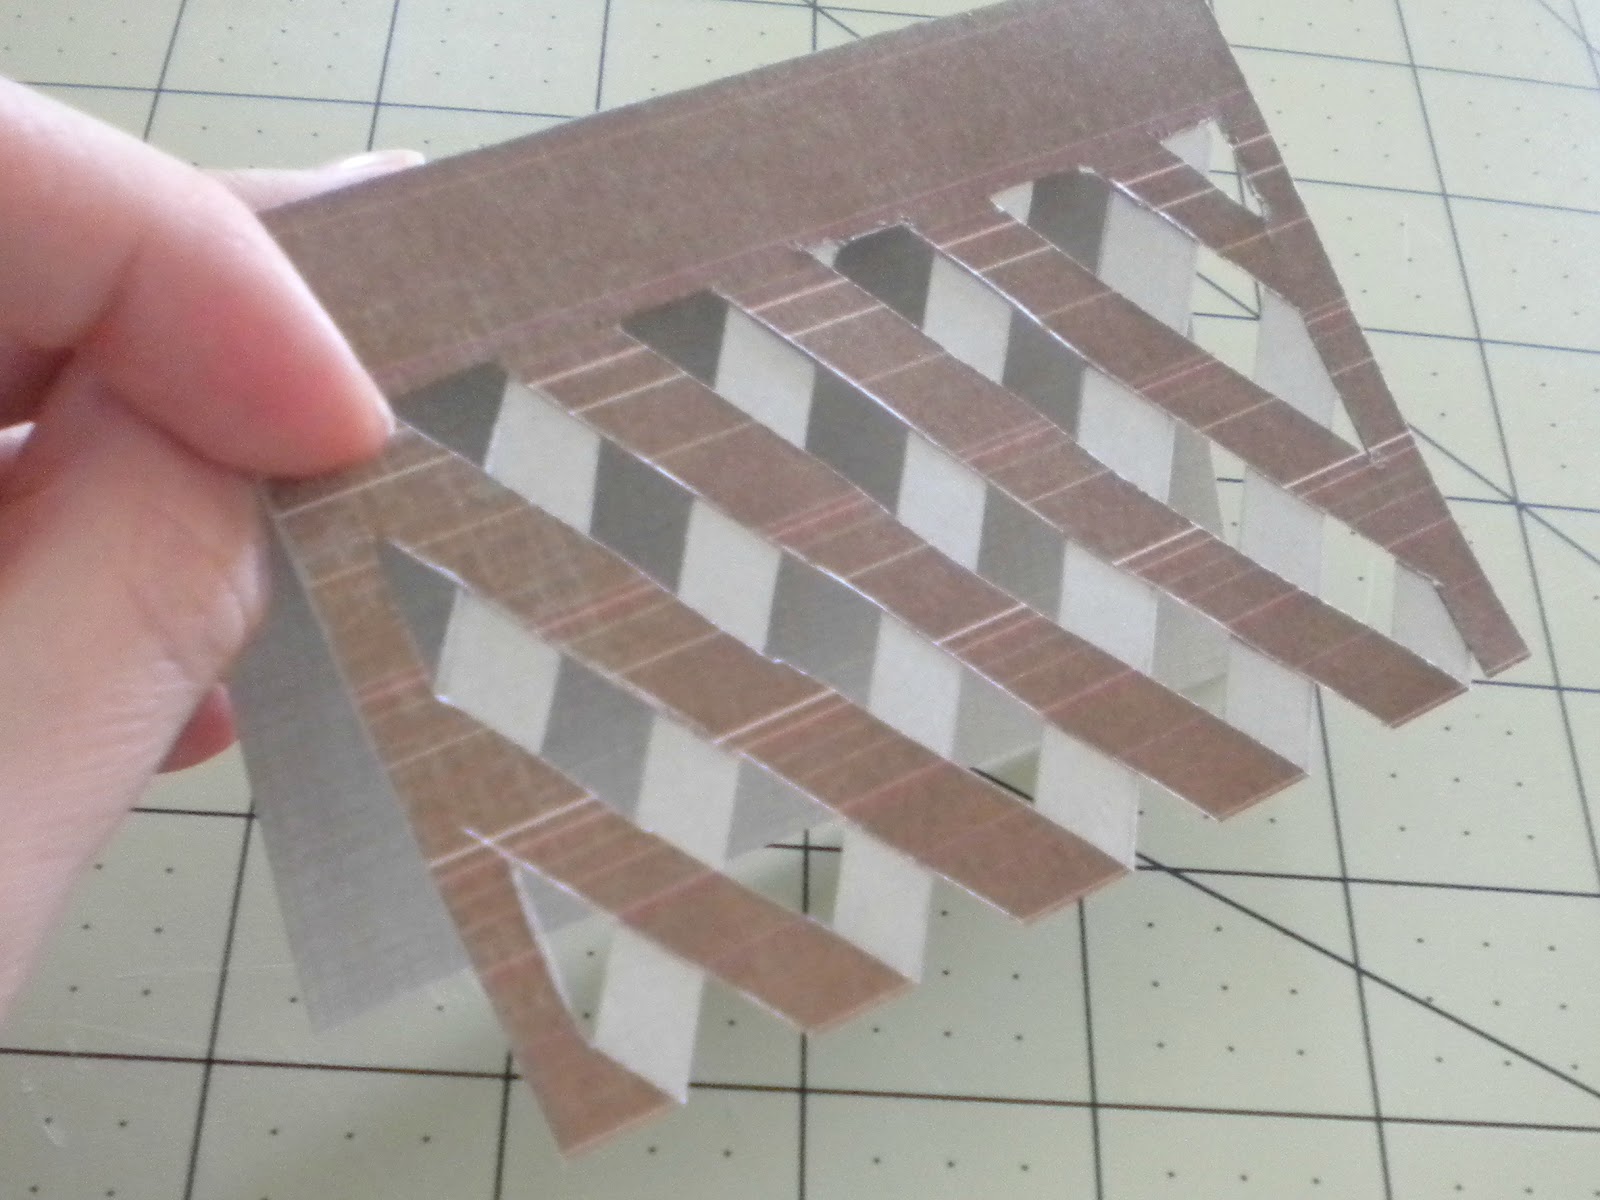
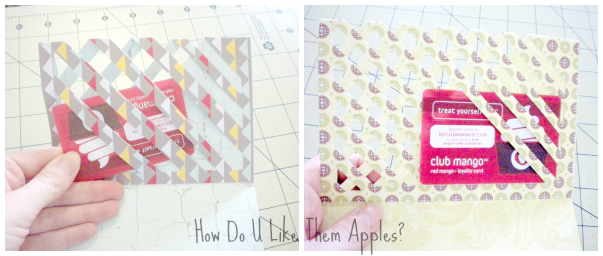
1. I like to start with my envelope…envelopes are the culprits that only come in certain sizes (unless you make your own, then kudos to you!). Once you know the size of envelope you would like to use, keeping in mind your GC of course, then you can cut your paper. 2. Instead of cutting a piece the paper to make a bi-fold card, you will need to have enough paper for a tri-fold card-this way you’ll have the extra paper you need to make the weave design. I use a score blade on my paper cutter to score the paper, but good-old-fashion folding by hand works, too. 3. I used the envelope to trace a square on two of the sections of the card-using the envelope gives I strong edge to trace.  4. I had a rectangle of cardstock in my scrap pile, so I cut it on an angle (corner to corner) using my paper cutter. This new rectangle makes a great pattern for the diagonal lines. I traced the diagonal lines with a pencil, eye-balling the measurement (approximately 1/2″ wide). 5. Here is the trickiest part…After all the lines are traced, I used my cutter to cut along the pencil marks (and used tiny scissors to cut the short ends. Side note: Depending on your paper, you may have really clean cuts and/or messy cuts…inking the edges of your cuts (with a small ink pad or marker) will ‘hide’ the imperfections. Or be brave and let the card bare the imperfections proudly-it’s up to you 🙂 6. I glued the outside boarder down using a glue pen, but a glue stick or other scrapbook adhesive will also work.
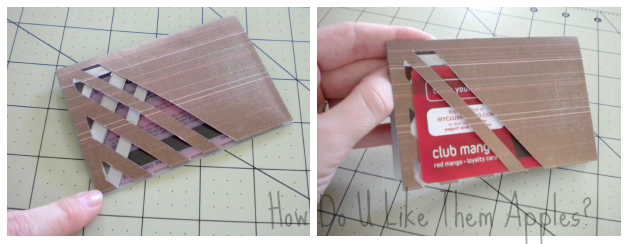
I cut strips the entire two sections of the card in the above example, but if you only cut about half way through the rectangle/square you traced from your envelope, then you can use the card to hold a lovely GC by sliding the card into a couple of strips (that’s why you do not want to glue your strips together). Here are some examples of how to insert the GC:
*remember to erase any pencil lines still visible on your paper…it will help your card look more put-together and professional. And on a larger scale…
….you can use the un-cut part to ‘hide your GC.
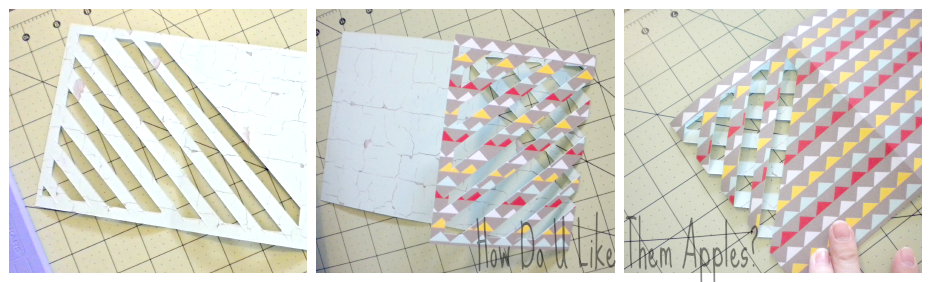
I like to decorate most of my cards with quotes, names or sayings on the front; so I came up with a way to do just that and disguise the GC inside…tricky fish! I cut a piece of paper roughly the size of my gift card, then cut a contrasting paper slightly larger (to frame the first paper). You could use all solid colored paper for this step, or pick a coordinating print (or use the opposite side of your main paper).
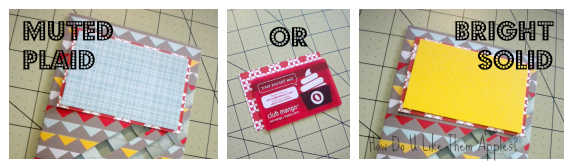
I used a red pattern as the frame (larger piece), but couldn’t decide between a muted turquoise plaid paper or a bright solid marigold paper…but ultimately went with the marigold, because I thought it looked a little more festive. But I used the muted turquoise paper as well-to beautify the inside of the envelope:

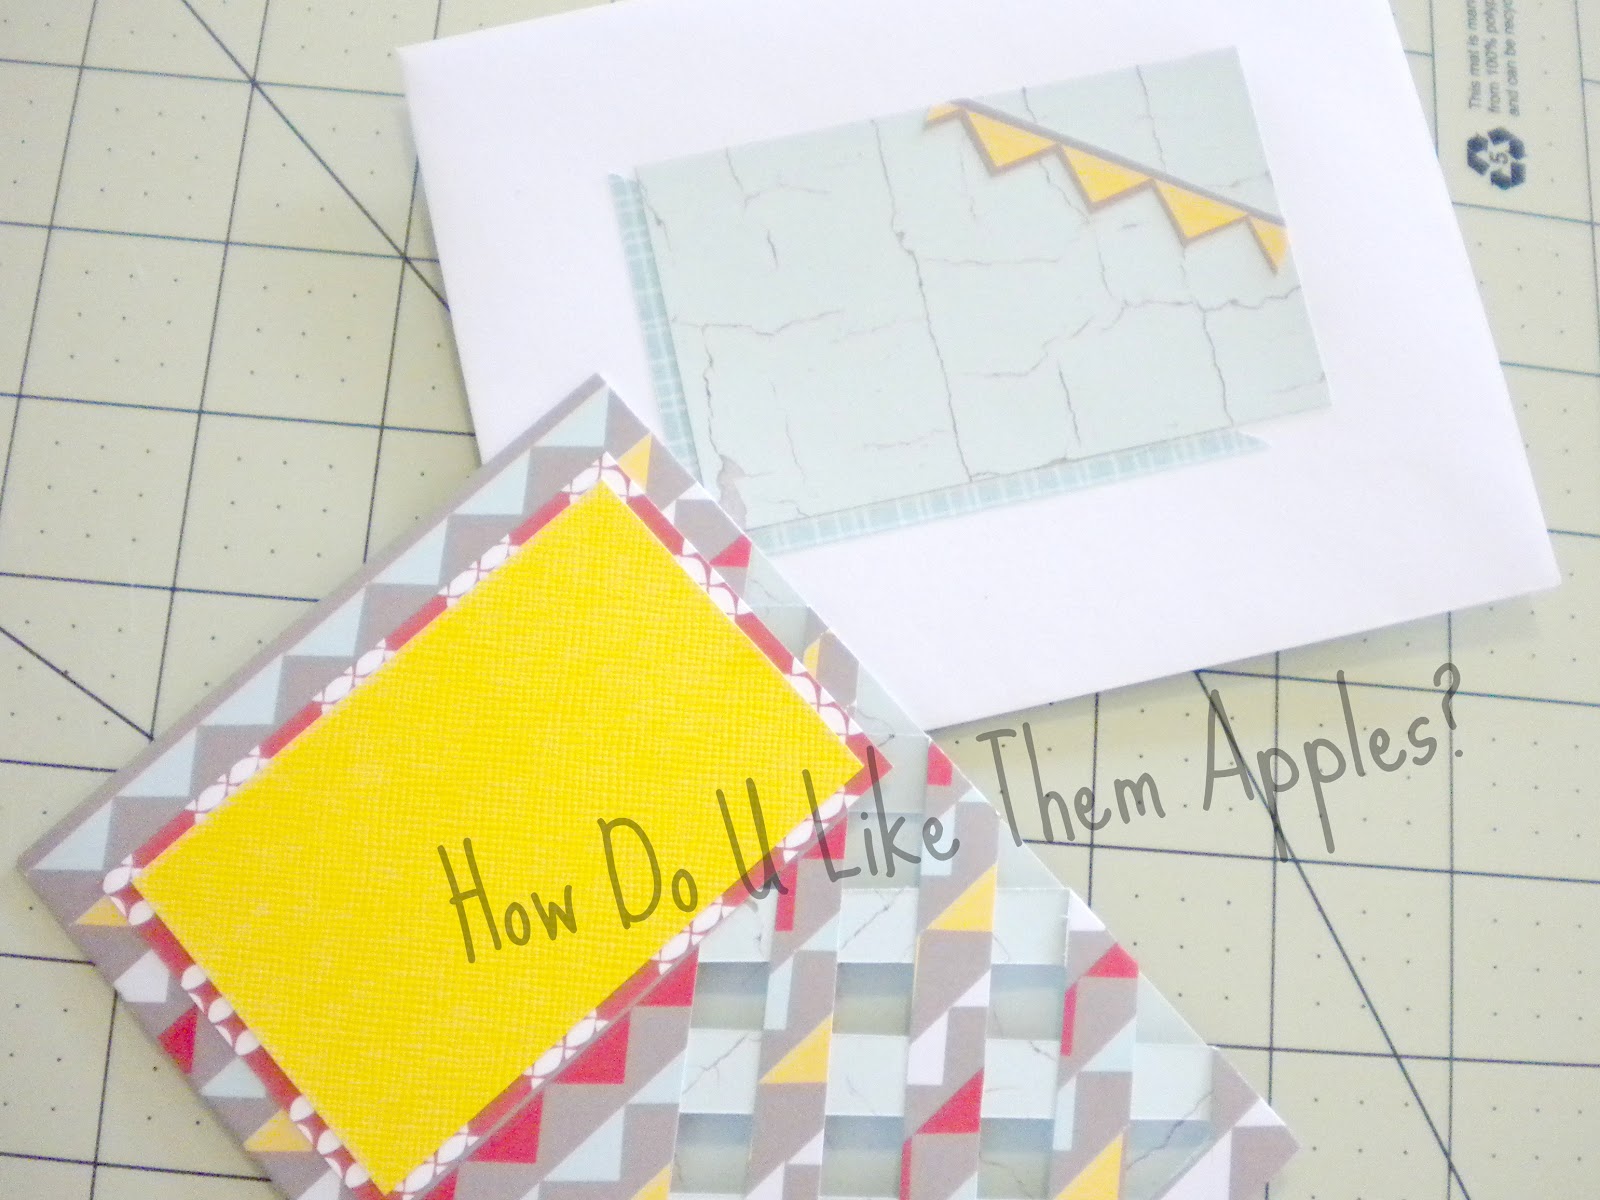
Write a “Happy Holidays” or any catchy phrase on the outside of the card, a sentimental remark on the inside, and address the card to the recipient. Then fill your new finished woven card with a GC of choice and send it on it’s way! (but remember the actual GC is still optional)

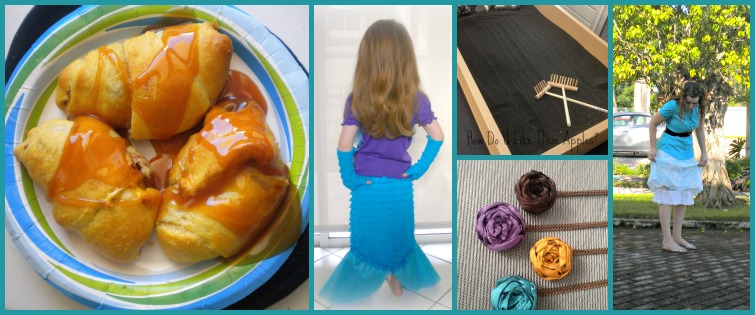
- One of my popular Fall treats: Caramel Apple Bites
- How I made a Mermaid Fin/Skirt for Widget
- And I even get my Hubs in on crafts, err…projects, like this black sand Zen Garden
- Fun personalized and handmade gifts like the Mini Rosette Necklaces
- Clearance skirt revamp: Twirly Skirt for Mom

Thanks again for letting me come visit the blog today Mandy!