I am so excited to be guest posting here again at Sugar Bee Crafts! My name is Alicia and I blog over at Joy in the Everyday. I blog about our homeschooling life, crafting and baking adventures, and my quest to find “joy in the everyday”. Each December I spend the month blogging about ways we celebrate the Advent season – this year we are hosting an orphan from Latvia for 4 weeks.
 |
| My kids and I on a recent trip to an apple orchard in North Georgia |
Today I am going to be showing you how to make a simple but, fun Christmas gift. If you are like me you get to Christmas and have a list a mile long of your children’s teachers, dance instructors, and coaches who you would like to get something for. Recently, I shared with a group of women a few simple crafts {everything from loom knit scarfs/hats to stamped tiles and homemade goodies} that you and the kids can make and share with all those people on your list. This project “Santa-tizer” was the biggest hit.
Supplies needed:
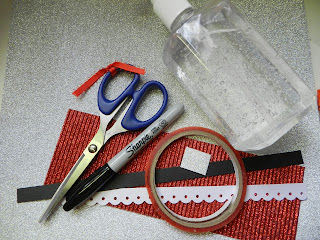
1 Pump Hand Sanitizer
Red, Black, White and Silver Cardstock
Scissors
Paper Cutter
Red Line Double Stick Tape
Black Sharpie or Black Letter Stickers
First Step is to remove the stickers from the hand sanitizer. If any stickiness remains I recommend using Goo Be Gone or some vegetable oil to remove the rest.
Next Step, is to measure around your hand sanitizer bottle to get the length and width you will need to cut each of your scrapbook paper down to. The red is for the Santa suit; the black for the belt; the white for the trim at the bottom of the suit; and the silver for the buckle. When planning out the size of your suit remember to leave enough room at the top of the bottle to either hand write with a black sharpie “Santa-tizer” or find black stickers small enough to spell it out.
Once your paper is cut down to size it is time to add the red line double stick tape to everything. Trust me – you do not want to skimp on this step. Red line on the red paper down each side and fully across the smaller pieces. This will make sure your creation will not come “unglued”.
Next step, just assemble all the pieces – beginning with the white trim, them the red suit over top, followed by adding the belt and belt buckle. When it is all done print or apply your black lettering at the top.
I hope you have enjoyed this fun tutorial, let me know if you have any questions. Enjoy your holiday season and come visit me over at Joy in the Everyday to see what we are up to this December.


