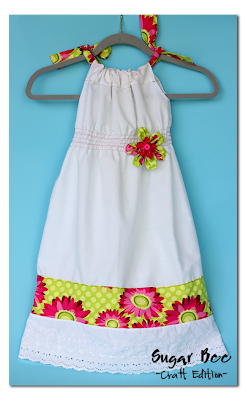
I love how simple a pillowcase dress is – and by making it into a “maxi” style, the dress really shows off the print of the fabric, etc. This turned out just how I pictured it when I started – and I have a how-to tutorial for you!
It’s a really great concept and you get just want you want, and the option to choose what scale of print you want. Love it! The fabric choices are so bold and perfect. You’ll want to check them out for sure: Modern Yardage
With coordinating fabrics, I knew it was the perfect opportunity to make a fun summer dress along with a matching doll dress (warning, cat photo bomb – – and you would think I would have moved the hose for pictures, but I didn’t, so just ignore that…)
So, let’s get started…
My girls are 6 and 8 – this will fit both of them. You can make it bigger or smaller – it’s not a precise pattern, so you have lot of room for guesstimation.
For the main piece of fabric, I started with 40 inches wide and 23 1/2 inches tall.
Contrast fabric:
40 inch wide by 4 inches (hem trim)
? inch wide by 5 inches (top trim casing)
40 inch wide by 3 inches (waist trim)
First, with right sides together, sew the hem trim on to the bottom of the main fabric. You can top-stitch along the seam if you want:
Then cut a piece off of the top to insert the waist trim. In the picture below I tried 3 inches but I wanted it wider so I redid it and ended up cutting 5 inches down – that’s what you’ll see in all the rest of the pictures.
With right sides together, sew the waist contrast piece to the top of the big main piece. Then sew the smaller main piece to the top of the waist piece – it’ll look like this when you’re done:
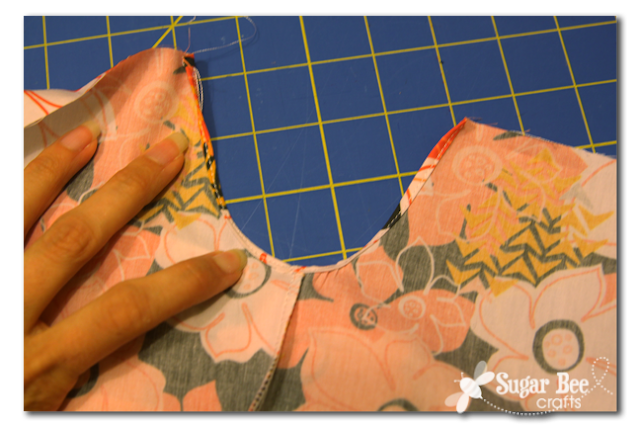
Now, fold it in half and sew up the side seam, top to bottom. Then cut a “half u” shape out of the top of each side like shown:
That will be the under-arm area. Turn it under twice for a skinny hem and sew into place. Repeat for the other side:
Now, take that top Trim Casing Piece, and it cut it to length – I know it’s 5 inches long, but I can’t remember how wide. It’ll need to be about 1/2 to 1 inch wider than the top piece (between the arm holes) like shown:
Then you will do a narrow hem on each of the short ends:
Then iron the two long sides in 1/4 inch. And iron it in half to create the casing – it’ll look like this:
To attach, slide the top of the dress into the bottom of the casing and sew along that bottom edge. You’re catching the top of the dress into the casing like a sandwich. Repeat for the other side.
You can use a ribbon or make a fabric strap to use as the tie. You’ll just feed it through the front and back casing and tie it on one side:
Now, the shirring. Don’t be scared! I think the shirring is the star of this dress – it really gives it shape and definition. It is just basically sewing with elastic thread in your bobbin. I just sewed rows, round and around, over that contrasting waistband. You can see where I stopped and started. I based this off of a dress I had made in the past and loved:
I won’t go too into detail about shirring because I did that on this post: Shirred Skirt – which you’ll want to check out because I talk about how you’re supposed to steam your shirring (it shrinks it even more and gathers it more, etc) and I even show a video of the steam in action – so cool!
Love how the shirring pulls in that waist and gives some body to to the bodice:
Now, just hem the very bottom of the dress and you’re done!! You can do this! Then, whip up a mini doll version – same way, just smaller. And I didn’t add the waist on the doll one, so it was really quick.
So cute, right?! I’d love if you could spread the cuteness by pinning this post to pinterest, giving it the +1 on Google Plus, sharing it on Facebook, and whatever other social media you think is awesome.


That is darling – and so is the dress. 🙂 Very 1970s.
How much/how did you order your fabric….newbie here!
I ordered Petals and Pods in Sorbet Multi (1 yard) and Chaise Lounge Chevron in Permission Punch (1 yard) and a fat quarter of Fun-Fetti in Summer Peach – – I had fabric left over too.