Whether you’re doing in-person school or hybrid or school at home, tote bags are ALWAYS a must! They’re a great gift idea too! And when you see cats in glasses, you think Library Bag – at least I do! Any tote bag definitely needs a pocket, am I right?! So today I have the Pocket Tote, Library Bag, and I’ve got the FREE pattern and tutorial for you. Get excited!
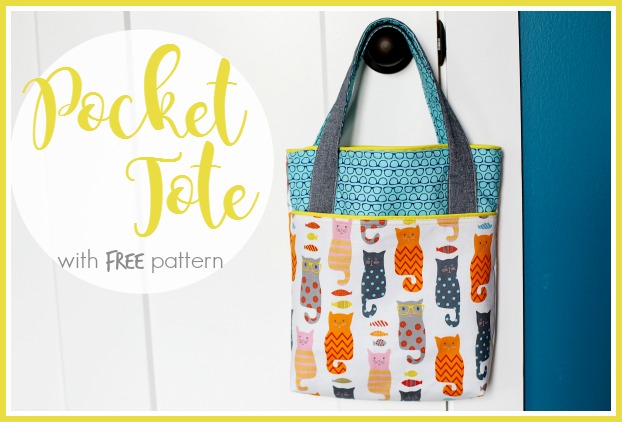
Sewing a Bag
Bags are one of my favorite things to sew, because once you understand how they go together, they’re relatively easy (just straight lines!) and they have so many different versions and variations. And they are a project where you can really get wild and crazy with the fun fabric.

A perfect simple sewing project that a beginner can definitely tackle. 
Tote with Pocket
The crowning feature on this bag is the big pocket up front – because every bag needs a big pocket!! This post may contain affiliate links.
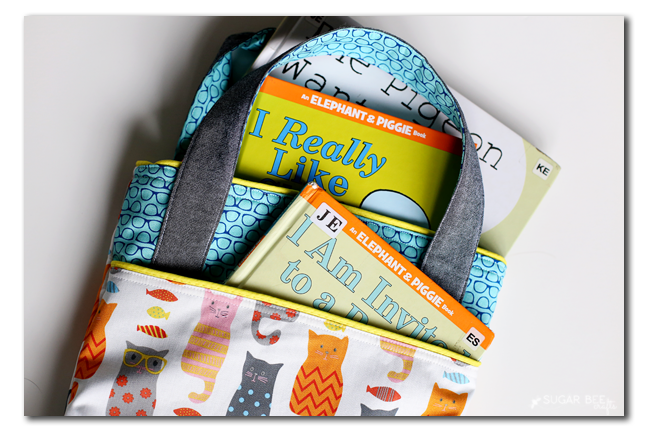
Pocket Tote, Library Bag
You’ll need:
1/2 yard main fabric (I used the cats)
1 yard coordinating fabric (I used the glasses)
1/2 yard fusible fleece
1 pkg piping (optional)
How to Sew a Tote Bag
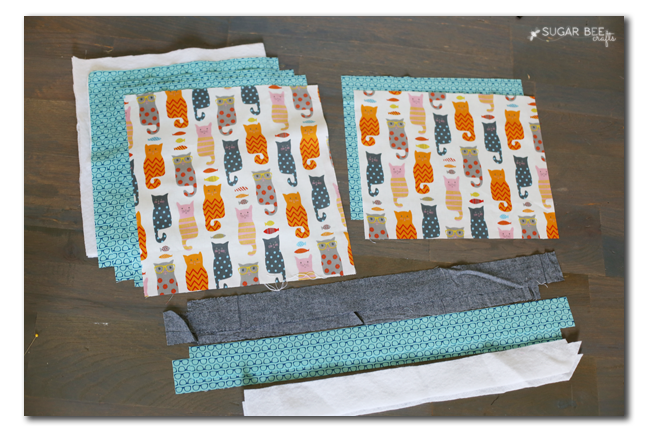
First up, cut all your pieces out. You can adjust these measurements if you want a differently sized bag, but here’s what I used:
POCKET: cut 13 in wide by 11 inches tall out of main fabric and coordinating fabric (2 pieces total), plus 1 fusible fleece or fusible interfacing
BAG: cut 13 in wide by 14 inches tall, 3 out of coordinating fabric, one out of main fabric (4 pieces total), plus 2 fusible fleece
HANDLES: 24 inches by 2 inches, 2 of coordinating fabric, 2 of main fabric, 2 of fusible fleece.
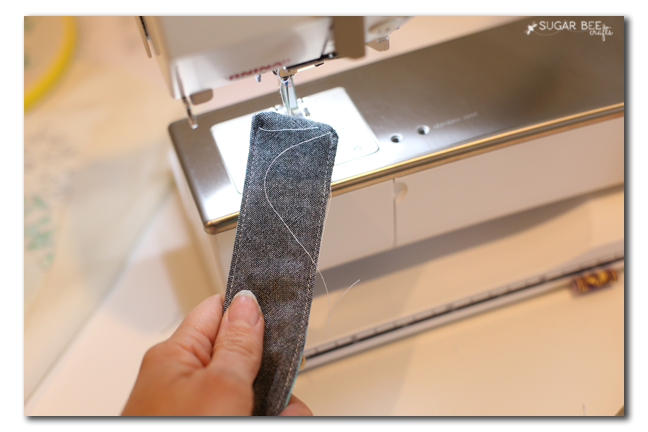
Sewing Handles
My least favorite part of making bags is the handles (I just want to get started on the main stuff!), so do those first and have them ready and done. Iron the fleece onto the back of the main fabric. Then with right sides together, sew a strip of main fabric to a strip of coordinating fabric along the long edges. Turn right-side out. Tuck ends in. Top stitch all the way around. Repeat for the other handle.
Sewing a Bag Outer Pocket
Next you’ll assemble the pocket. Iron the fusible fleece or interfacing to the back of the main fabric. Then with right sides together, sew the top of the two pocket panels together. Optional – in the seam, sandwich the piping (raw edge up, matching the other raw edges.)
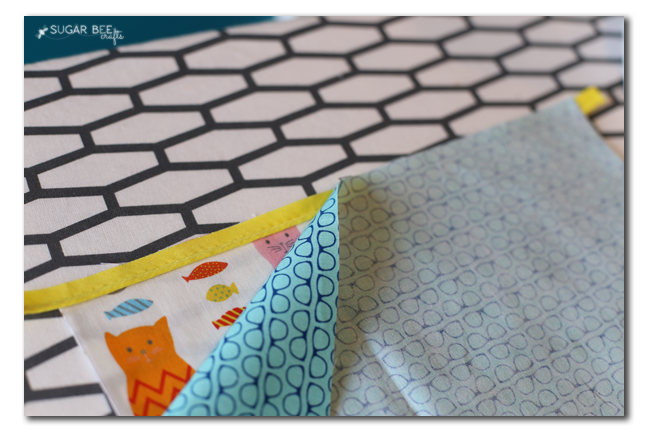
After sewing, turn it right-side out, so the two pieces have wrong sides together. Top stitch along the top seam that you just sewed. Set aside.
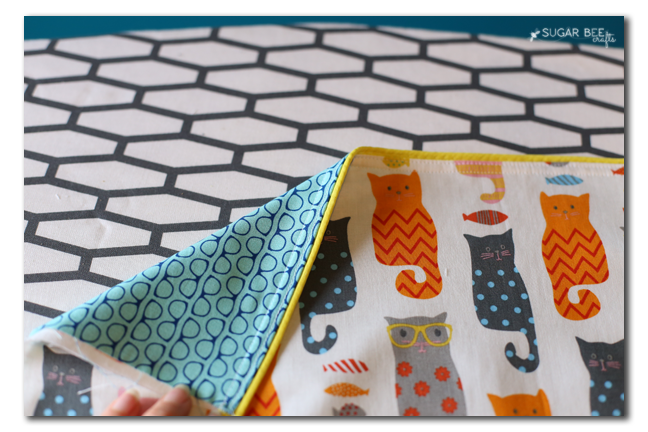
Tote Bag Assembly
Next we’re going to work on the main bag. It is using the larger bag pieces you cut – you’ll need one of main fabric and one of contrasting fabric. Iron the fusible fleece onto the back of each of those.
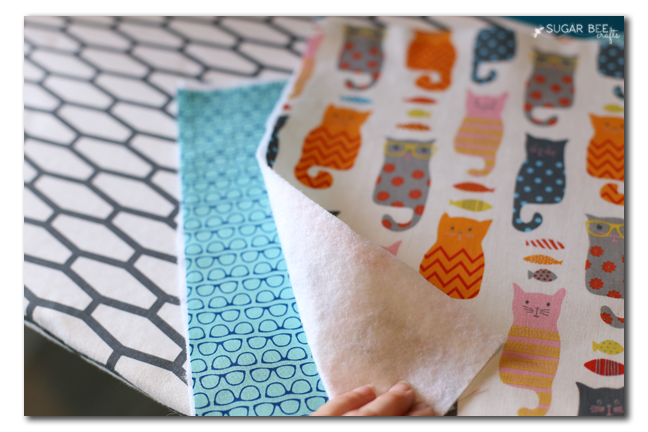
Place your handles on each of those and sew them into place by sewing a square with an “x” in it near the bottom of the handle. Then sew up each side of the handle about 3 inches (do not sew the handle all the way to the top of the fabric – leave a couple of inches unsewn). The bottoms of my handles were placed 5 inches from the top and 2 1/4 inches from each side.
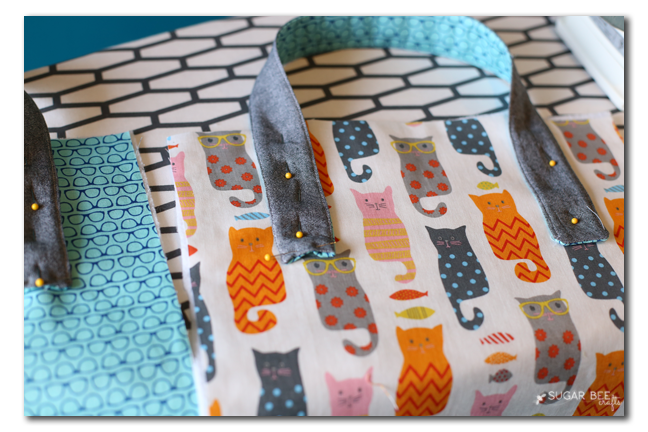
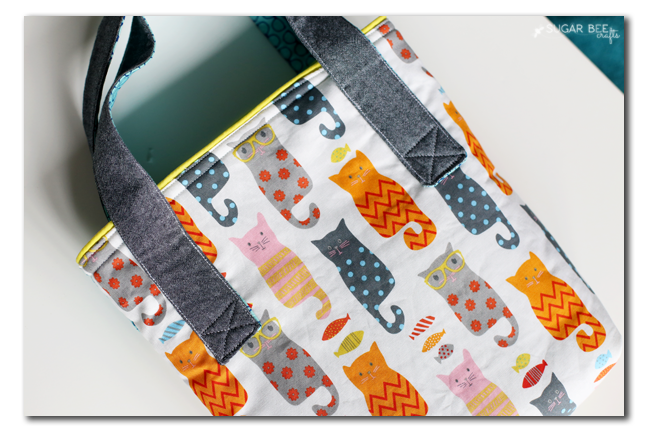
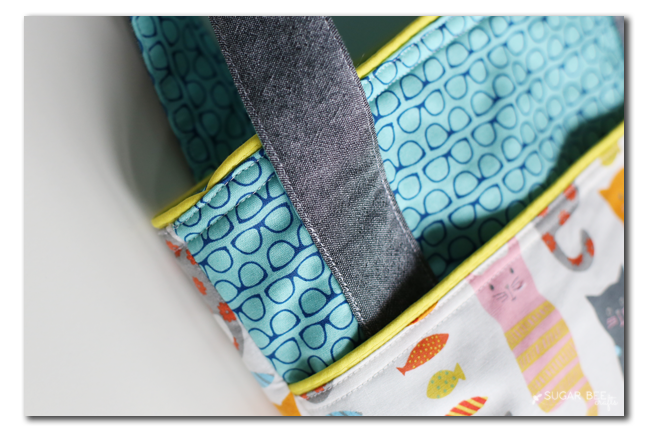
You can see the “x” at the bottom of the handles in the picture below. This is a view of the back of the finished bag:
Place the bag piece out of contrasting fabric face up. Lay the pocket (face up) on top of it, matching the bottom edge. Optional: baste around the edges of the pocket piece.
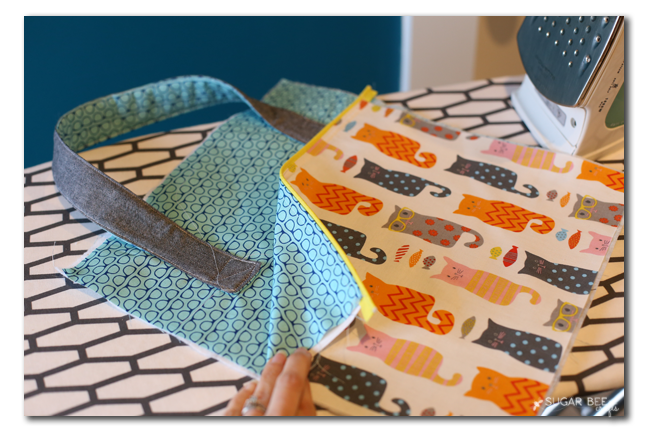
Place the other bag piece face down on top of that stack. Sew the sides and bottom, but leave the top unsewn. Place 2 bag lining pieces right-sides together and sew sides and bottom together as well. So you will have 2 “bags”, the main bag and the lining bag.
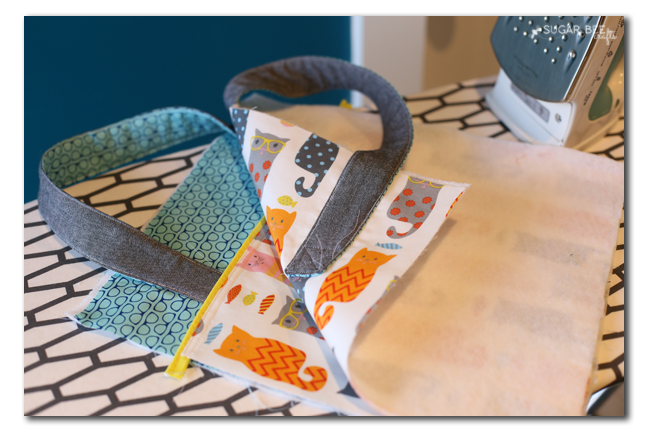
Next sew in a boxed corner. To do this, pinch the corner so that the side seam and the bottom seam are on top of each other and the corner forms a triangle.
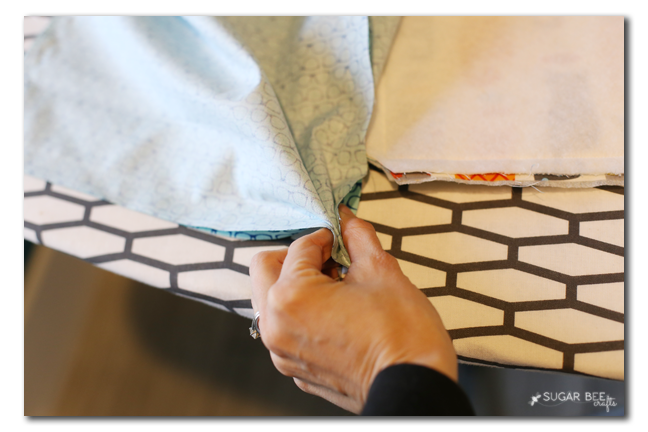
Sew the flat triangle about 1 1/2 inches in from the point. After sewing, clip off the excess.
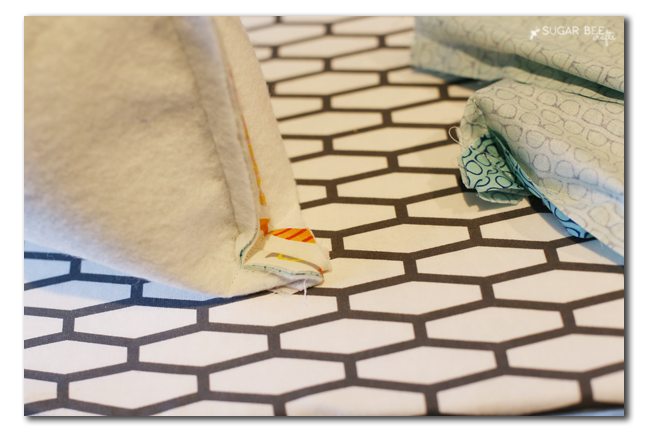
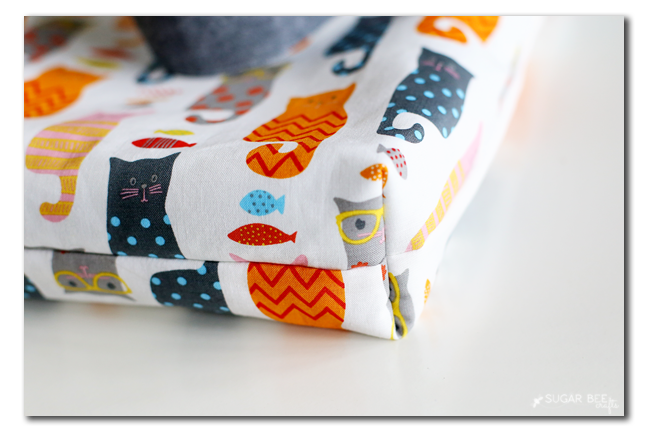
You can see the result of the boxed corner – it gives your bag sides and a bottom, instead of being flat.
Now we’re going to put everything together! With the main bag inside-out and the lining right-side out, slide the lining into the main bag matching top raw edges (this makes right sides together) – be sure that the handles are tucked down in. Sew along that top raw edge all the way around, leaving about 3 inches unsewn. . Through that 3 inches, pull the lining and main bag right-side out, then push the lining back down into the main bag. Optional: as you did with top pocket seam, you can sandwich in piping (not shown, cause I forgot it the first time!).
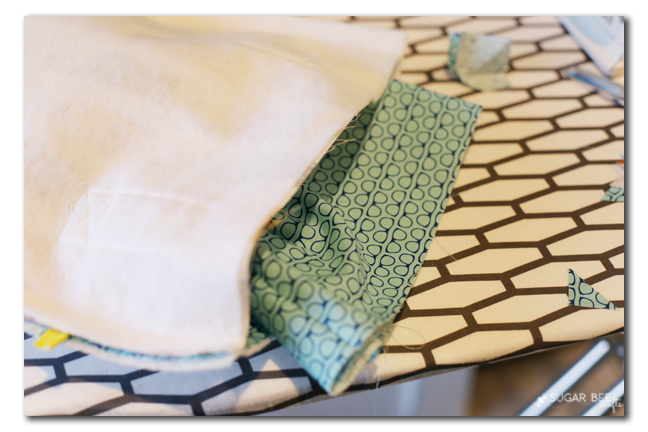
After you have it all turned right-side out, topstitch that seam. It will close the hole you used to turn the bag right-side out, and it will give it a nice, finished look.
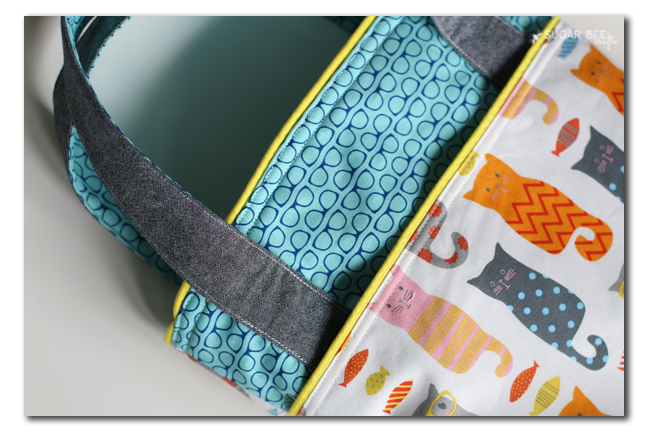
You can see where I accidentally have my piping seam in the front of my bag, instead of the side seam in the back – oops!! I’m just calling it a “design element” and going with it 😉
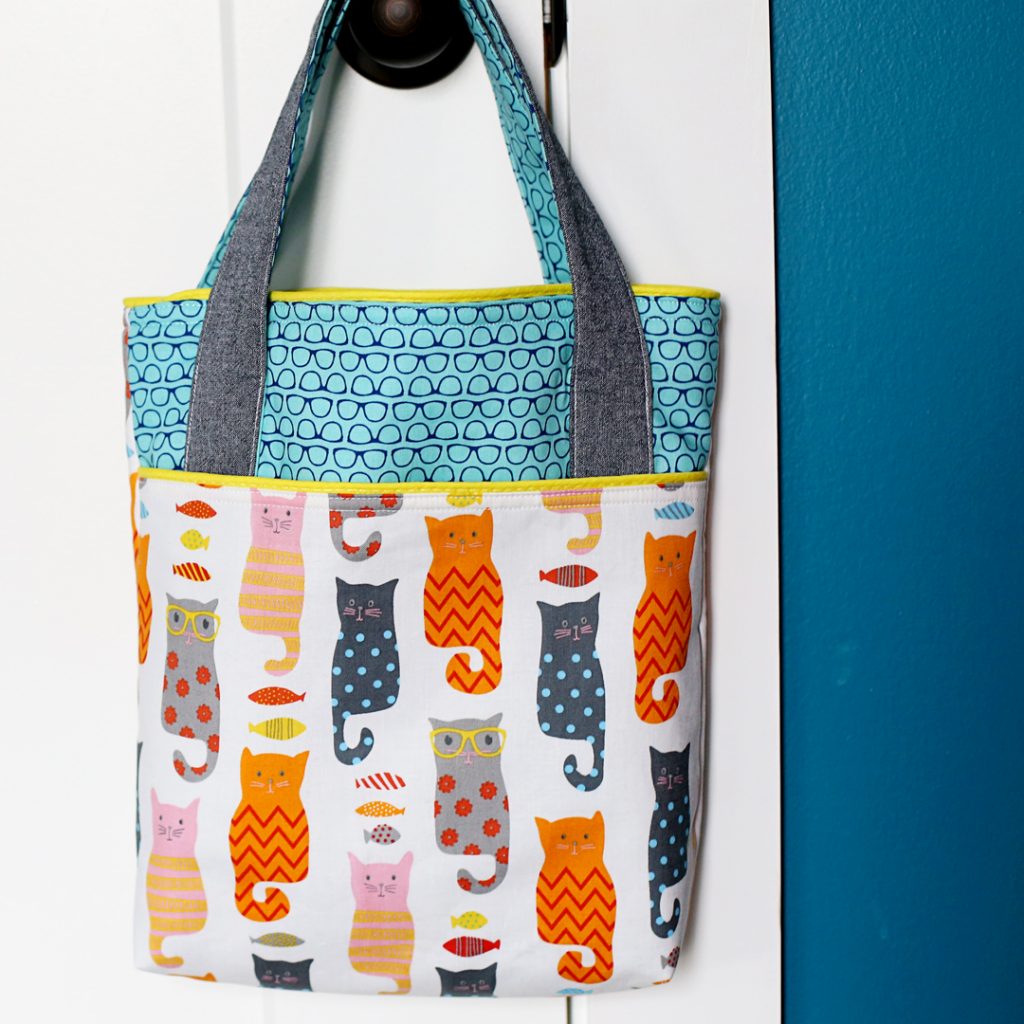
I hope you enjoy your Pocket Tote, Library Bag as much I as do!

I love the big front pocket – it just makes the tote that much more functional and awesome. And of course I can’t get enough of the Smarty Cats fabric!!
Free Sewing Patterns for Bags
If you are looking for free pattern tutorials for tote bags, I have a few more that you’ll want to check out:
And Video Tutorials over on the Sugar Bee Crafts YouTube Channel!


This is adorable! And I love the pocket, so many “pockets” seem to be too small to be useful, but not this one! 😀
Jessica [Havok] recently posted…Writing Should Not Be Complicated
Hey,
Love the tutorial. Maybe I missed it, but just wondering what the seam allowance is? Thanks!
Cant wait to make the bag.
I think I used 1/4 in, but it’s not a precise pattern, so any seam allowance should work!
This is a great bag. I love the piping and the pocket. I also like the way you have added some weight to the fabric with the fusible fleece. I have added this tote to my DIY Grocery Bags Pinterest board: https://www.pinterest.com/thelostapron/diy-grocery-bags/
I am normally pretty computer savvy but I cannot find the .pdf file ?!? I really want to get started on this – 3 of my grandkids are summer readers!!
Sorry, there is no PDF, it’s all straight lines, so I just provided the measurements to all the pieces in the instructions – the pieces are: First up, cut all your pieces out:
pocket, cut 13 in wide by 11 inches tall out of main fabric and coordinating fabric (2 pieces total), plus 1 fusible fleece or fusible interfacing
bag, cut 13 in wide by 14 inches tall, 3 out of coordinating fabric, one out of main fabric (4 pieces total), plus 2 fusible fleece
handles, 24 inches by 2 inches, 2 of coordinating fabric, 2 of main fabric, 2 of fusible fleece.
Thanks!!
Very cute pattern! I’m just in the process of cutting it out and 1/2 yard of coordinating fabric isn’t enough for the lining. I will have to use one piece of the main fabric and one piece of the coordinating fabric for the lining. No big deal but just a heads up. (I bought the same fabric and aligned the cats and glasses the same way as the photos).
Oh no! I will go and recheck, thanks so much for the heads up!!
Hi Mandy! I finished my first bag and it turned out so cute!! I’m making a second one and cut both sides of the pocket out of the main fabric (instead of one side using the lining fabric). That allowed me to have enough lining fabric (the glasses) for the entire inside of the bag, instead of one side lining, one side main fabric. So your original fabric requirements of 1/2 yard for each fabric will work if you do it that way 🙂 Thanks so much for sharing this pattern!!
I love the pattern, but not all the pictures come up so have to kind of guess at some things.
sorry about that – maybe try refreshing the page in your internet browser and see if they’ll all put up?
Thanks for the great pattern! May I ask where you bought your cool fabric?
the fabric is from Riley Blake, so you can find it online or at local fabric shops – hope that helps!
I need help with this bag and would appreciate a call. I used a solid color for the pocket and bag piece. I laid assembled the pieces as per your instruction, but when I added the lining and turned the bag out the monogram was on the inside. When I turned it to get the monogram on the outside the box bottom was all wonky. The only thing I did differently was making the boxed bottom. It came out perfectly on the lining. Help!!!!
I realize this comment is months old, but in case someone else has the same problem:
When you box the corners you need to make sure the pocket and bag front are on one side of the “box” and the bag back is on the other, with the seams you’re matching up in the middle. If you accidentally put the bag front and back on the same side when you box the bottom, you will get what you came out with: the lining on the outside and the main fabric on the inside of the bag when you turn it out.
The good news is that this problem is solveable, just pick out the box line stitches, move the bag front to the opposite side (the pocket side) and re-stitch the box line.
Hope that helps!
Thank you! This was perfect timing! I had this issue and couldn’t figure out why and I have only been sewing for a few weeks and didn’t know why this happened!
Me again, I Made a comment earlier. Why should the finished measurements be. I’m not sure you could get very many books in this bag.
sorry, I don’t have it right here to get the measurements, but I made it for my daughter, and as such was thinking of having it hold kid-size chapter books – they’re a great size for the bag. For adult size books, maybe try altering the pattern to make the bag bigger. Great point!
Love, love, love 💘💝💞 this tote ! One of my “go to” patterns for gifts to friends and co-workers. Thanks for sharing this wonderful tote. I make them in sports themes only for special friends.
Love the bag! and the Fabric!! Do you know the name of the line of fabric – from Riley Blake?
I think it’s called “Smarty Cats”
Hi, where is the pattern, I cant find it?
Thank you.
the pattern is listed in the text, it gives you the dimensions of the pieces that need cut, how to assemble them, etc. hope that helps!
I don’t quite understand about the lining. Is extra fabric required other than what is in the tutorial: 1/2 yd main (the cats) and 1 yd contrasting (the glasses)
Thanks
I used the glasses as my lining – hope that helps!
I have re read ths instructins and some comments of others about the pockets & lining and I think I have it figured out now, Thanks,
This is adorable! I am a beginner sewer and I can’t wait to try this out! My son and I visit the library often and we use the bags that we collect at festivals but they always give out. Thank you so much.
he’ll love this bag!
just wondering whether i have to use the fusible fleece… is it just for extra strength/thickness? If i don’t get a reply, I will just use ordinary fleece (we have some old stuff). Hope you can get back soon but it is not completely necessary
I think either should work! I like the fusible because it doesn’t move around, but regular should work too!
HI Mandy,
Love this tutorial! Thank you for sharing. I very NEW to sewing…I was wondering I want to make this for my niece she’s 4 yrs. old. Does the measurement on this perfect size for a toddler? Or do I cut the size down a bit. Thanks!!
i think it’s a great size for a toddler!
Love my new book bag. My one note for someone starting this project is to undercut the fleece on the narrow ends of your handle pieces by the amount of your seam allowance. Tucking the fabric under with the bulky fleece doubled up leaves it difficult to end up with nice squared off corners. I solved my problem by covering up my less than perfect ends with an extra pocket on the back. Thanks again. Happy reading AND sewing.
Very cute, but if your instructions include putting the piping between the liner and the bag, I missed it. Will know to do that on the next one I make. Thanks for the pattern!
This pocket tote is so cute & user friendly! I loved the pocket & not to mention how you nicely pull out the finishing Mandy! But my question is did you fell any problem while sewing the handle? Cause the fabric was much thick!
The only thing I have changed about this bag are the handles. I made one of these bags for each of the children in my daughter’s kindergarten class 3 years ago. The handles made me cry, but I was also making 30+ bags. To make them easier, instead of adding the fusible interfacing, I cut my handles 5″ wide x WOF. Then i folded them in half lengthwise, ironed, opened them up, took each side to the middle and ironed again, lastly folding it in half again and ironing – basically making my own bias tape. But then I sewed a 1/8″ seam down the length of each side. I also made my handles longer to fit over an adult’s shoulders too…because kids always hand their bags to mom. And just to note, these bags are fun! The kids I made them for are still carrying them. I now make one for each new girl scout that joins my troop. It helps them keep all of their girl scout things in one place. Thank you for this great pattern!