


this is a post in collaboration with Expressions Vinyl - LOVE being part of their blogger team!
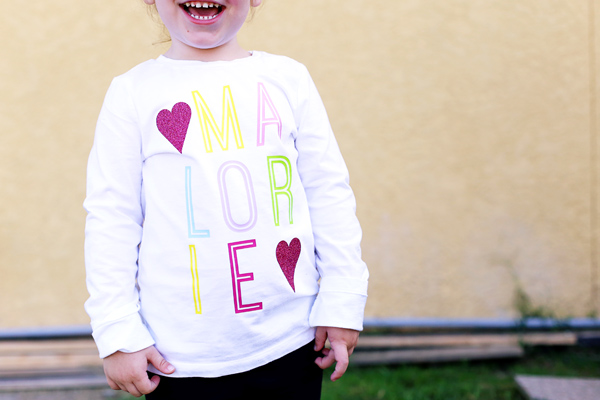
I just used the coolest secret vinyl hack and HAD to share it with you!! Normally placement with heat transfer vinyl is easy, because it all moves over to your project on a carrier sheet. BUT, when you use multiple colors, you have to place them all as individual pieces, and I’m not the best at getting everything lined up and evenly spaced (and surely I can’t be the only one who struggles with that….). But I was able to get Perfect Placement of Heat Transfer Vinyl on this tee and want to show you the super simple way that I figured out!
I love when I think of genius ideas that make things easier!!
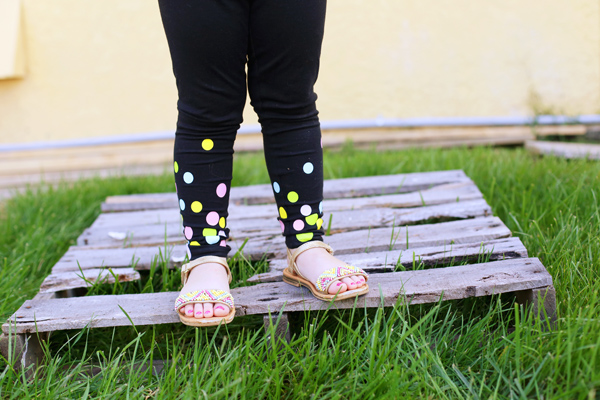
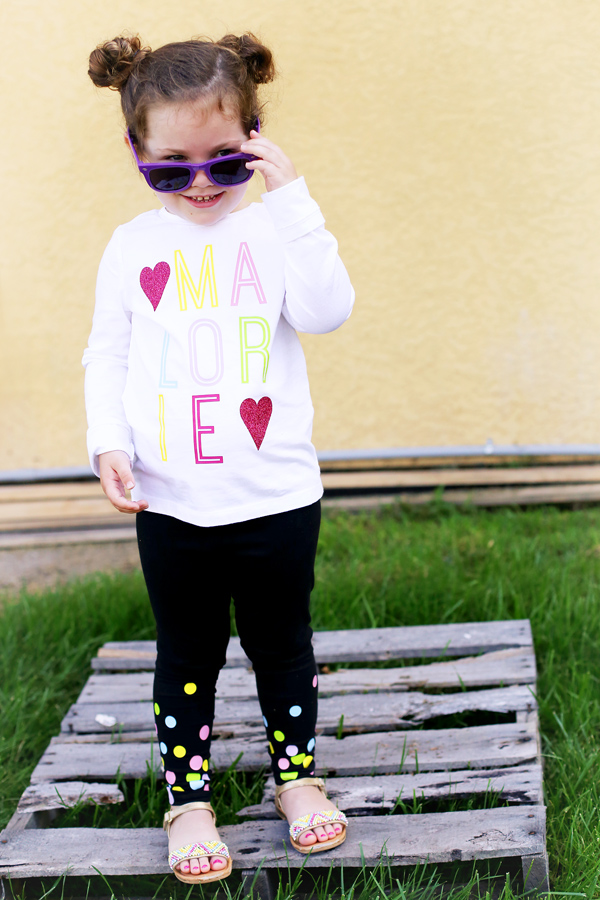
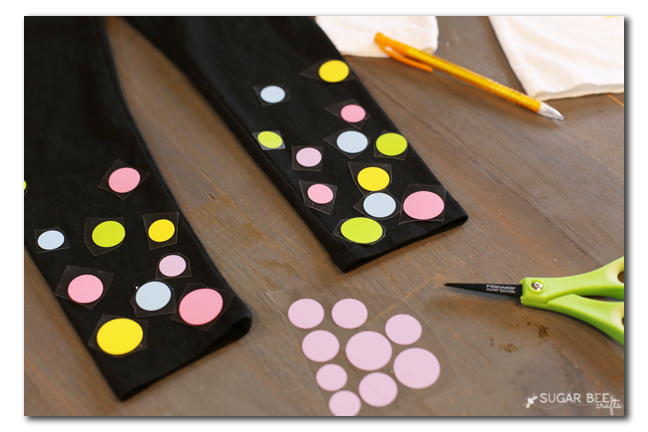
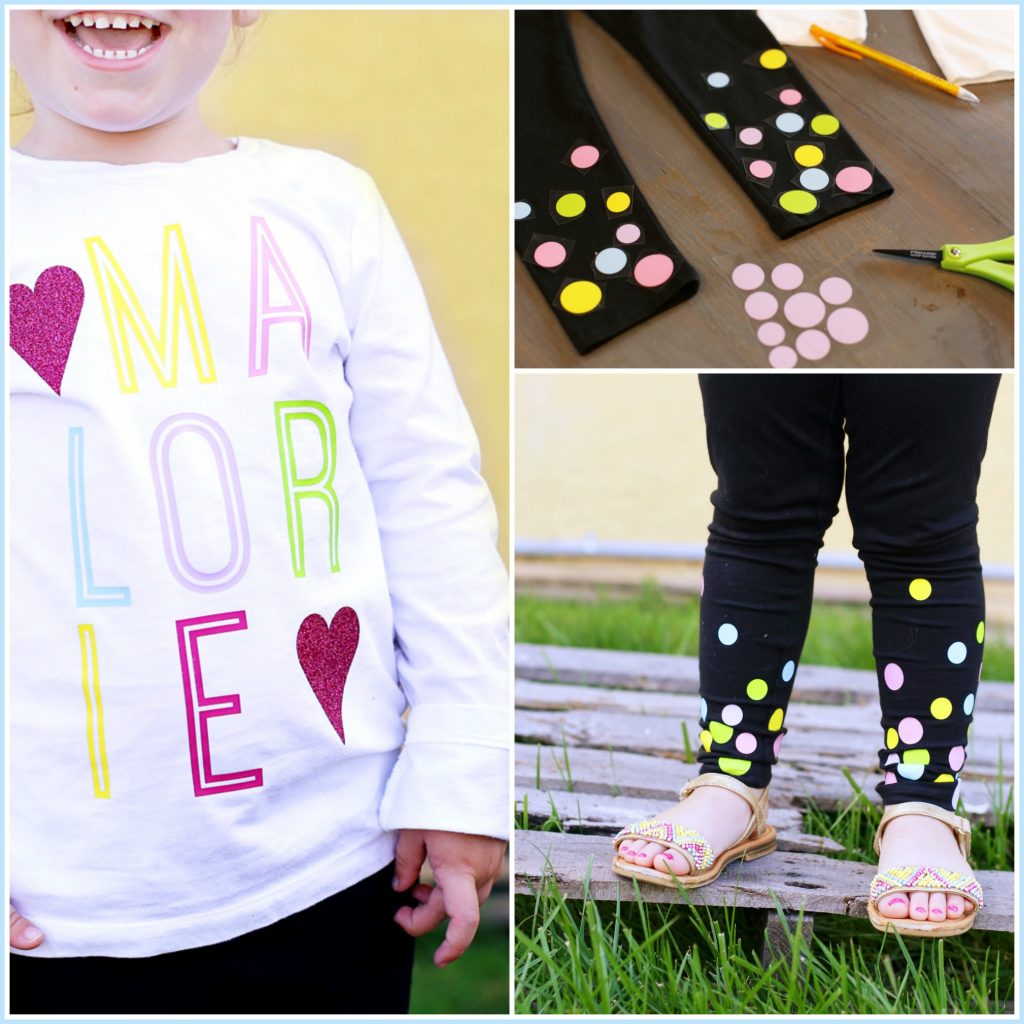
And then of course I had to make matching pants for the birthday tee, cause you know, how could I not! I went with polka dot confetti, and kind of wish I had polka dot confetti pants of my own…
Customized Birthday Outfit – you’ll need:
–heat transfer vinyl (I buy all mine through Expressions Vinyl (affl. link) LOVE them, fast shipping, and ginormous selection!!)
–tee and leggings (grabbed mine at walmart)
–cutting machine (which is best?? I talk all about that) – I used my Silhouette for this project
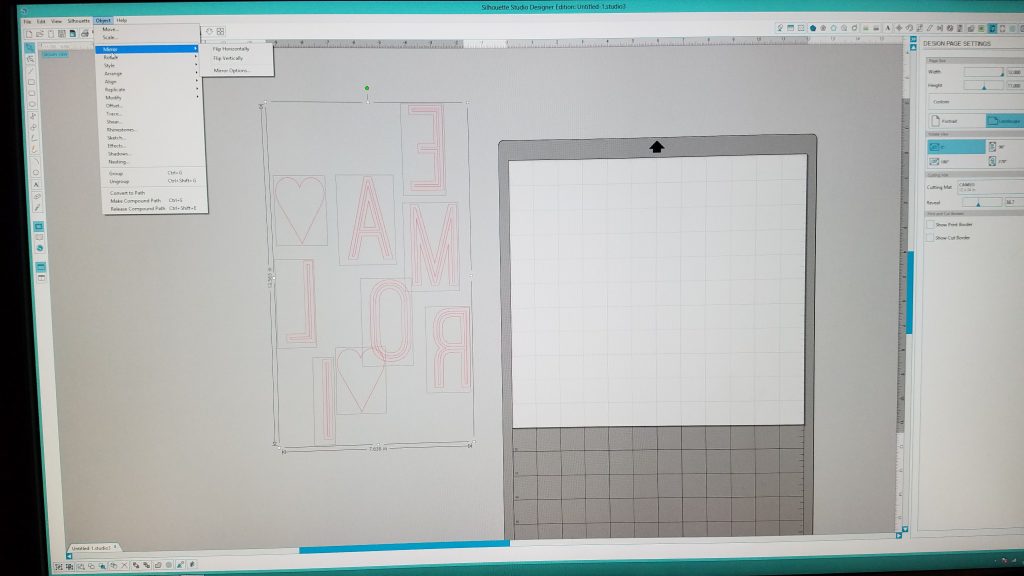
I cut everything for this project on my cutting machine. I thought about using a punch for the polka dots (yes, you can do that!), but my punch is getting dull and was having a hard time cutting through the HTV. Plus I wanted various sizes of dots. So I just cut each letter individually out of a different color of vinyl, and cut dots out while I was at it. When cutting heat transfer vinyl, don’t forget to MIRROR YOUR IMAGE!!!!
and then I just cut all the polka dots apart and placed them randomly on the leggings:
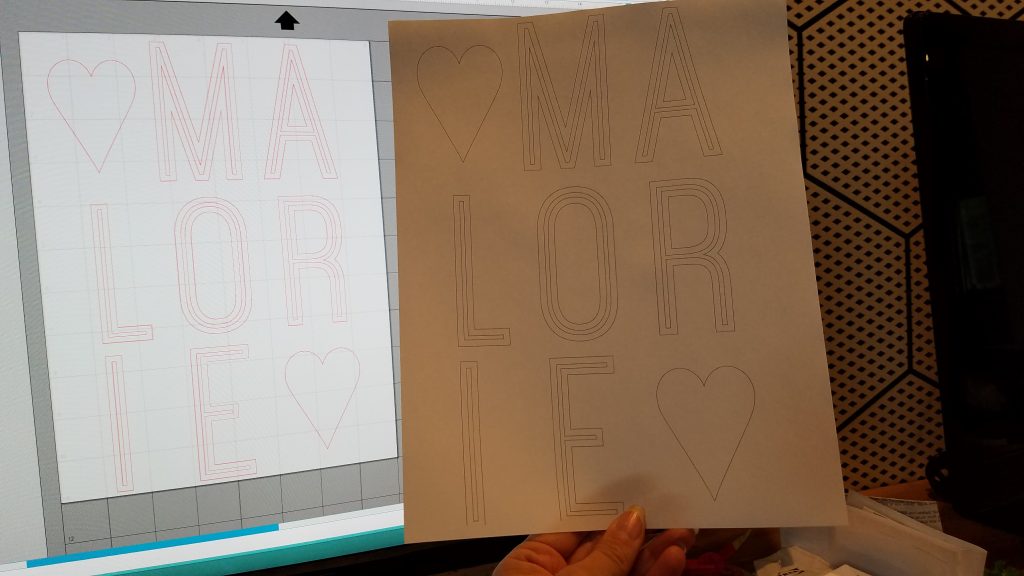
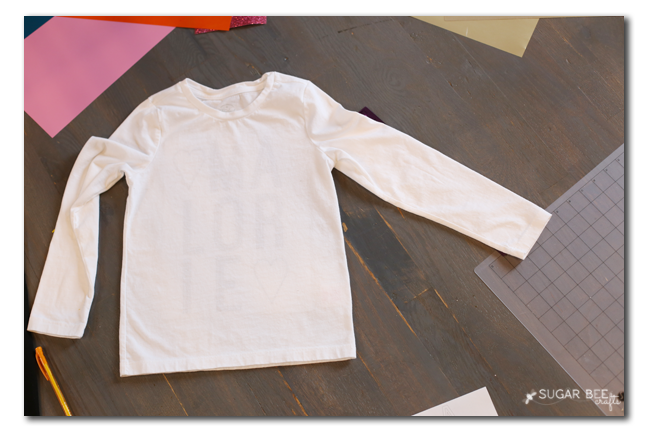
Now for the tee – I had all the letters cut out of Heat Transfer Vinyl (HTV) in separate pieces, because they’re separate colors, but I knew I couldn’t get the spacing right….
Perfect Placement of Heat Transfer Vinyl
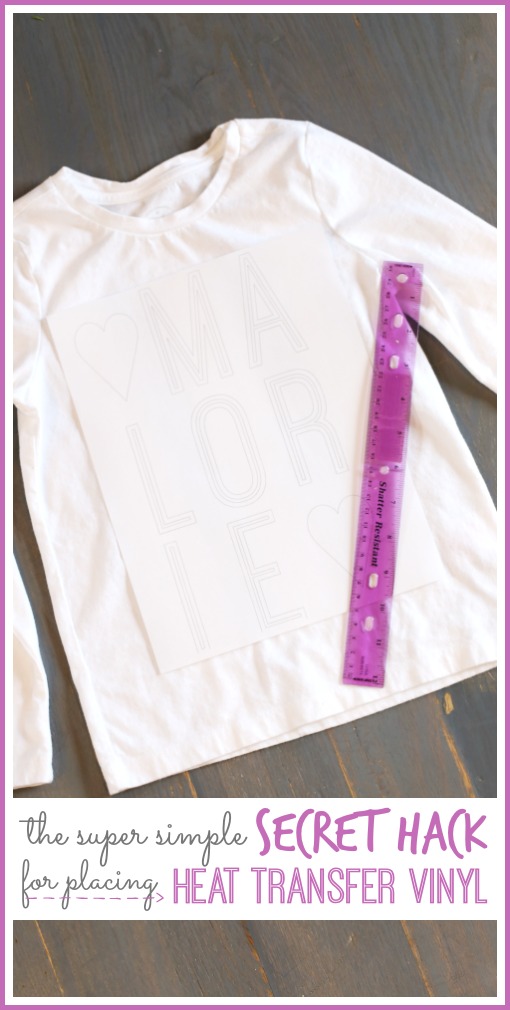
Here’s the secret hack: print your design! Just print out a copy of what you’re going to cut (you’ll need to make the lines a little thick in the software) – –
Gauge where you want that design to go:
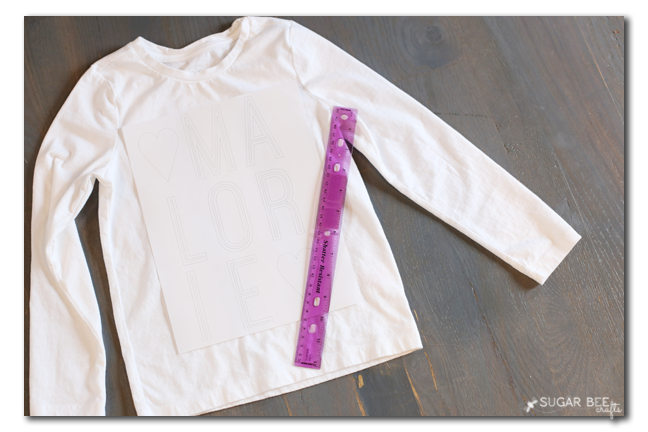
And then slide it INTO the shirt – – you can see through it (this won’t work with dark-colored tees, but for light ones, you’re good to go!)
So I used the paper as a guide, and set each of my pre-cut letters right onto their outlines showing from the paper.

See!! perfectly spaced and lined up! Then just slide the paper out, and iron the vinyl decals into place. Done and done. The whole outfit turned out so good – I love when that happens!! And know you know the trick to Perfect Placement of Heat Transfer Vinyl!
Need more details on using Heat Transfer Vinyl? Check out this post!
This is a neat idea! I’ve always used the offset feature in Silhouette Studio to create a slightly larger version of my design, then cut that version out of freezer paper. Then I iron the freezer paper on and use it as a template. The outfit turned out adorable!!
that’s a good idea too – – mine is probably the lazy way, ha!!
Great idea, thanks! I’m new to my Cricut and have been having a hard time with this. It’s so time consuming. I’ve been using a “seamstress style” measuring tape and aligning everything one by one. How can I get it to cut and have everything on one sheet like yours? Did you use a vinyl transfer sheet? Again, I’m brand new to this, so these might be silly questions.
Thanks 🙂
-Krystle
if you’re using heat transfer vinyl, it will come with a carrier sheet, so then you can cut all the designs of the same color on one sheet, hope that helps!
Great idea! the tutorial is really helpful. Does it heat transfer vinyl printing is also works on woolen clothes?
I pretty much do this, when doing a dark colored shirt, I pin the paper at the top(neck) and on both sides, on the inside of shirt, but on the backside.. Then I fold the front up, I can usually get the bottom 2/3 pressed. Then I unpin the printed page and line it up with the area I pressed. Then place vinyl under the page.
Hmmm. I thought this was a great idea until I realized this isn’t going to make sure it go’s on straight and doesn’t go uphill or downhill. That is what I am looking for…a foolproof way for COMPLETE placement. Tee is nomgoodmgoing uphilmpr downhill. :{. Placement isn’t difficult for me. It’s MUCHE easier to measure sides of tee to vinyl for centering than it is for uphill/downhill.