


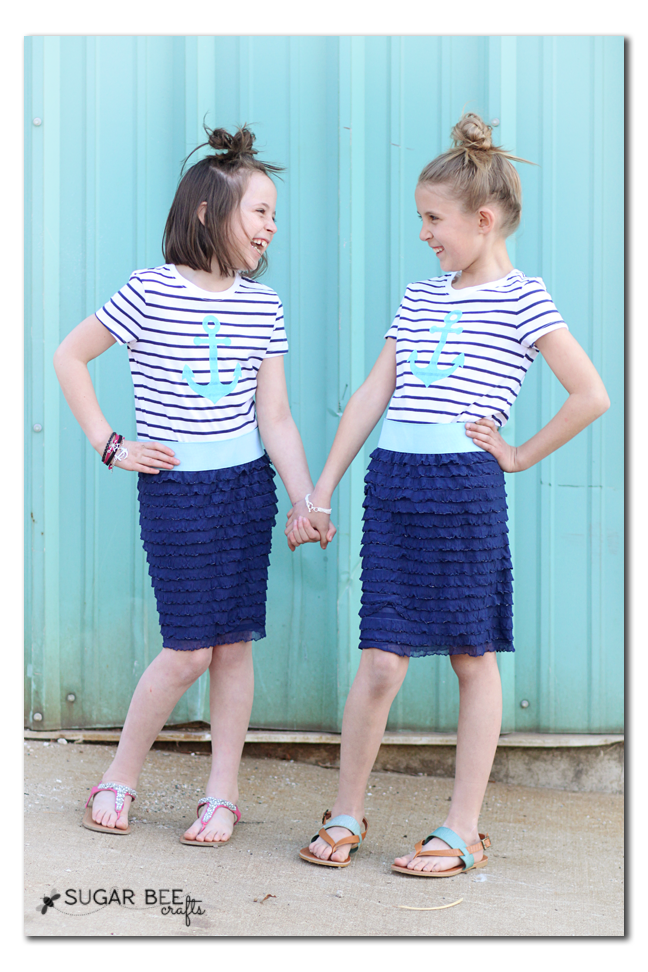
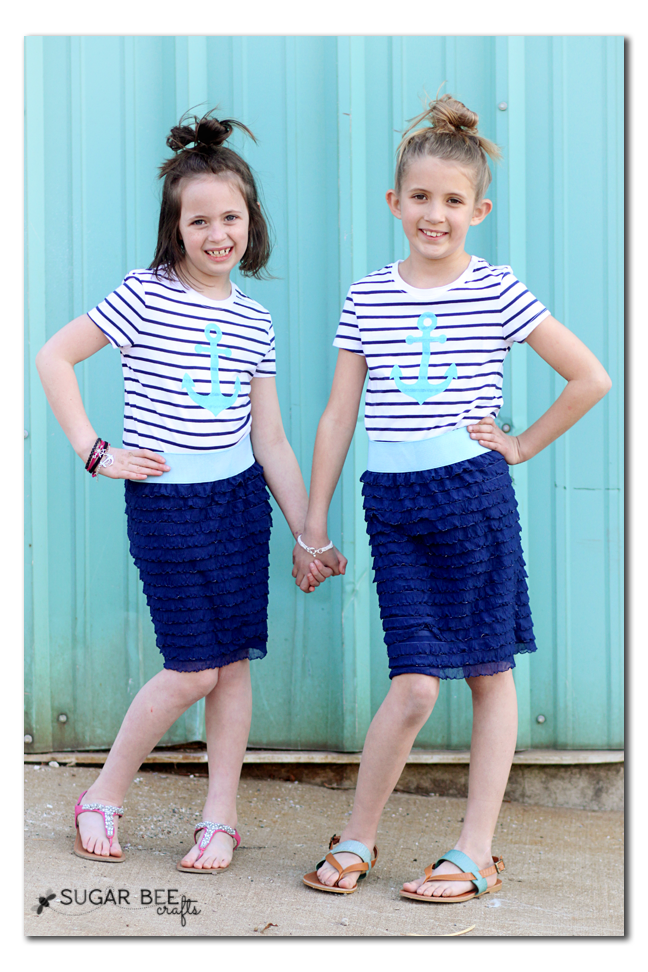
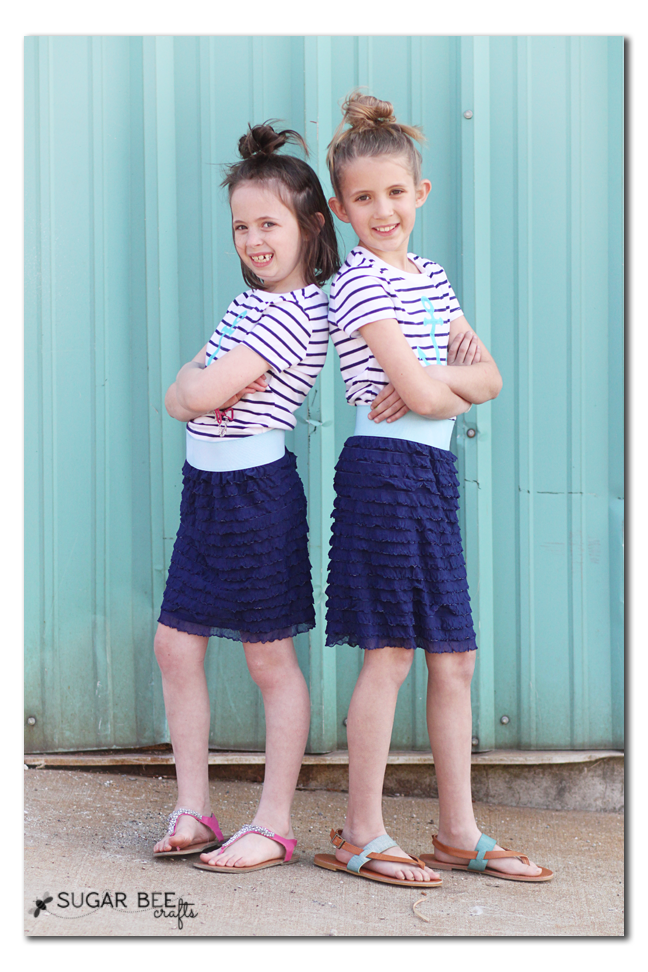
Back for some more Nautical Inspired Projects?? This afternoon I’m covering the DIY Anchor Stenciled Shirts and the 5 Minute Skirts. I’ll do a quick tutorial on how to make them. You can wear them separate, but of course they’re super cute together!


This is easier than you think! – here we go – you’ll need:
–Shirts (I found these navy stripe ones on sale at Target)
–Anchor Stencil
–Craft Paint and Fabric Medium
–Sponge or Paintbrush
–Paper Sack or Cardboard
Okay, so first off, the stencil. I cut mine on my Silhouette. But if you don’t have one, don’t worry. An anchor is a simple enough shape that you can hand cut it. Just find an image online and trace it onto contact paper or freezer paper and cut it out. If it’s contact paper or vinyl, you can just stick it to the shirt. If you go with freezer paper, iron it to the shirt.
Did you know that you can use regular craft paint on fabric – yep! Craft paint comes in TONS of colors, and fabric paint is limited, so I always just go with craft paint. To make it usable on fabric, you just need to mix it with “fabric medium” – it makes it soft and uncrunchy. 2 parts paint to 1 part fabric medium (I guesstimate.) I used 2 tones of aqua and my fabric medium to get the color I was looking for:

Then you’re going to paint it on with a brush or a sponge. Not too thick – you don’t want it to bleed under your stencil. If you want it thick, it’s better to do several thin coats.
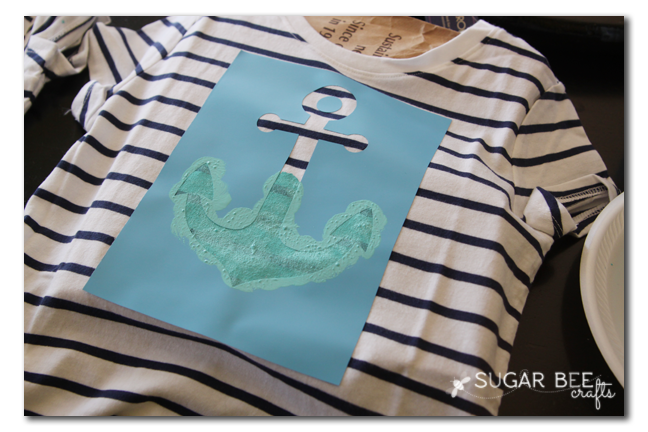
It won’t take too long – just work your way around it, being sure to get paint to cover it all.

I did 3 coats (I let it dry about 5-10 minutes between coats) and still didn’t cover the dark stripes completely, but I was okay with it. With the stripes showing through there’s a little “worn in” look going on that I like (and the picture below is deceiving – they don’t show nearly that much in real life). Let dry completely after the last coat. Then you can slowly peel off your stencil. I love revealing the crisp edges!!

After 24 hours, you can heat set the design (iron it) and then it’ll be safe to wash it. That’s it! See, you can do this!
That moves us right into the next project….
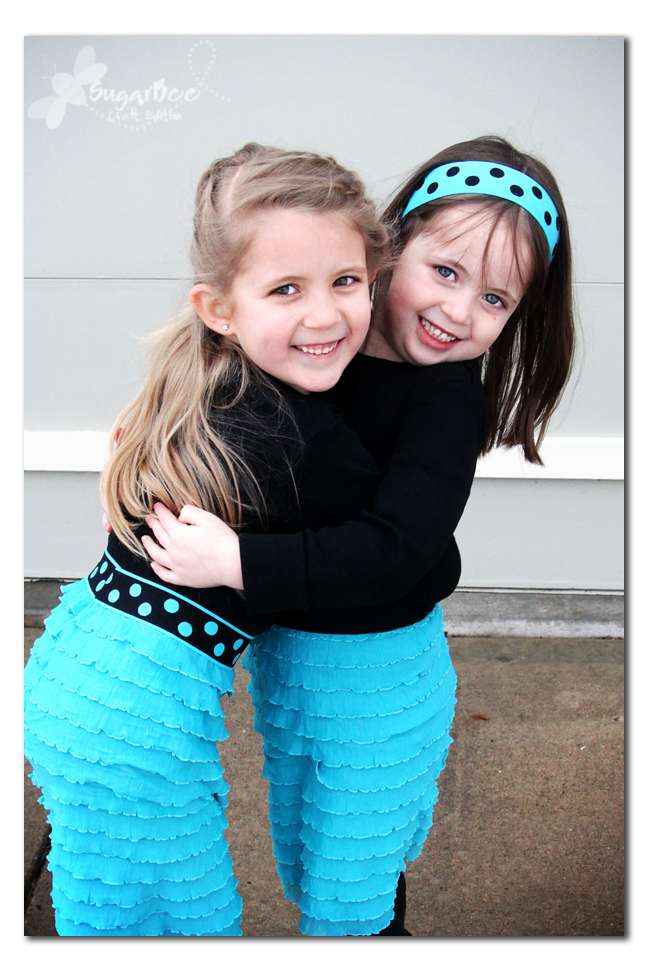
5 Minute Ruffle Skirts
You can do this. Even if you don’t really sew. It’s not hard. Seriously!
I found the ruffle fabric at Jo-Ann. I love ruffle fabric – it’s stretchy and very forgiving. And it doesn’t fray so you don’t even have to hem it!
Colored elastic is a little harder to come by, but you can find tons of wide elastic in white. So I just dye it using Rit Dye to my desired color.

My girls are 7 and 9 years old. I can get two skirts – one for each of them – out of a half a yard of ruffle fabric. Just cut the half-yard on the fold. Then you’ll have 2 rectangles. The jist of the tutorial is that you sew on the elastic and then just sew up one seam. Yes, that’s it. Done and Done.
I don’t have step-by-step instructions here, because I wrote a whole tutorial for the same skirt a few years ago here: 5 Minute Ruffle Skirt
It has lots of pictures to walk you through how to make a simple ruffle skirt.
Random – – I knew my girls needed new ruffle skirts when my 7 year old tried to wear her old one (from when she was 4!) last week to church. She came downstairs in that super-tight now-mini-skirt and Trevor and I just looked at each other – and then she had to go pick out something else. So of course I was on the lookout for ruffle fabric for a new version.
3 years gone by…


OMG! Those 2 are SO stinkin adorable!! Excellent job Mandy! The WHOLE nautical look going on in 3 posts! Nicely done!!!
So cute! I love the nautical look!!
aw these projects are too cute Mandy! But seriously I’m loving seeing those two girlies and how they’ve grown just as much! such cuties!
they are so cute!
Super cute shirts and skirts!! Loving the nautical look! 🙂
These shirts are just adorable!