Hi, I’m Leslie from Violet Imperfection
I’m a wife, a stay at home Mama, crafter, reader, lover of all things Disney and an in-progress reformed perfectionist. My blog is about teaching my daughter Violet that not everything in life has to be perfect.
Today I am going to show you how to make a Thankful Burlap Banner.
Supplies:
- Burlap
- Fabric (in at least two patterns)
- Popcorn kernels
- Jute Twine or ribbon of your choice
- Green Ribbon
- Card stock
- Hot Glue or bonding of your choice
- Mini Clothespins
- Pencil
- Scissors
- Permanent Marker
The first thing I did was make a stencil for my burlap flags and cut them out. You can get creative and cut out any shape, triangle, circle, rectangle, etc. Set aside.
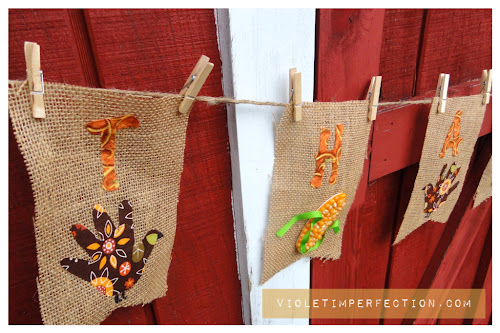
I used paper for my stencil, I pinned the stencil to the fabric and cut around. I cut the turkey hands facing in two different directions. For the letters I printed out the word “THANKFUL” in the font I liked and cut them out the same way as the turkey handprints. As you can see I don’t have a machine for cutting so it is good ol’ scissors for me.
Set your turkey prints and letters aside and it is time to start working on the corn cobs.
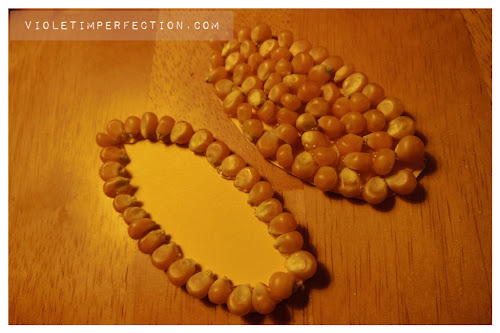
I cut a rough shape out of card stock for the corn cobs, I used yellow card stock in case any of the kernels showed through. I used hot glue as my bonding agent and I found if I started on the outside edge and went around the kernels laid out more evenly. The key to using hot glue is to lay just a little glue down at a time or it will dry before your can place your kernels.
The next step is to glue the corn cob to your burlap. After the corn cob is glued down, I glued the ribbon to the burlap. I twisted it again as I glued. Glue all four corn cobs onto your flags in the same manner.
I found an easy way to glue the turkey handprints and letters as they were a bit floppy being made out of fabric.
Pick one end to start at, glue a small piece and attach to the burlap. Make sure you don’t glue to your work surface….speaking from experience here…. Once I placed the glued end down, I would glue small sections at a time to make sure the letters and handprints lined up the way I wanted. With a permanent marker I drew legs and a beak directly on the burlap for the turkey handprints.
Next is the fun part, at least for me, attaching your flags to your jute twine. I used mini clothespins to attach mine, you could also use a wider ribbon and sew. I prefer glue gun crafting to machine sewing,
Now it is time to admire your handiwork. I love how this banner turned out if I am allowed to toot my own horn a bit. I think it will be easy to store since I can take the squares off the line and put them away stacked instead of bundled up on the line.
I hope you have enjoyed the tutorial I have shared with you today and I hope to see you over at Violet Imperfection where you will find crafting tutorials like my Disney Pin Wreath
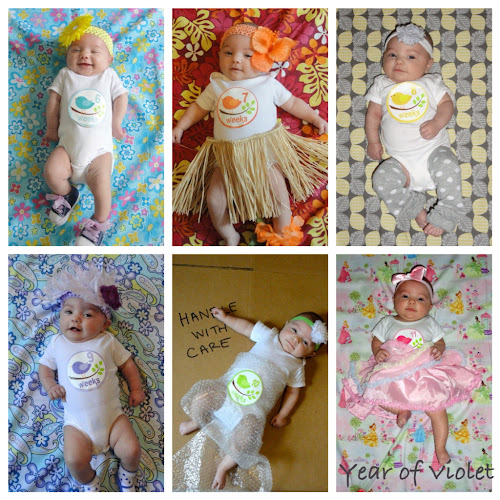
My year long project Year of Violet


The Thanksgiving banner is just darling. So cute.
Judy
Thank you so much!
What a gorgeous banner and I love that you used violets hand print. That will be precious for many years to come. Thanks for sharing.
Thank you. I couldn’t resist her little hand, it is so cute….and the perfect size!
Hi Mandy & Leslie,
Love your T-giving banner. Violet is adorable. I bet you’re looking forward to the time when she can say “time for crafting, Momma?” I’m a recent follower of Sugar Bee Crafts, and now going to hop on over to Violet Imperfection! Hope you can come by and check out my
guest post “Giving Thanks” Journal at The Ivy Cottage via my blog, Altered Artworks (altered-artworks.blogspot.com).
Doreen
Thank you. I am really looking forward to crafting with Violet. 🙂
Cute banner–and the corn is great!
Thanks! I love how the corn turned out.