Hi!! I am Cecilia from So Tei-Tei. I am a work out of home mom and wife that loves sewing, painting, designing, creating all kind of crafty stuff.
Designing clothes is my passion since I was a little kid, so I created a shop where I sell sewing patterns for babies and kids clothing.
Designing clothes is my passion since I was a little kid, so I created a shop where I sell sewing patterns for babies and kids clothing.
I am really happy of a being a guest at this awesome blog today! I want to share this tutorial to make this cute baby blankie, simple to make, and very easy for the baby to grab. I hope you like it!!!
– cotton or more fleece or minky for the blankie
– 2 black beads
– white and black thread
– needle
Cut he pieces:
Download the free pattern here, print it and cut the pieces. You will get:
– 2 pieces for the head
– 2 white pieces for the ears
– 2 pink pieces for the ears
– 2 muzzles (white)
– 2 paw (white)
– 1 nose (pink)
– 2 10×10 inches of fleece/felt piece for the blankie (you can also make one of this pieces out of cotton like I did for this tutorial)
How to make it?
1. Take one white and one pink piece for the ears together, right sides facing and sew along the curved edges, leaving the straight edge open. Turn the ears right side out.
2. Place the ears over the right side of one piece for the head, align the open edge of the ears to the top edge of the head. Stitch to attach the ears to the head. Lay the other piece of the head, right side down. Sew along the curved edge, leaving the straight edge open. Turn right side out.
3. Stuff the head with cotton and close the opening.
4. Take needle and thread (white) and make long stitches along the edges of the muzzles, stuff with cotton and close. Repeat this step to make the paws and nose.
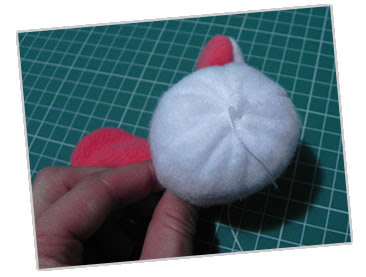
5. Use your fingers to pinch about 1 cm in the middle of the head and sew from side to side (as shown in the picture below) to create the “orbit” of the eyes, you will sew the beads there.
6. Sew the nose it in the middle of the face. Then sew the muzzles one next to each other right below the nose. Sew the beads in the eyes.
7. Wrap the black thread around the paw to make the fingers.
10. Next you have to make the blankie by taking the fleece and cotton fabric together, right sides facing, sew along the sides leaving a 2 inches opening.
Turn the blankie right side out though the opening, sleep stitch to close it and then top stitch along the edge (this last step is optional).
Finally sew the bunny to the blankie and it’s done!
You can enlarge the pattern pieces and measurements for the blankie to the desired size.

Thanks for checking out this post from www.SugarBeeCrafts.com – – click on over to read it in its entirety – you’ll love it!


How very cute!!
So cute!!!!!!
Love your blankie !! Adorable
Love your blankie !! Adorable