


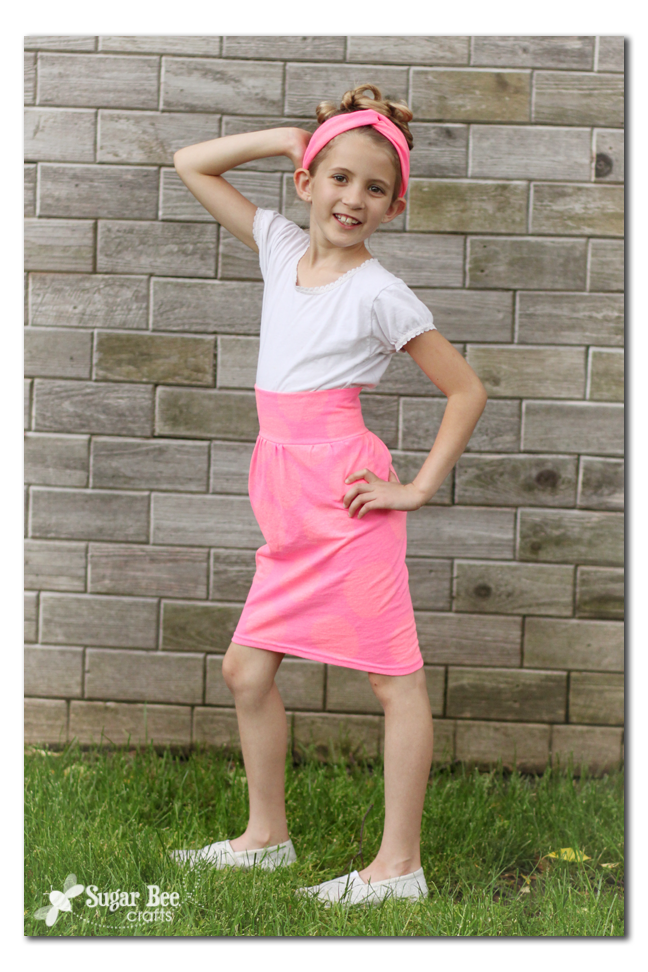
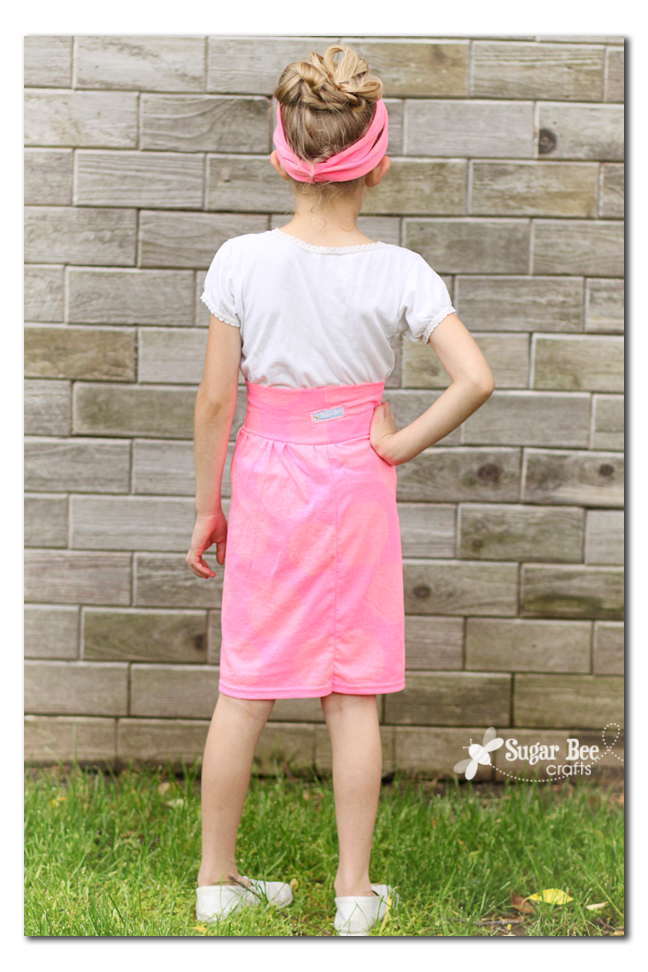
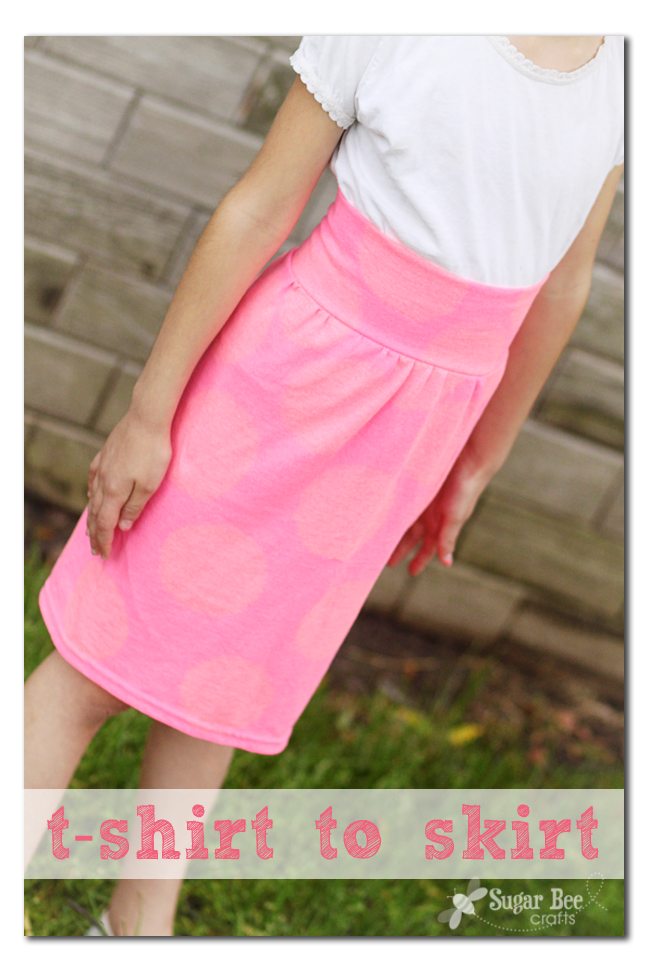
This is a fun and simple project if you want to give knits a try! Knit is the fabric that tshirts are made of and it makes for a comfy playskirt. My daughter didn’t want to take this off.
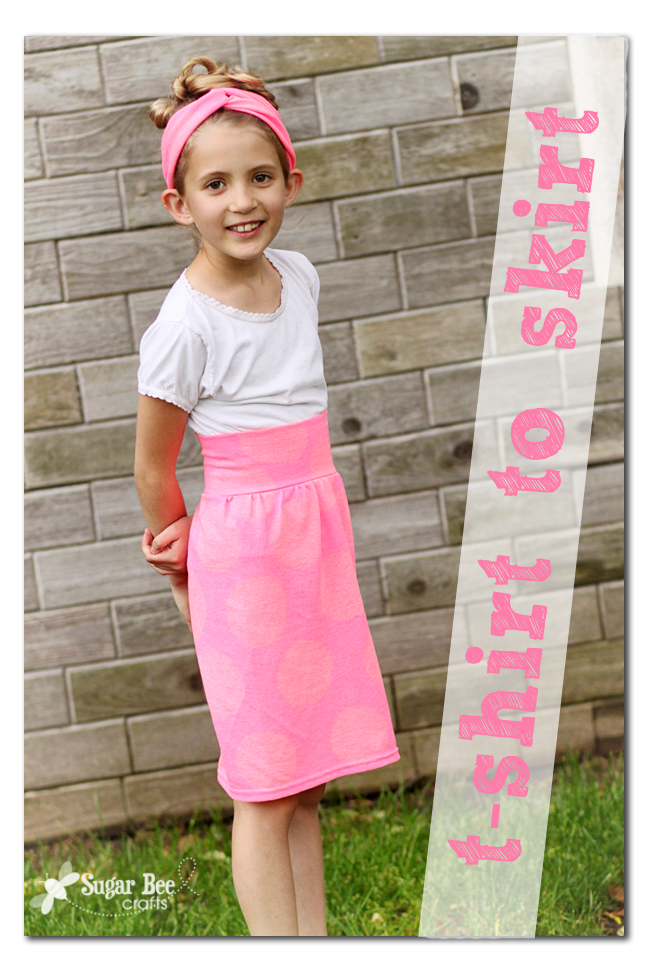
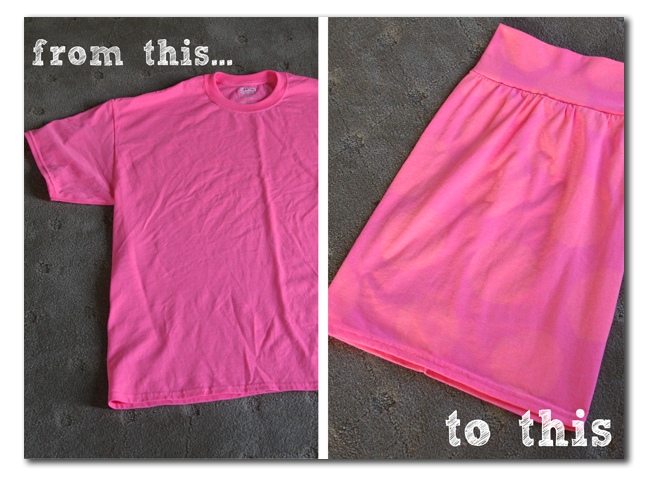
Since neon is all the rage, I grabbed a XL neon tshirt from Michael’s when they were on sale for $2. You could just as easily use a tshirt you already have on hand. My daughter is 8 and the XL gave plenty of fabric for a high-waisted skirt.
I have a tutorial on how to put this together – you can do it! If you’re wanting to make the tshirt headwrap, I have previously posted a tutorial on that: Twisted Headband

But, if you’re here for the skirt tutorial, here we go!
T-shirt to Skirt Tutorial


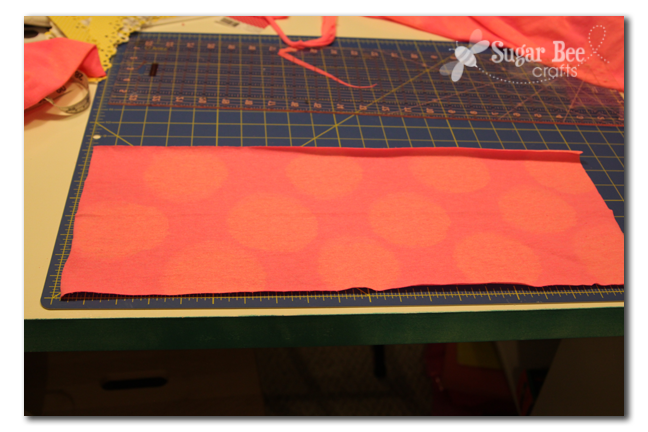
First, wash your t shirt if it’s new – you don’t want it to shrink after you put the work into sewing a skirt. Then, cut out the big sections – – straight across from armpit to armpit – that’ll be the main skirt part. I also cut up one of the sides so I could lay that section out flat. Then the front and back chest area – I used one piece for the waistband and one for the headwrap.

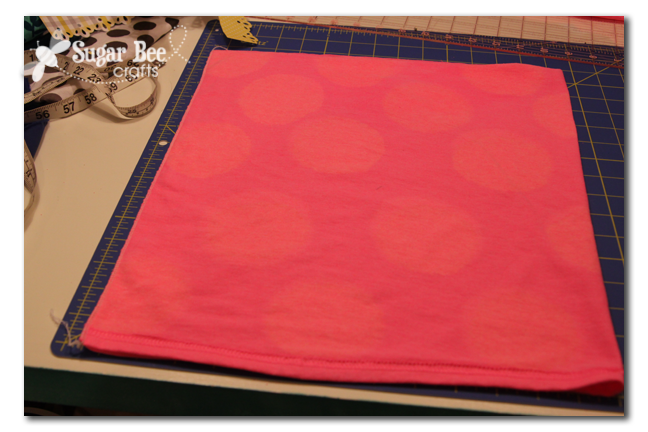
If you want to embellish it in any way, now’s the time. You could stamp it with fabric paint or whatever. I wanted to make big bold polka dots and I used the bleach method. The dots didn’t bleach out as I pictured (maybe my bleach/water mix was too watered down??) but the subtle look works too.
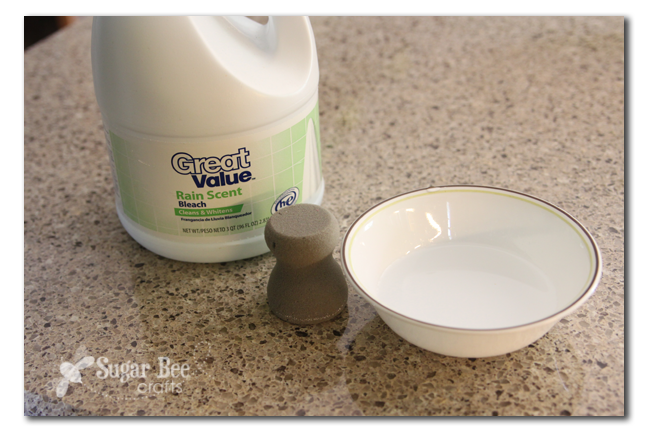
I used the round sponge to add spots and you can see they went on a small size but seeped and grew into the cool mega-polka dots.
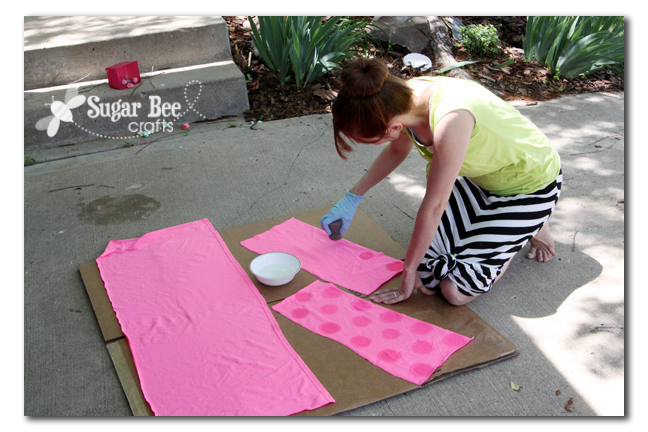
I tried to push the bleaching by setting it to dry in the sun:

Then rinse and dry your fabric again, or heat set it if you went with the fabric stamping route.
Now, on to assembly.
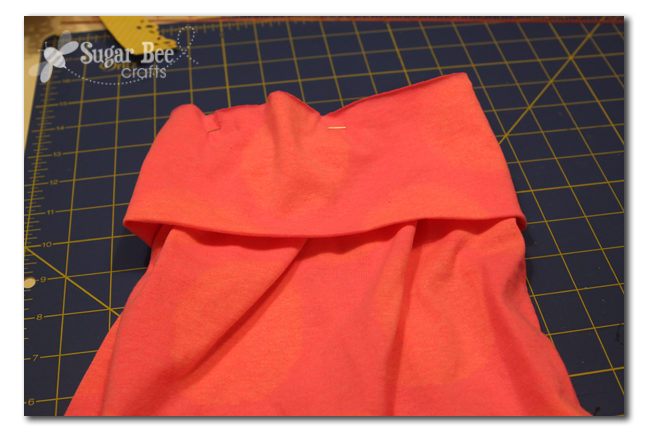
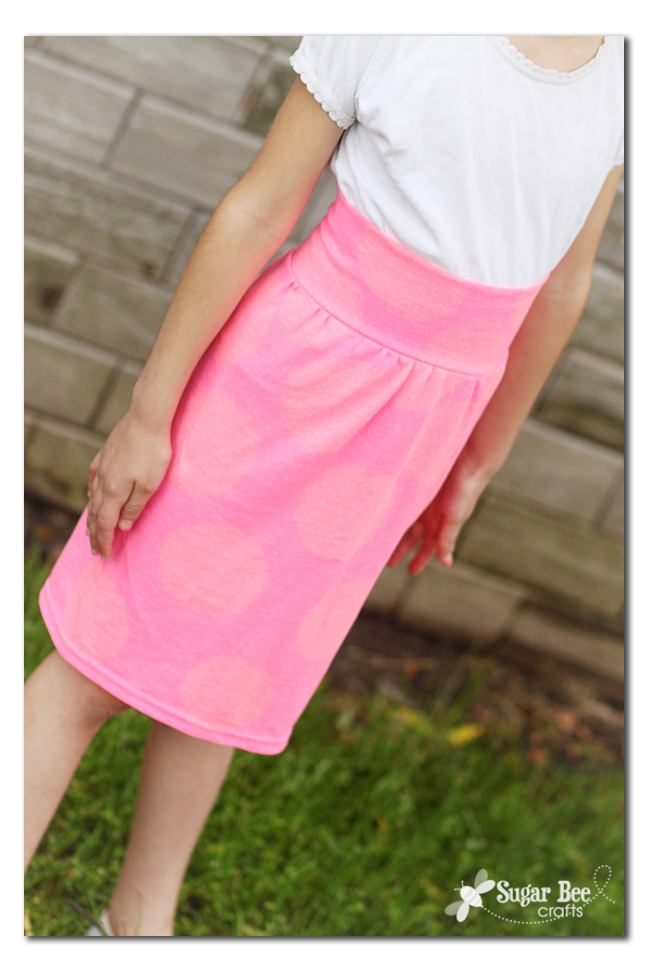
I started with the waistband. I didn’t measure – I just held the strip of fabric around her to where it was taunt (would stay up) but not too tight. You can measure if you want – just find the width that will wrap around. And then for height it should be double how tall you want the waistband – I think mine was 8 inches tall which made for a 4 inch high waistband.
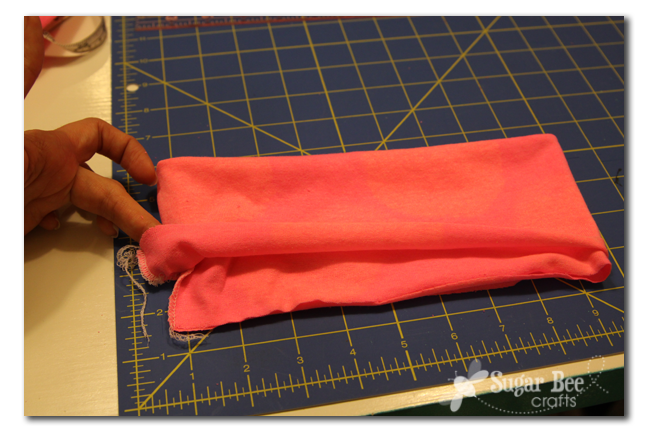
With right sides together, sew the ends to create a tube:

Then fold the tube in half with the seam on the inside. Set aside.
Make the bottom part of the skirt using the bottom part of the shirt – that way you don’t have to hem it – you just use the existing hem. It should be about double as wide as the waistband, and however long you want it – I was going for a high-waisted skirt, so mine is longer than a normal skirt would be. Sew the short ends together, with right sides together.
You have a big tube. Now, sew a basting stitch (that’s just a really wide stitch) all along the top of the skirt (just one layer of fabric – you’re not sewing anything together, just sewing around). Then use that to gather the top of the skirt. You pull one thread and slide the fabric along the other thread. Anyways, gather it to match the size of the waistband. Oh, if you want to add a tag, do that.

Now, flip that waistband and put it over the skirt (that is right side out) and match up the raw edges along the top. Also match the two seams (they’ll go in the back of the skirt). Then sew everything together along that raw edge – I used my serger, but you can use a zig zag stitch. You won’t want a straight stitch because you need it to stretch a little.
That’s it!! Stand back and be proud of your tshirt transformation!
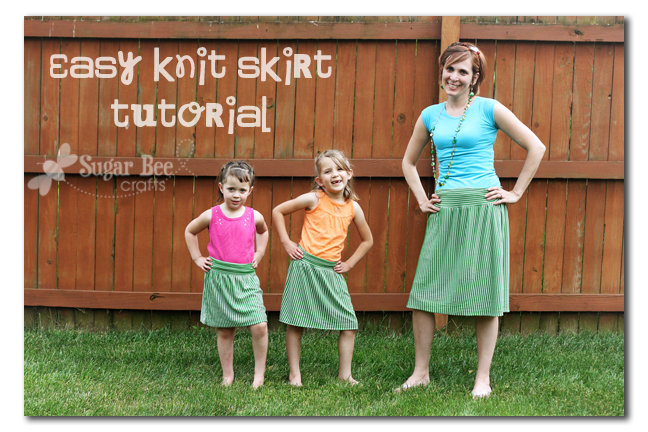
If you’re looking for more, I have another tutorial for a knit skirt that is slightly different – with it you sew the waistband to the front and back separately, then you sew the front and back together. It’s an option if gathering in a circle is too tricky.
If you love this T-Shirt to Skirt tutorial, feel free to share the love by commenting, pinning it, and/or sharing the link on social media! Thanks in advance.

Ooh, this is really good. What a great way to recycle a T. Love the head wrap!
Mandy, I’m loving the big polka dots! I think my brat would love making the design with bleach or fabric paint!
THis is awesome! I want to make me a skirt like this now!
super cute! I love the polka dots… even faded… I’ve been making a bunch of bleach t-shirt projects and I just used straight bleach…. try not watering it down next time… You just have to wash it after about 5 min.
Emily @ Nap-Time Creations
I love this idea! I’m a beginner when it comes to sewing, but you made it look so easy! I would love it if you would come and link this up at my new link party
Dandelion Wishes Wednesday. I’m also pinning this 🙂
So cute! Love the polka dots.