


Thanks to Adobe Photoshop Elements for sponsoring this post! All opinions are 100% mine.
You guys! I just finished attending the blog conference SNAP and as always had so many takeaways to make things here even more awesome. On top of that, I learned lots of things I can pass along. I attended a couple of classes from Adobe Photoshop Elements and Premier Elements and had a few mind-blown type of moments, and I want to share that info with you! I thought it would be perfect to showcase it via the project of How to Make a Photo Pendant – I know we’ve covered this project before, but that was years ago! Time for a refresher 😉
I had to make a new one because my kiddos keep growing – which means I needed an updated photo!
How to Make a Photo Pendant
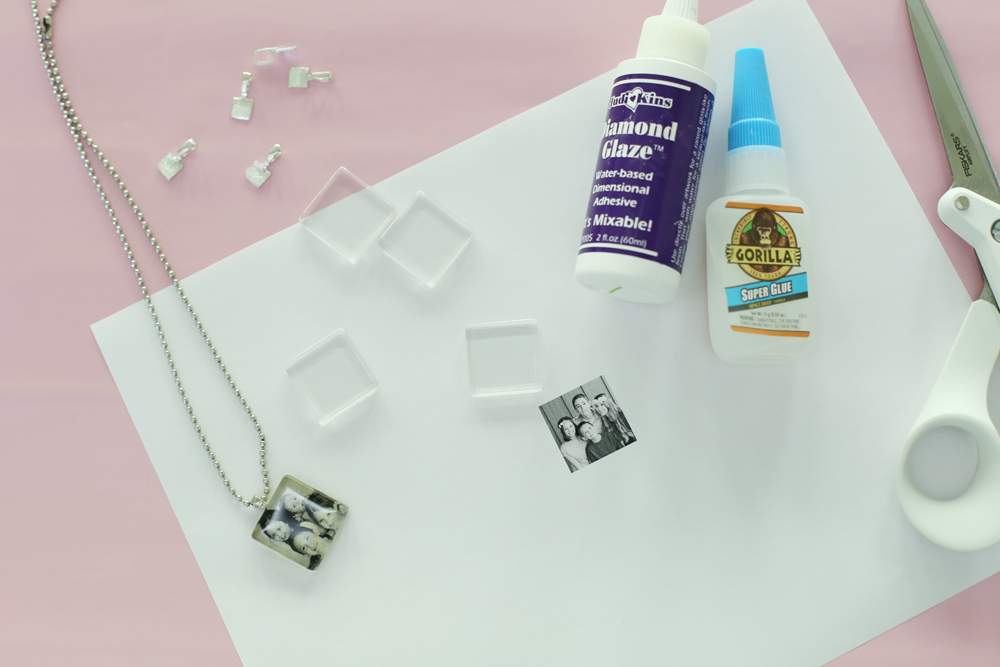
Supplies:
–photo (via Photoshop Elements and the instructions below)
—Bails (the hook so that it’ll hang from a necklace)
Preparing Your Photo
Before we can dive into the project details, you need to have your photo ready. I used Photoshop Elements to prepare mine and I’m going to walk you through it. You can even GRAB A FREE TRIAL and see if you like it. I know I’ve talked about Photoshop Elements before, but just for a refresher, don’t be intimidated – Photoshop Elements is the scaled-back version of Photoshop, so it’s simple to use – I use it almost daily and love it. Even with all the amount of time I spend with the program, I recently learned some new things I wanted to share with you. It’s a section of the program called “Guided” and it was mind-blowing – I don’t know why I haven’t explored that area before, but I’ve for sure been missing out!
Guided Photoshop Elements
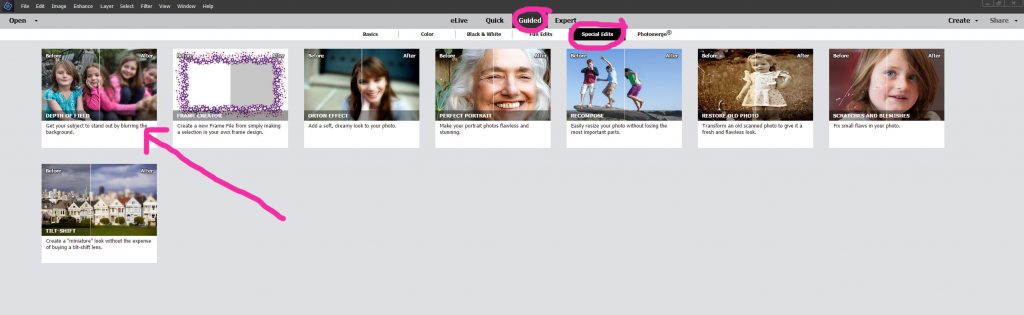
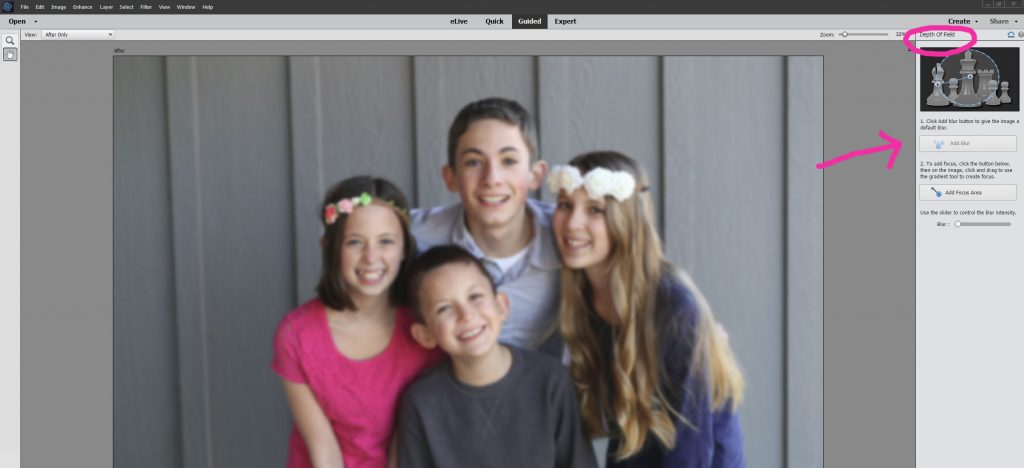
There are 3 main ways to use Photoshop Elements – the Quick mode, the Guided mode, or the Expert mode. Guided has been so fun to play around with – there are tons of edits that it helps walk you through, things I would never be able to figure out on my own. For example, with the photo today I used the Depth of Field Guided Edit. Go to Guided -> Special Edits -> Depth of Field:
It’s perfect for when you want that awesome blurry background, but when you captured your photo, it didn’t come out that way. So when you open it up, click “add blur” and it will blur your image like so:
Then you are going to go back and add your Focus areas – – this is a more drastic example below, but I pulled Abby’s face into focus and left all the rest of the photo blurred:
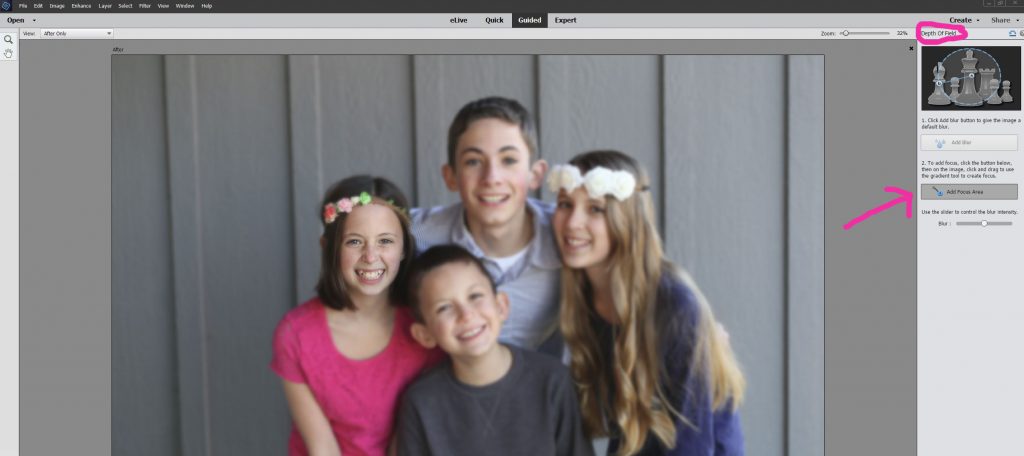
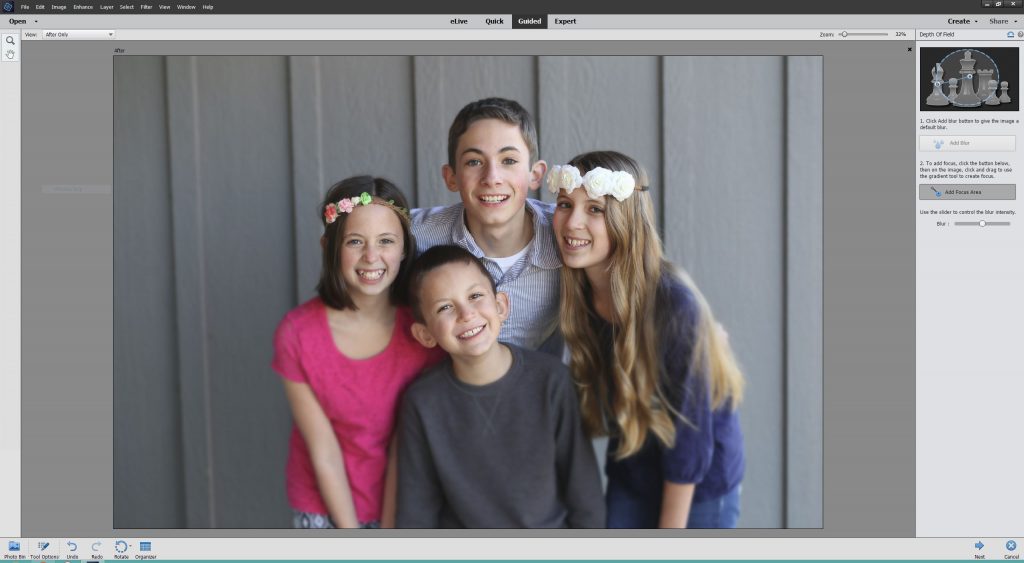
It’s just a click of the mouse to do all that – so easy!! I went ahead and set the kiddos faces in focus and the background blurred how I liked it:
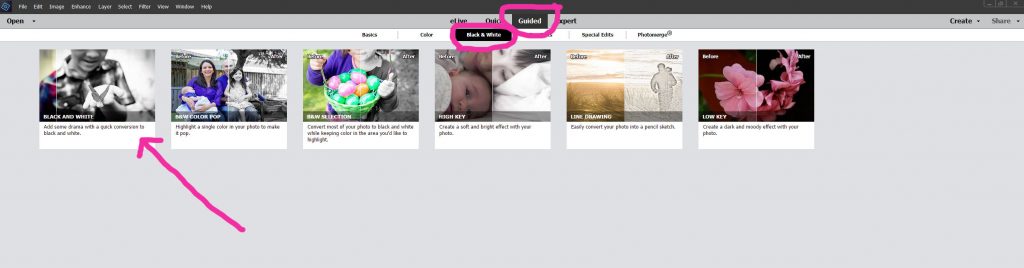
Now, I used the Guided mode again, this time for the Black and White feature – there are so many cool black and white features, so play around with it. For example, if you wanted to make it black and white but leave in all the color pink, you could do that sort of thing. They make it so easy!
Resizing the Image
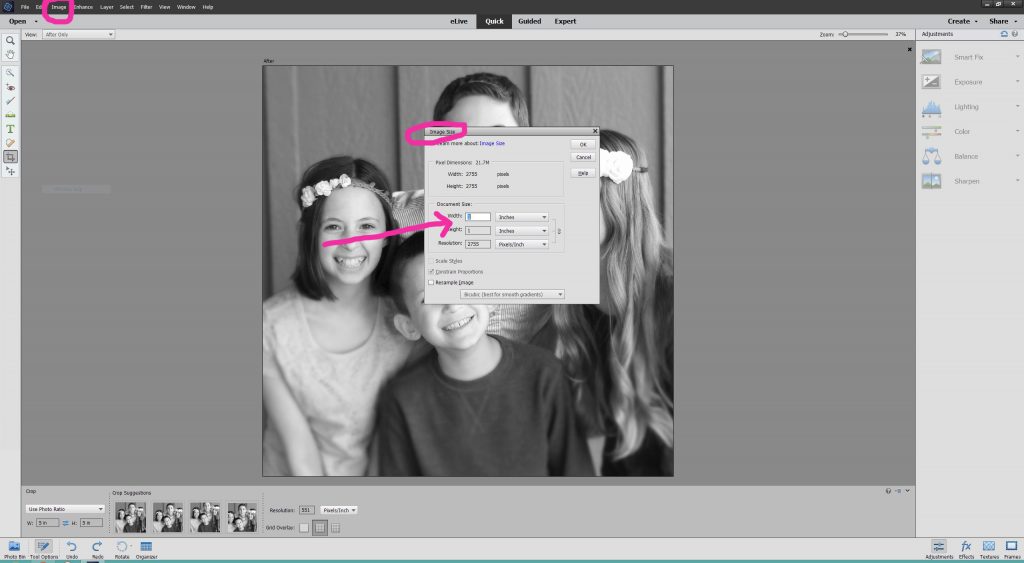
Now, you’ll need to resize the image to be able to fit it to the 1 inch glass tile square. First, I cropped it to a square using the crop tool.. I used the default square setting of 5×5 inches.
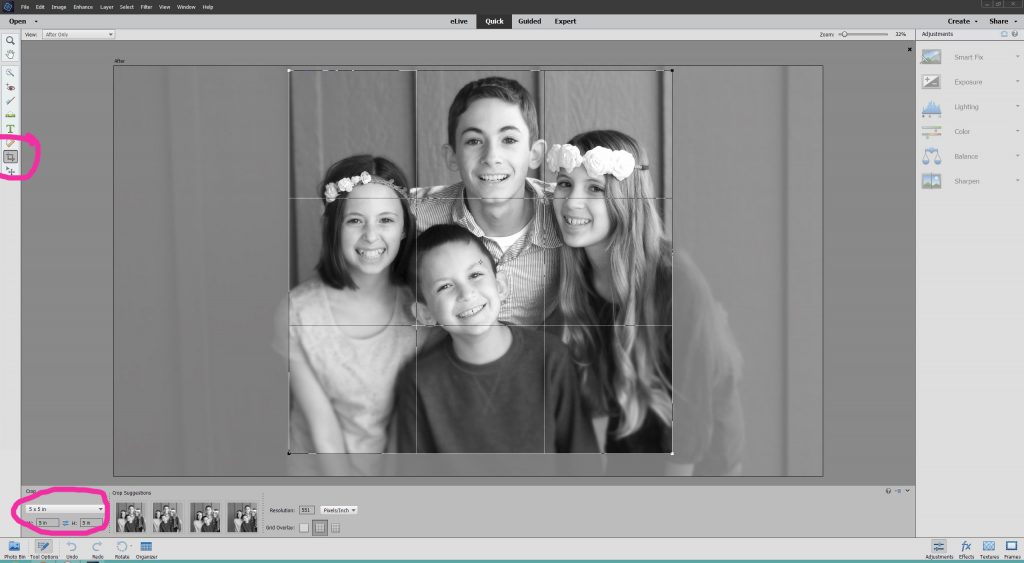
You could change those settings before you crop. But if you don’t, just go to Image -> Resize and then resize it to 1 inch by 1 inch.
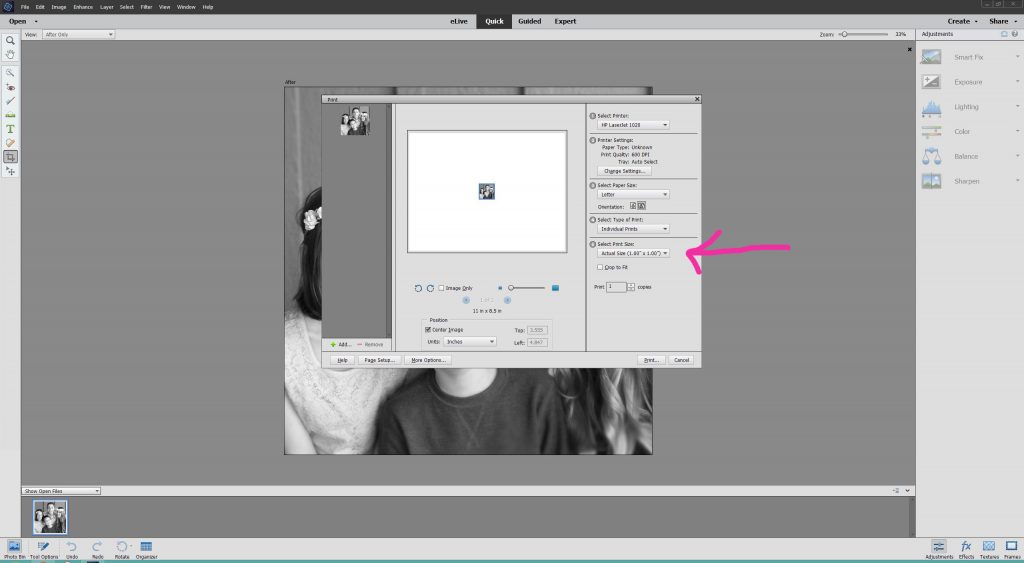
That’s it!! And then when you print it, be sure that you’re printing “actual size” – you can select that under the “Select Print Size” section of the pop-up print box:
Are you convinced yet that you need Photoshop Elements?? Grab that free trial and see what all it can offer!
Project Tutorial
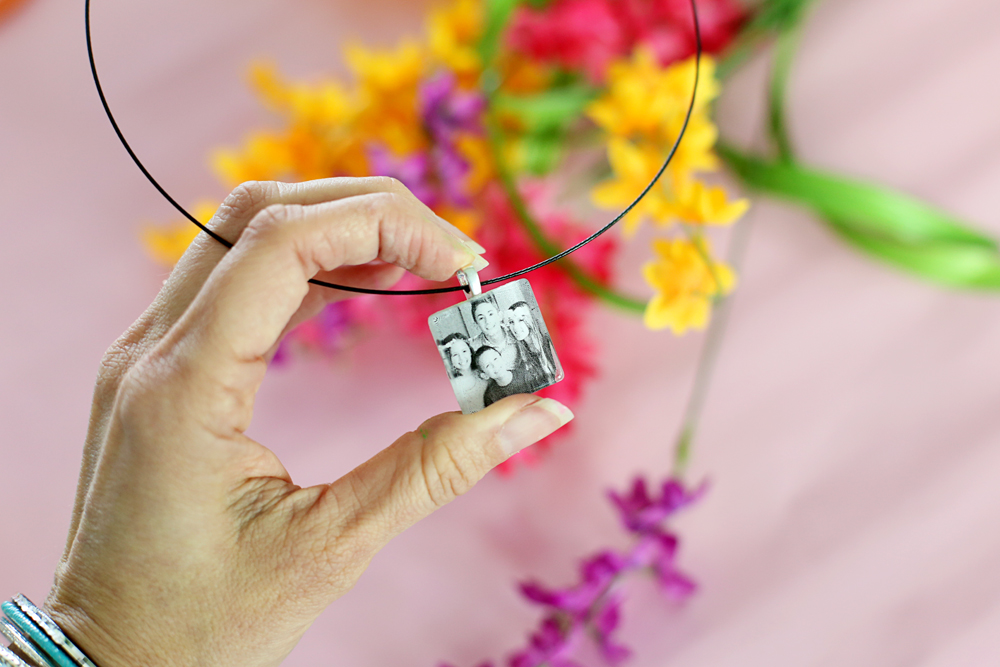
Okay, now that your photo is ready, let’s turn it into a pendant!!

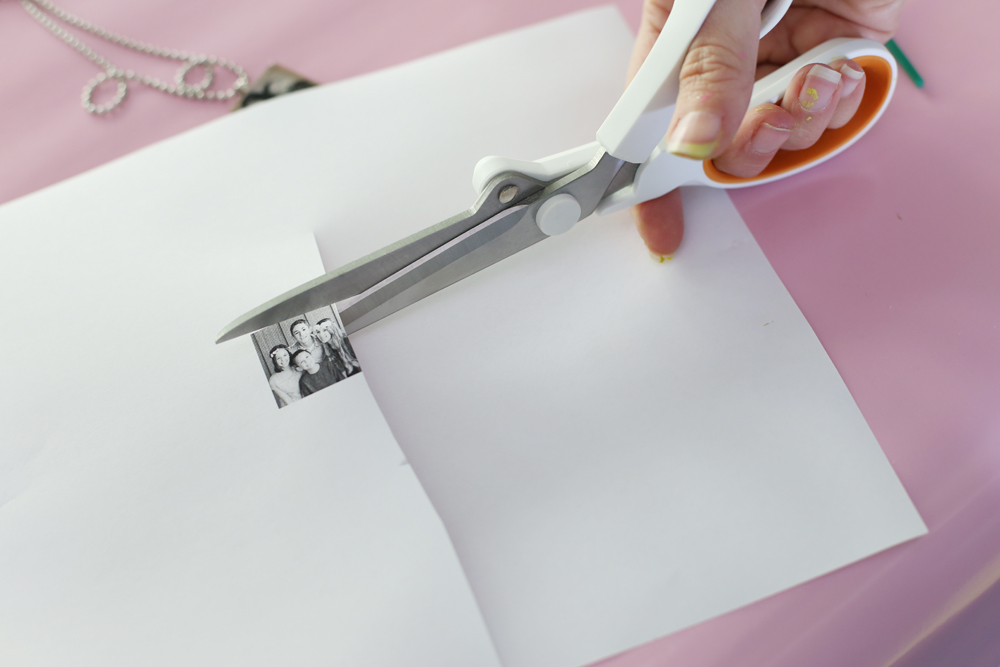
First, cut out your photo image. I just printed mine onto regular copy paper, nothing fancy. When you cut it out, you might want to slightly round the corners, since the corners of the glass tile are slightly rounded.
Next, cover the back of the tile with a layer of Diamond Glaze.
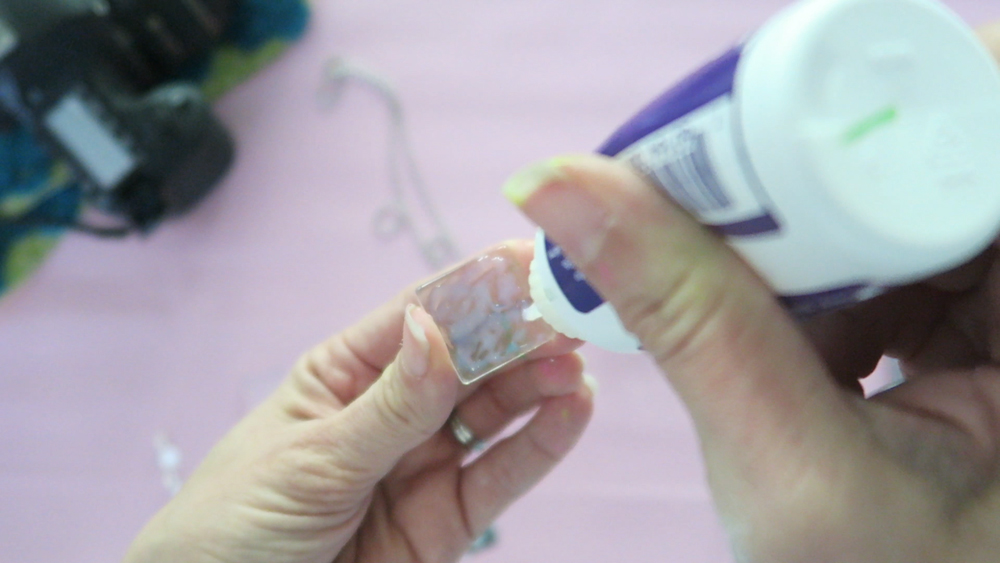
Place the photo face-down into the diamond glaze. Essentially you are putting the photo on the back of the tile, so when you look through the tile, you see the image. Press into place, making sure there are no air pockets or bubbles between the glass and the photo.

Then cover the back of the photo with a layer of Diamond Glaze to seal in the photo.
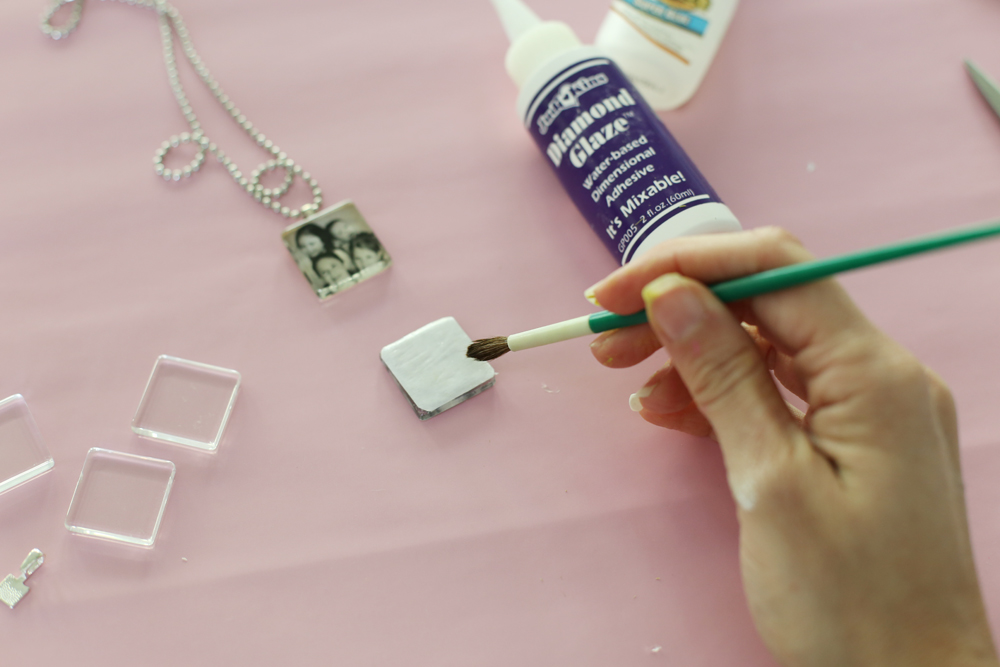
Let dry. When it’s dry, use the super glue to attach the bail to the back of the pendant. Wear and enjoy!!
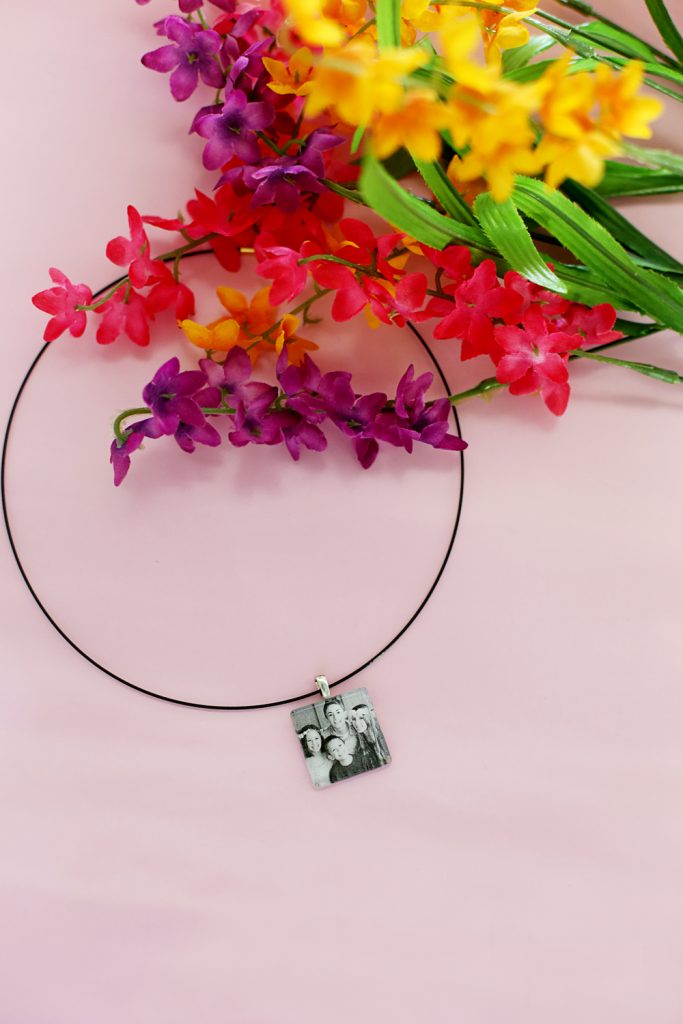
What a neat project. The way that the photo is displayed is so clean. I wish I had seen this before Mother’s Day because my mom loves jewelry and I think she would really love a photo necklace with a picture of her grandkids. Oh well, I will pin this and maybe I can make her one for something else. Also, thanks for hosting Show and Tell.