


Cut a strip of material – the wider it is, the taller your flower will be. The longer it is, the bigger your flower will be. Fold it in half and sew the raw edges together – I used a serger, but you could just zig-zag it instead.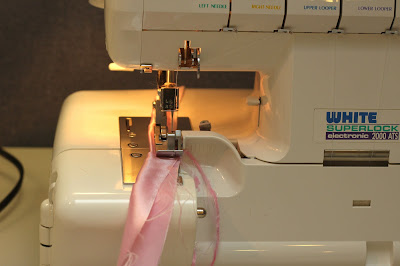
Next, along your serge/zigzag, baste (that means sew with a wide stitch). If you’d like tulle wound into the flower, put it on top of your material and then baste. I found that if the tulle was gathered before adding it, it had a lot more body.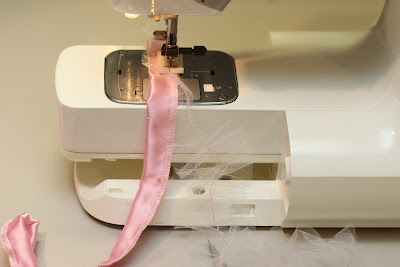
Be sure to leave tails of thread. Pull on one and gather your strip. Below half is gathered and half isn’t – see the difference and the “umph” that gathering will give. At this point, if using tulle, it should look like a bad garter purchased at a discount store. On to the hand sewing.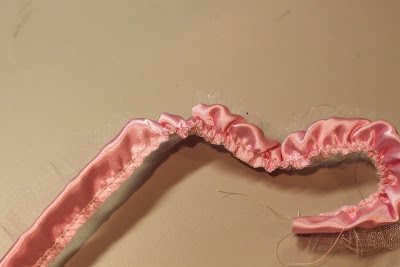 Wind your strip around and around. Just hold the serged/zigzag edge – use pins if you need to. Sometime’s this step is easier if you hold the flower upsidedown. Don’t worry about poofing – the gather should give that effect for you.
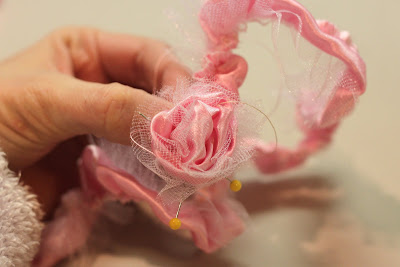
Final step, get your needle and thread (it’s very helpful to have it threaded and ready to go before you begin – instead I tried to thread mine with one hand while precariously holding a flower wrapped just so with the other hand). There’s no right way – just hand sew the back a bunch to hold the flower together. 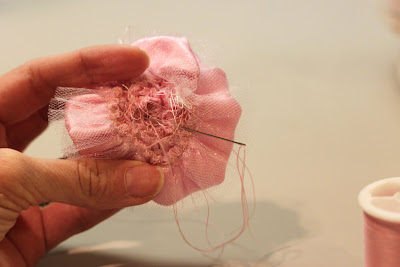
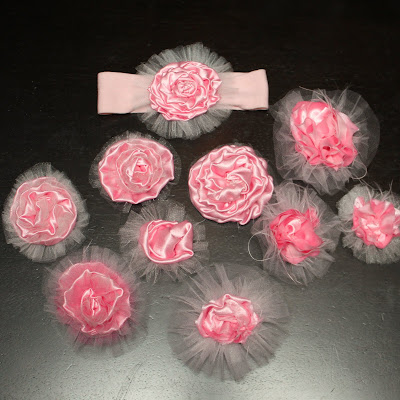
And that’s it – here you go. You can attach it to a baby headband or hairclip or just stick a bobby pin through it and pin it in.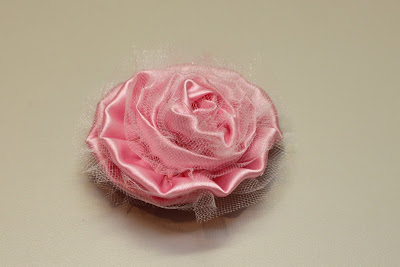
I started experimenting with different styles. I made one without tulle wrapped inside and added a tulle edge at the end instead (like my little model is sporting on her headband). Then I made some “shabby chic”, leaving a raw edge. Here’s a quick how-to on the raw edge with a tulle border – same basic idea as above, but don’t fold your strip of material. Then stitch your baste (sew with a long stitch) without adding tulle. 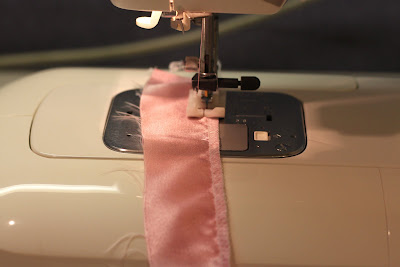
Pull your tails and gather so it looks like this: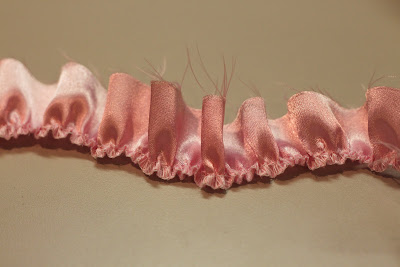
Then wrap around and sew the bottom as show above. After that is done, take some pre-gathered tulle and hand-stitch it around the underneath edge.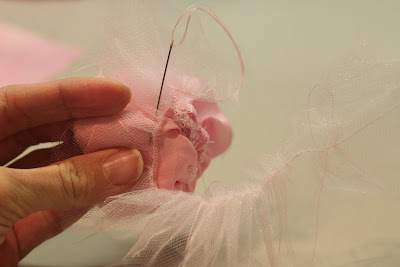
And that’s it. Here’s another look at the variety (3 shabby chic on the right-ish) – but don’t try to replicate any of these – it’s too hard. I tried to replicate the ones I really liked, but I could never make the same one twice. They all came out different. I guess that’s the fun of it. Anyways, go try making one!! You can do it right now, while I head off to a manicure……(those up close pictures of my hands – yikes!)
And don’t forget, I’m giving away a Pink Fluff skirt – scroll down a couple of posts to enter!! (ends Wednesday evening – hope to ship it in time for Valentine’s Day)
Thanks for the flowers, Mandy!!!
I am SOOO GLAD you posted this turtorial-I have been wanting to make fabric flowers for some time and I think this is the easiest one I have found-and one that I am willing to give a try! You are a crafting crazy at your house right now!-but I LOVE it! And I LOVE these cute flowers!
Now, that looks fantastic! I made a ribbon rose last week and that was the secret to that too. You pull the wire in the ribbon and it gathers like a ruffle to make the rose. I thought looking at it, Oh that is so simple,right. Then I made them and it wasn’t so simple.I added the same step-I sewed them back and forth with a needle and thread. Really nice!
Mandy, I love it! I’m so glad you posted this. I’ve been wanting to make fabric flower headbands and this is a great tutorial.
Pretty…I have done a lot of fabric rosettes (with tulle and sating also) but never thought of using them together…aahh they look beautiful
…and love your model…shes sooo cute 🙂
The fabric flower revelation given by you is very useful. The information shared by you is very useful
Upholstery