


I made myself a new Ironing Board Cover – and it was so easy! This has been on my to-do ever since I redid my craft room chair (um yes, that was Sept 2010…) and it took no time at all. Why oh why did I put it off so long?? I have a quick tutorial for you…

First up, know that my old cover was pretty nasty. And then I had a onesie decorating baby shower and it got worse, with lots of spots where the fusible webbing was ironed onto the ironing board instead of the onesie.
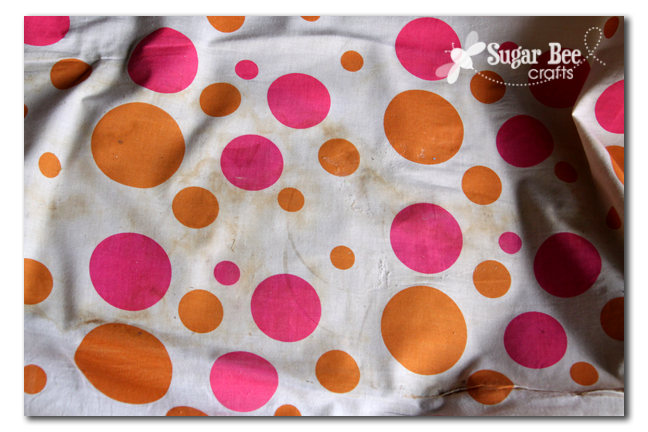
It was time to iron some white shirts for Trevor (I only iron clothes about twice a year – they just pile up until I give in, and everyone discovers they have a new wardrobe) and I knew I couldn’t use the old cover. Or maybe it was any excuse not to iron – who knows, but I made a cover!
First lay out your fabric and your old cover (to use it as a pattern). I assumed there’d be some pieces or something, but once I took it off the ironing board and stretched it out, it was just one piece of fabric – who knew!

Just lay it on top of the fabric and cut around it for the perfect shape:

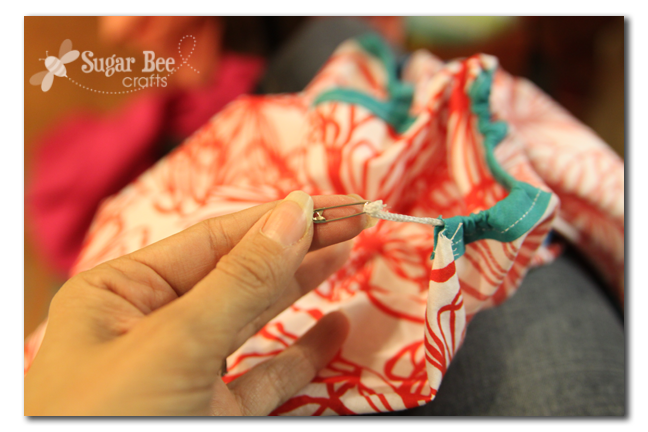
Mine was the kind with a cord running along the edge that you pull to tighten and fit the board. Some have elastic. For the cord, you’ll need a casing for it to run through. Just sew some double-fold bias tape all along the egde:
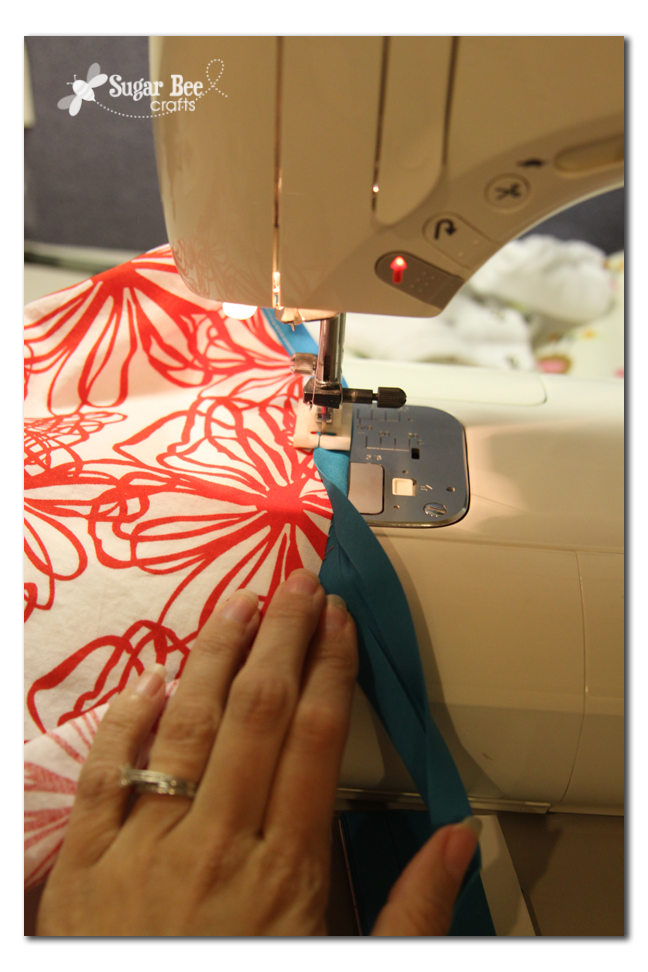
You’ll need 2 packages of it. I didn’t have enough of the same color, but oh well, I made do – no one will know (except all of blogland) –
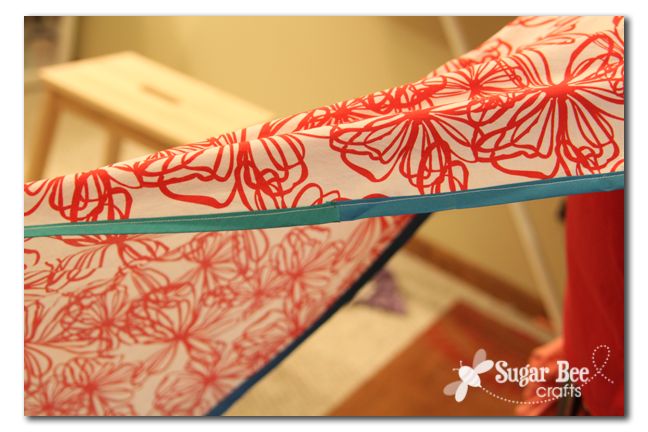
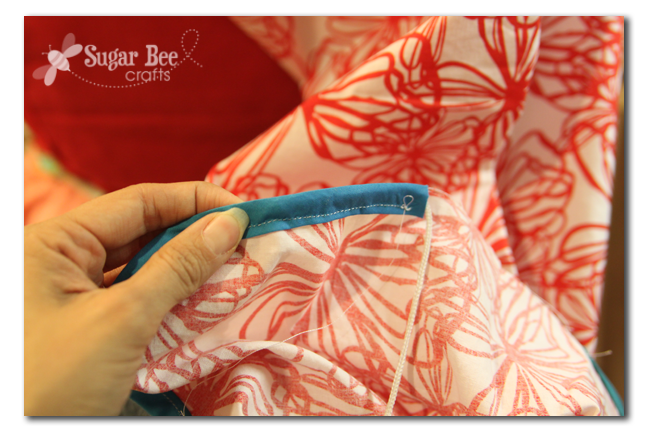
Take the cord from the old cover and thread it through the casing made by the bias tape. This will take a while. Pull it through by hooking a safety pin on the end:
Now, I was going to use the old padding – but it was in rough shape. So I actually bought a cover and pad even though I just made one – but mine was cuter so I was okay with it. See the old and new:

And speaking of a Walmart cover, whoever packaged this should have won an award. It came in this little pouch and when you unwrapped it, the pouch hangs down as a helpful bag – now that’s genius!

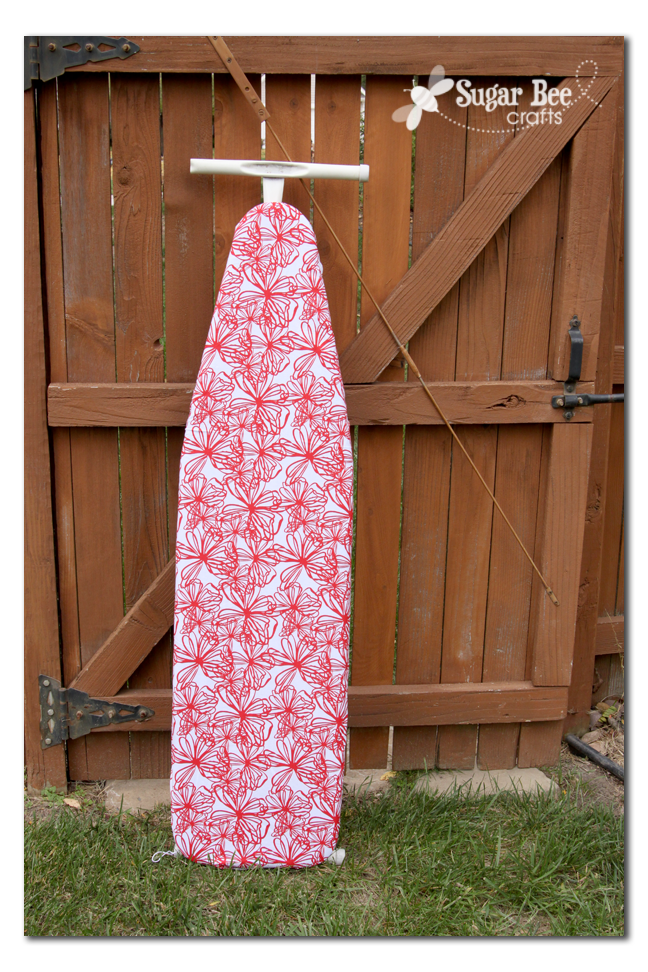
Anyways, after putting on the store cover/pad, I covered it with my super cute cover/pad. And when the option was to clean up my craft room to take a picture of it, or head outside, you can see what I opted for:
If you have an ironing board cover on your to-do list, just do it. It’s easier than you think!!


I so desperately need to do this! Thanks for taking the “how do I do this” out of the equation.
This has been on my to do list forever. THanks for the tips!
I need a new pad, mine is ugly. Now the big question is, do I make one, or commission Mandy? lol
Have a great day!
This came just at the right time! I have been staring at my ruined ironing board cover thinking I need to make a new one… Thanks for the tutorial!
I have been wanting to do this too! Thanks for the tutorial!
Very cute! It is a great option especially if your iron board is going to be in view…thanks for the post! Blessings from Nancy at livininthegreen
I love this so much, I need this so much, thank you for sharing 🙂
This just may be the incentive I need. My ironing board cover is so old that you can iron a pillowcase and see the imprint of the metal on the board.
I need a new one bad, too! Maybe I can add it to my mile long to-do list this week. HA! Yours looks great! Good job!
I SO need to cover my ironing board!! Thanks for the inspiration!
xo
Heather
This is so cute! I definitely need to recover my ironing board. It has the same cover on it from when my husband bought it in college!
I do have that on my to do list! Glad to hear it’s not that hard…
This has been on my list “like forevar”. I so need to recover mine. I must have the ugliest cover ever. Every time I take photos for a tutorial, I think how badly I need a new one. This so needs to move up on my list.
Hi Mandy, my ironing board is also in need of a makeover! Thank you for the inspiration!
Have a good day, Nancy
I have one of those Walmart covers with the pocket & I love it! It’s so genius & handy, absolutely perfect for keeping track of smaller stuff that I use all the time.
My Grandma gave my sisters and I an Ironing board (usually one that she finds at a thrift store), that she recovers and an iron it has served me well. But I think some day I would like to recover it to make it match my work surface.
I used an old towel for the padding – just cut it a bit smaller than the cover. Works great!
Thank you so much! Just finished one up for my college girl!
This is a cool idea, I had my son build one with a board so its portable, but this is nifty!!
Thank you for sharing on #omhgff this week, look to be featured next week!