{this is a sponsored post in collaboration with Pixers, all opinions are my own}
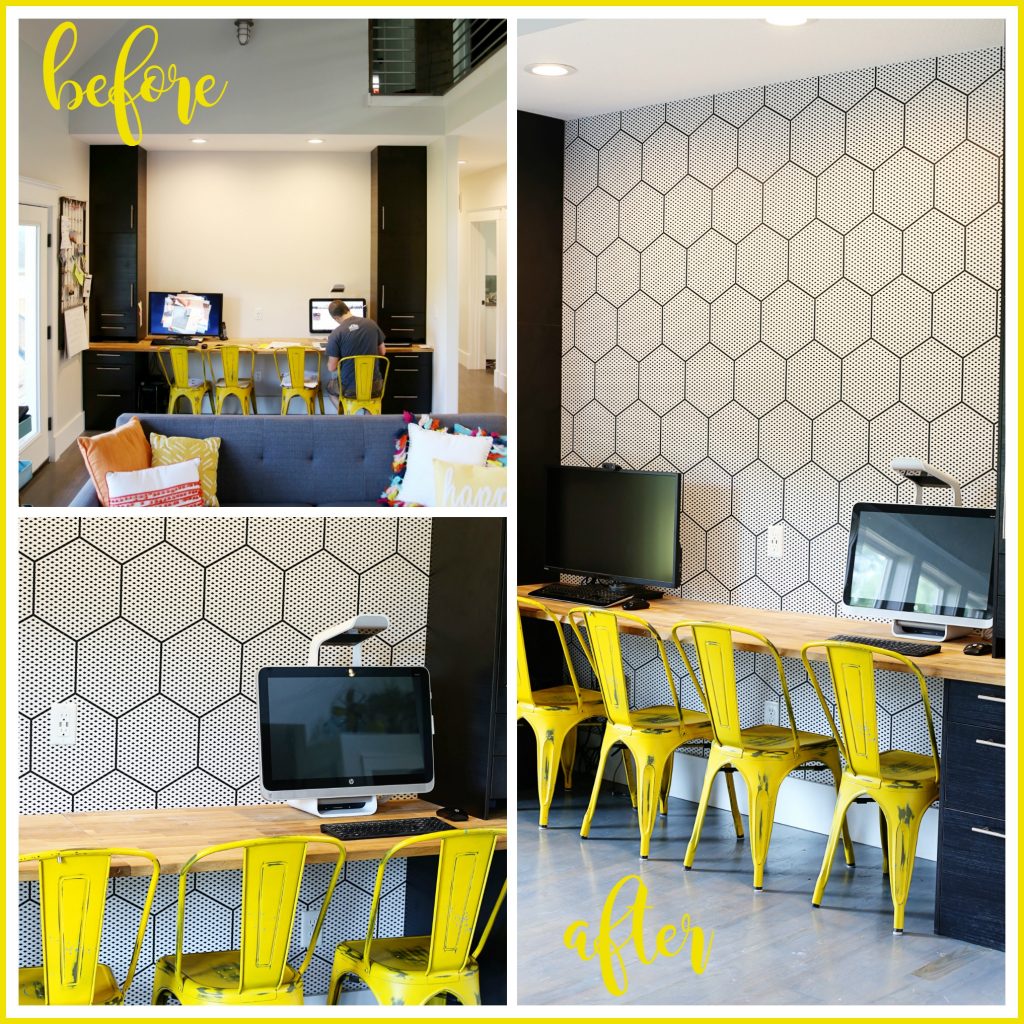
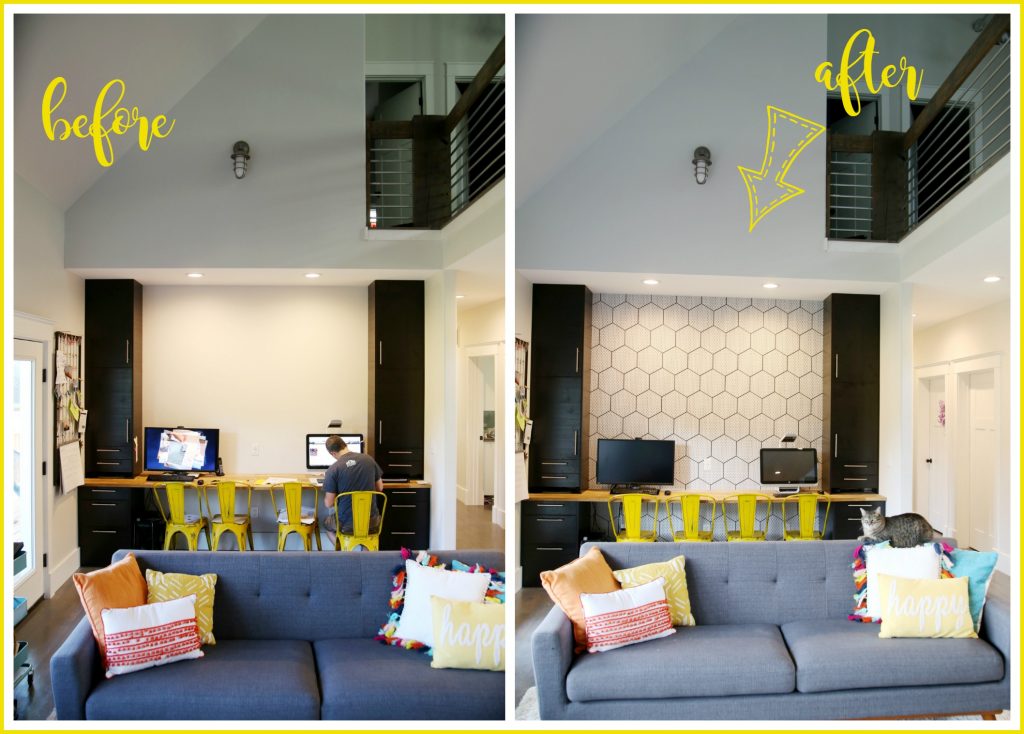
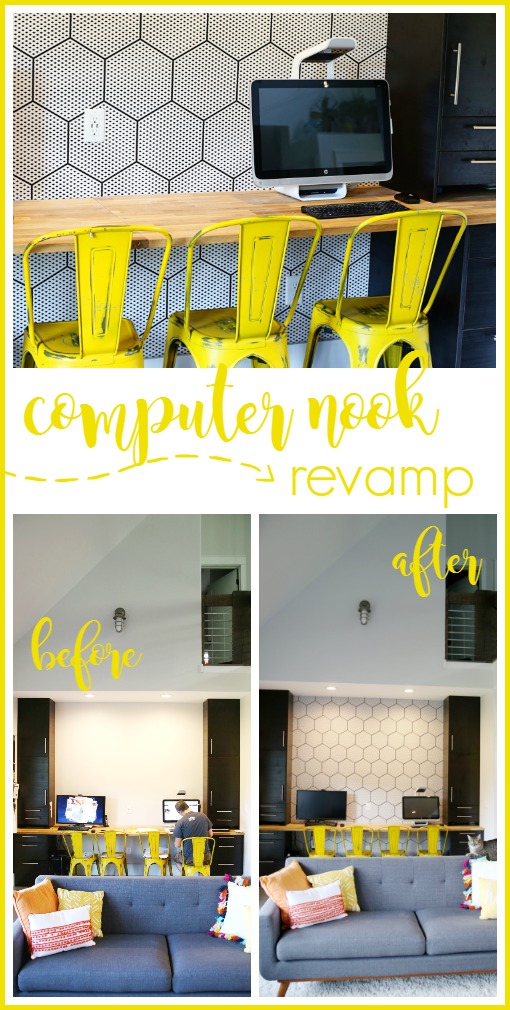
So I’m calling this post a Computer Nook Revamp, but maybe more accurately it’s a Computer Nook Vamp, because how can it be revamped if it was never vamped up in the first place?? Deep blog thoughts. Either way, let’s just call it awesome 😉 My computer area is a nook in my family room (which I love! I am a big proponent of having computers in main living areas) and we created the desk space with cabinets and countertop. But it was BORING. It’s a perfect, stand-alone nook, and so I have had in mine mind ever since we moved in that it would be a perfect place to do a focus wall – add some interest to the room, etc. This wallpaper that I settled on from Pixers is perfection – I love how it transformed the space!
If you are looking for a pop of fun in an area of your home, you need to think about PIXERStick! You can use one material and stick it on almost any flat surface in your home. It’s not what it used to be – now there are tons of modern and graphic and awesome designs, AND it is vinyl sheets, so they’re like a giant sticker, with adhesive already on the back, so no messing with wallpaper glue or anything like that. And this new type means you can stick and restick the wallpaper!
Durable and matte, reusable and self-adhesive material – easy to install in just a few seconds. PIXERStick sticks to any flat surface. It is resistant to tearing and creasing. You can peel it off easily and move it to another location or store it on the protective paper to use it anytime. Does not leave any traces after peeling off the wall; maintains its adherence for many years. It’s the perfect choice for people who either frequently redecorate their home, live in a rented apartment or who are looking for seasonal decorations.
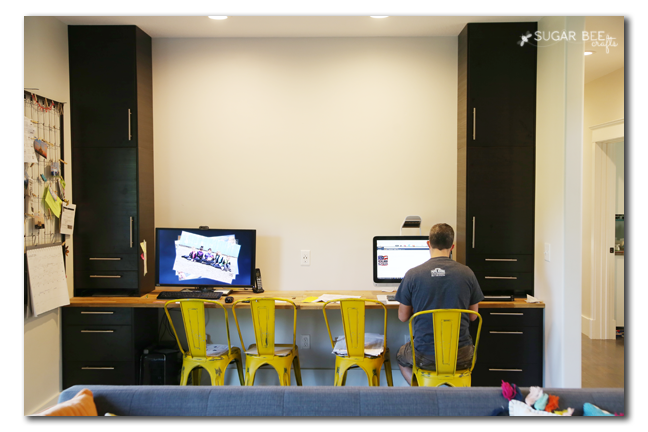
Let’s take another look at the boring before:
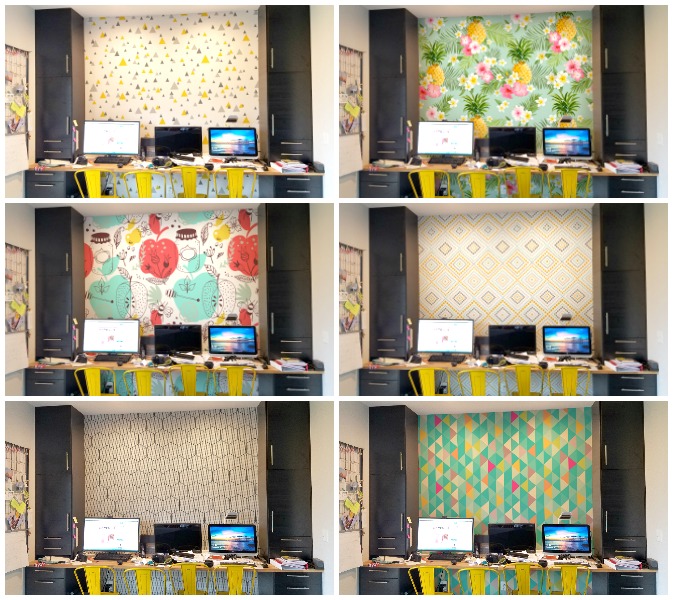
Picking the Design
The hardest part might have been trying to narrow down my choice from all that Pixers has to offer! I was able to send them a quick phone snapshot of our (messy) desk area, and they quickly returned several mock-up ideas for me. At first I thought I wanted bright and colorful, but then they also suggested the black-and-white hexagons, and there was just something about it that sold me. But I debated a while between those bottom two choices, I really loved them both!
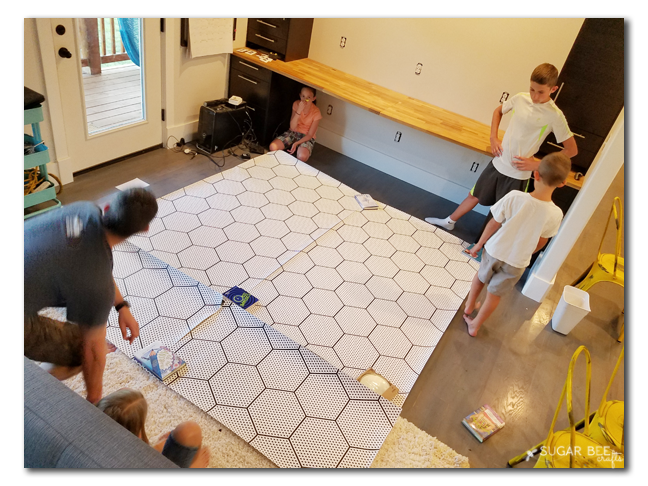
It was shipped in a big protective tube and arrive really quickly. We gathered the kiddos to help with installation. The first thing we did was figure out our layout and make sure we had the right seams touching in the right spots.
Installation
Installing this product will be more convenient with the help of somebody else.
How to install the wall mural step by step:
- Unfold the wall mural on a clean and dry surface. Remember that the printed side should be on top. Match the elements of your print.
- When the wall is ready – clean and dry, use a pencil to draw a light line where the edge of the wall mural is going to be. Use a long ruler or a spirit level.
- Start gradually peeling off the backing paper, starting from the shorter side, so that the PIXERStick remains on the protective film.
- Then place the PIXERStick to the surface and smooth the installed fragment with a squeegee or with a rolled paper towel in order to eliminate any air bubbles and to make sure that the it sticks to the surface. The second person should stretch the wall mural at the same time . If any irregularities or air bubbles appear, or if you install the sticker badly, peel it off and stick it again. Do not worry! PIXERStick allows it 🙂
- Slowly peel off another piece of the backing paper, and then press the PIXERStick l to the wall, as in the previous step. Repeat this process until you manage to peel off the entire backing paper.
- If the wall mural consists of several elements, follow the above steps for each of them . Remember to match the elements, sticking them edge to edge.
We used a laser level to find the middle of our wall area and lined up the edge on that, then just peeled the backing and worked our way through the space. The first piece was the hardest because we’d never installed this type of wallpaper before, but the next pieces went a lot faster as we found our groove. Of course we put together a timelapse video for ya! Check out our DIY Wallpaper Installation:
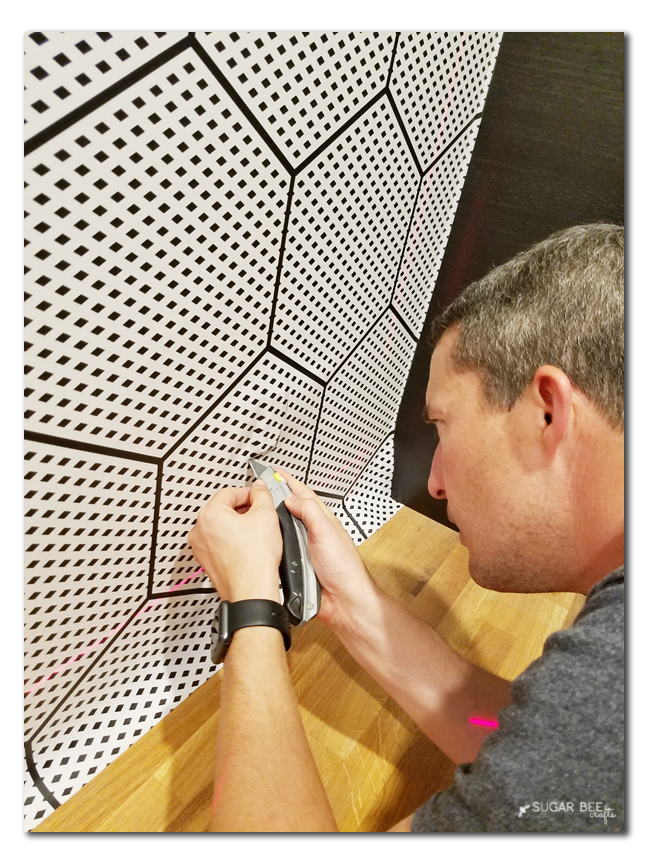
After sticking the wallpaper down, we carefully cut out around the outlets, triming as close as possible.
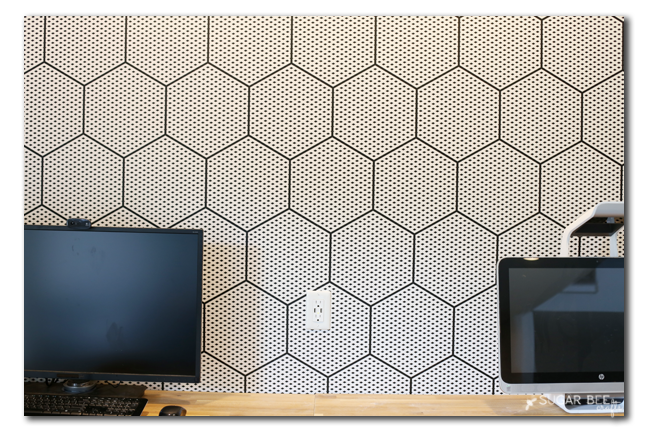
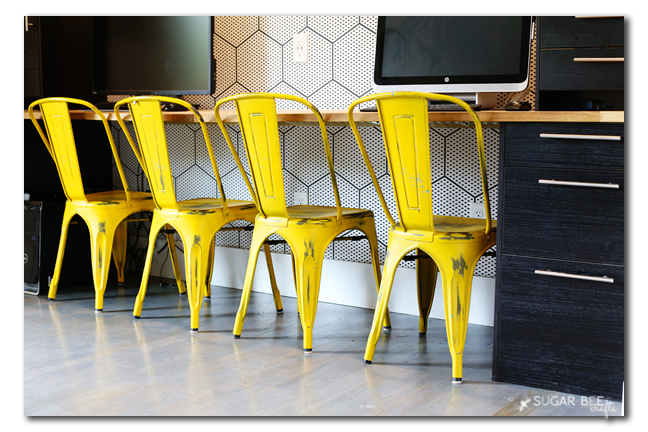
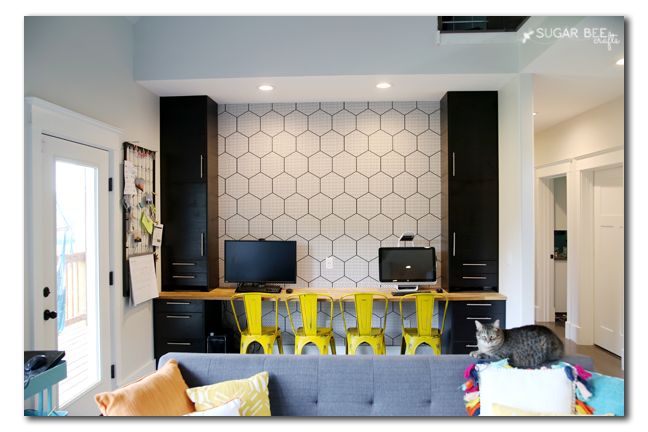
I think we did a great job on installation, and we’d never done it before! So if we can do it, so can you. Here’s a closer-up pic – the seam is right in the middle, but I dare you to find it – I know where it’s at and it’s still hard for me to find it!
We even installed the paper under the desk as well:
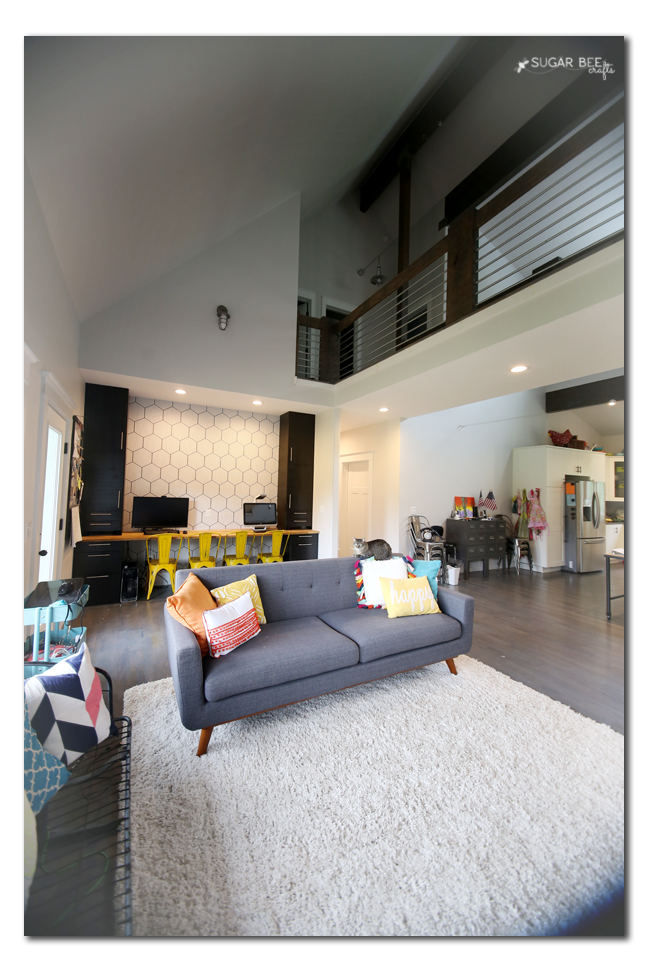
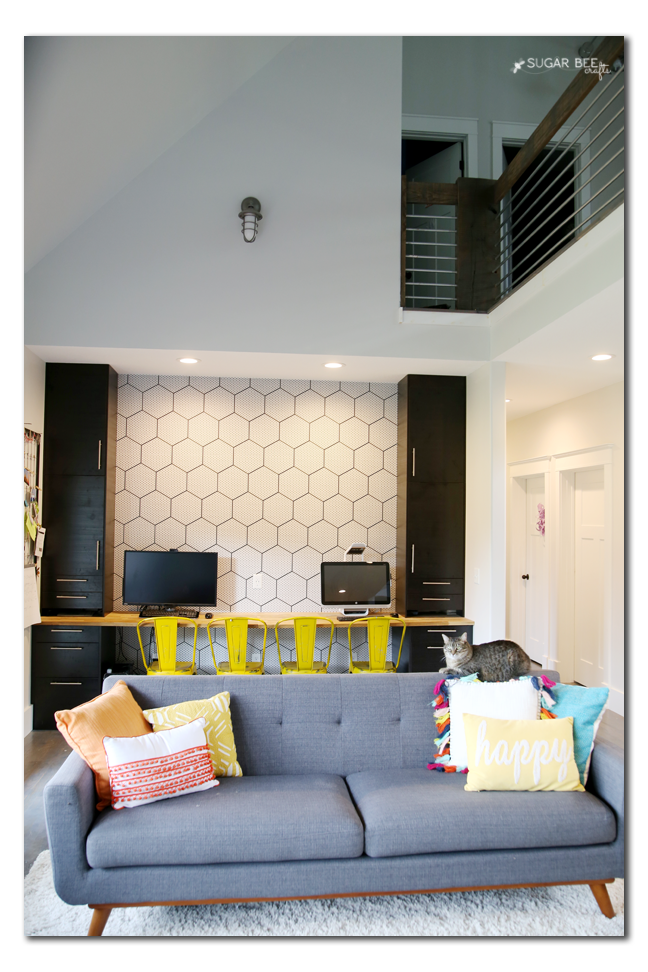
Here’s a backed-out view of the room – you can see how it was the perfect spot to add some interest – wallpaper was the perfection solution.
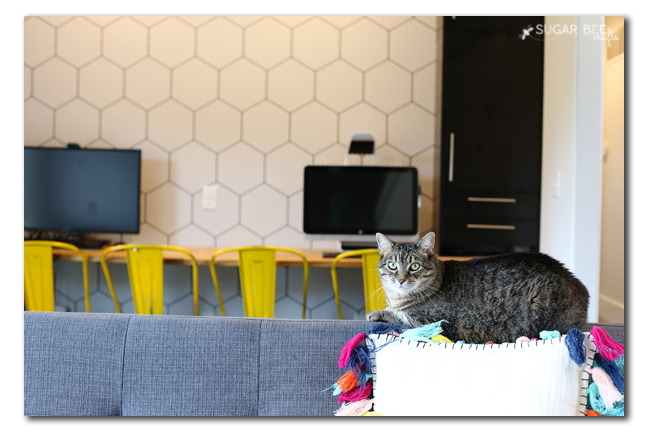
I think our cat approves 😉
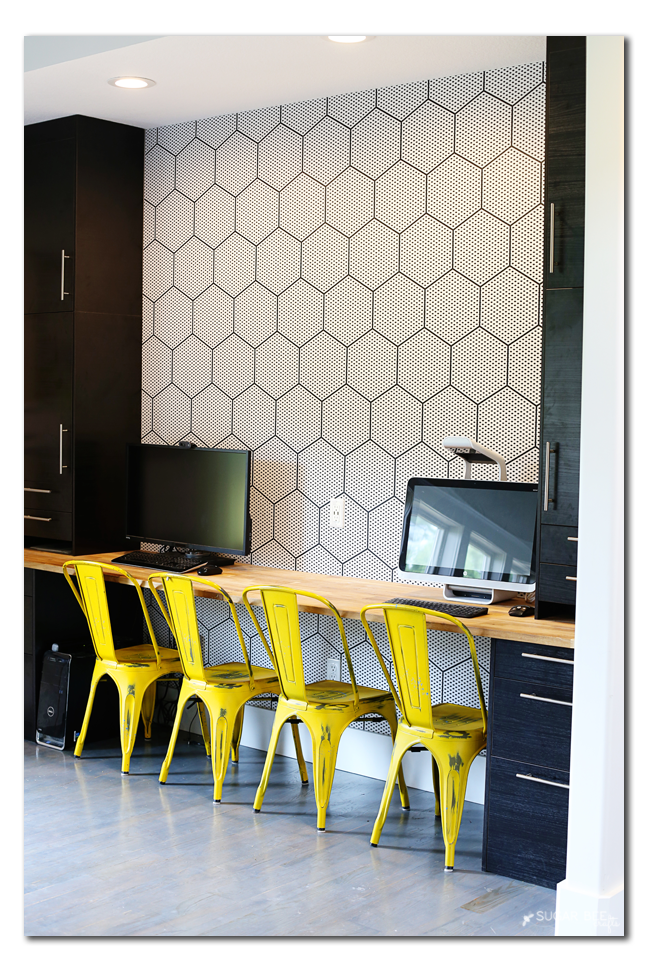
Reveal
And so do I! I just love love love it!
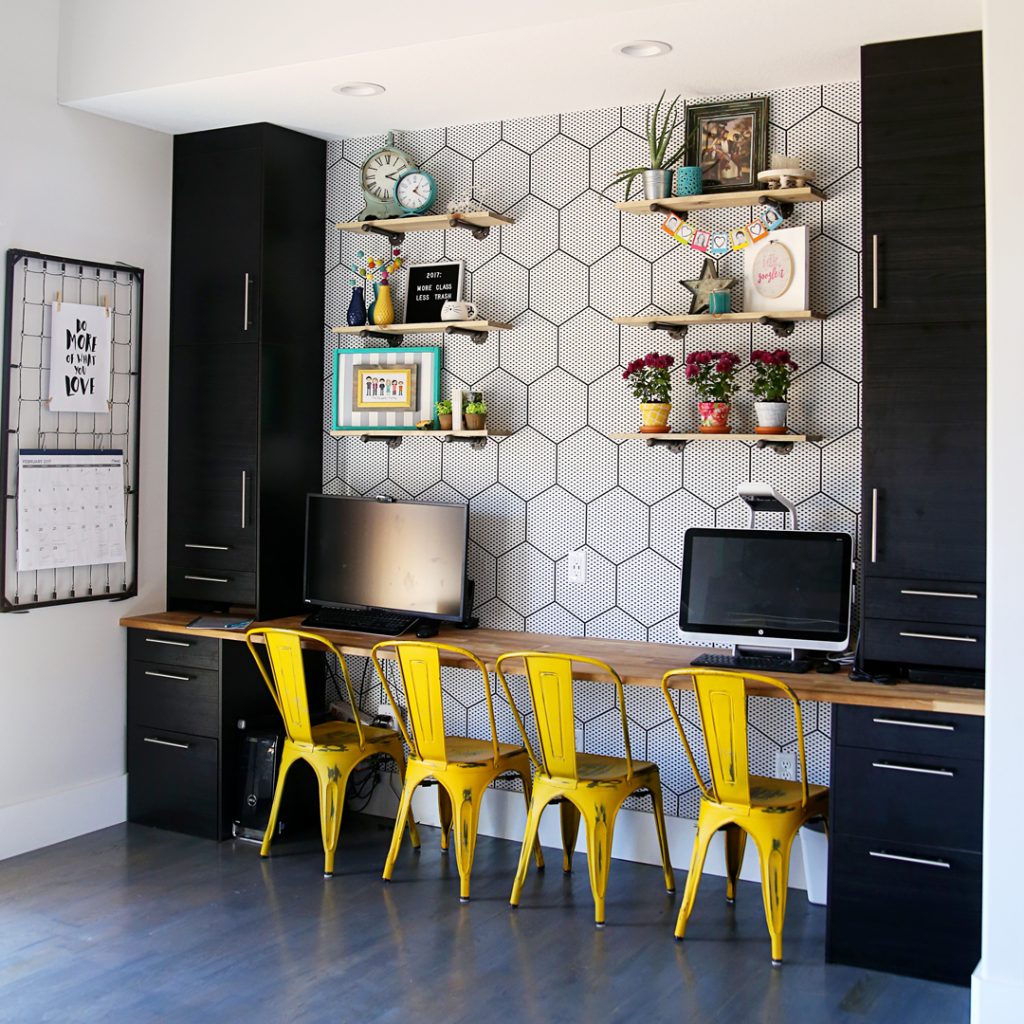
This is phase one of the Computer Desk Revamp – – next I want to add some shelving and such. All in time!
UPDATE – – to see the SHELVING, be sure to check out the post all about our DIY Industrial Open Shelving:
Which Wallpaper from Pixers are you going to choose for YOUR project??