


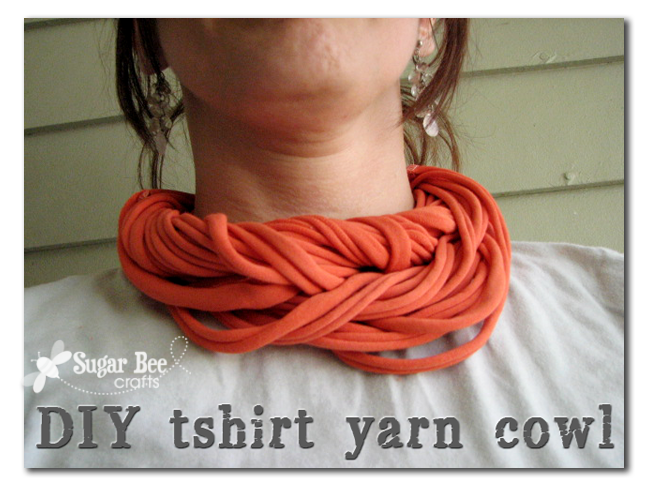
As promised, the tutorial for a Twisted Cowl – and yep, it’s no-sew….
I saw something similar to this on Pinterest from Whole Living, but they didn’t show how to get the “twist” look so I figured it out and want to show you a quick how-to…
Here I am, trying to replicate their picture, which never really works:

First up make your tshirt yarn. Basically, you cut a tshirt into a bunch of strips – mine were about 1 inch wide. Their tutorial tells you that part. Then you take that strip that you cut, which is actually a loop, and stretch it out. It will curl in on itself, and voila, it’s tshirt yarn.
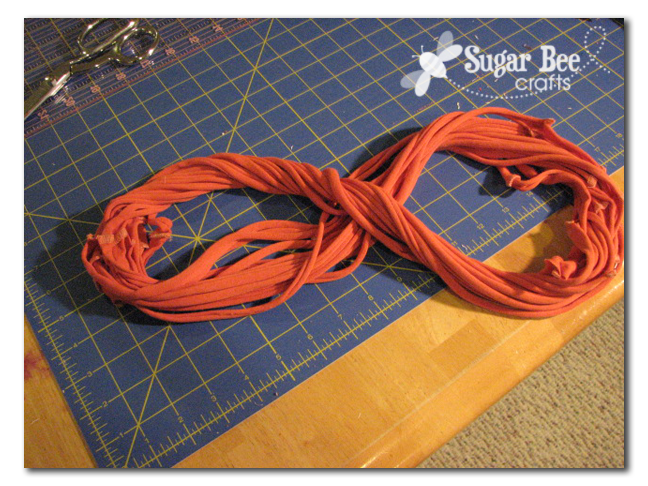
So lay all your loops out like this:

Then while holding the left end of the oval still, twist the right in of the oval in on itself a few times, til it looks like this – you can see how it’s twisty:

Then, with the twists in place, make a figure 8:
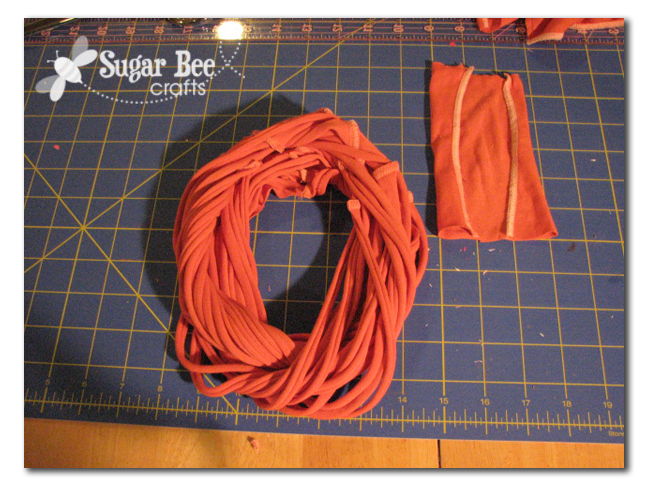
And then bring the two ends of the ovals together. That will make all the side seams from the tshirt in basically the same spot. Then take a scrap from the sleeve of the tshirt and cut it into a rectangle and fold the edges in, like shown:
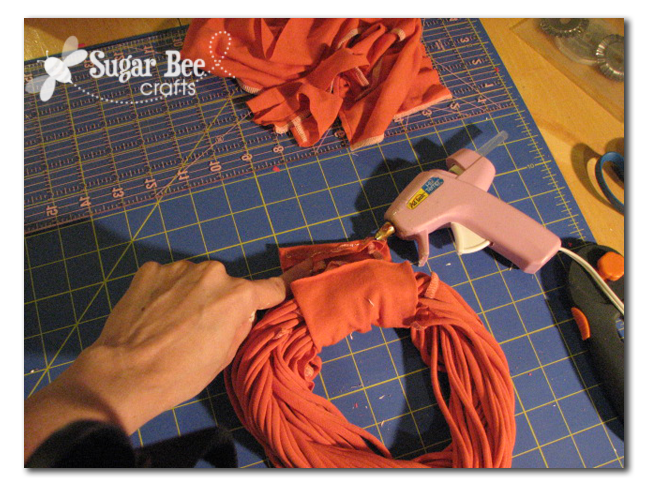
Place it around the area with all the seams. You are going to cover all the seams and hold the necklace together. Fold one edge down just a little (like a hem) and then put a line of hot glue on it and wrap it around and press it down. The hot glue will hold it – no sewing required.
Looks like this finished:

It’s a little snugger on my neck than I had planned – I think the main reason is because the shirt I used was an XS, so the loops just weren’t that big. But that’s okay – it’s not tight or anything.

I love simple, quick, easy projects – you can do this – really!! Go make one right now!


That is so funny… I used the same tutorial to make one this week too! I love the color of yours!
That is so cute! And I love your side-by-side photos. 🙂