“Have a Holly Jolly Christmas” sign was created and designed by The Patriotic Pam.
Hi, I’m Pam of The Patriotic Pam Blog!
I am an army wife of many years, and I love to cook, craft and just have a have fun wherever the Army sends us. If you enjoyed this project please take a look at other things I have also created at:
Well let’s get started with this simple Christmas sign to make. Here are what you will need to get started.
- Craft board….I used a board 3/8 x 6 x 24
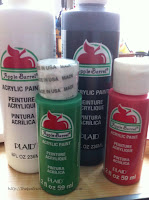
- Acrylic Paint in the following colors:
- White
- Black
- Christmas Red
- Shamrock Green
- Large heart and star stickers (stencils work too!) I used vinyl cut from my Cricut in the shapes I wanted.
- 220 Sanding block
- Tack cloth (Find this in the staining department, it is used to wipe away sand dust!)
- 2 small eye hook screws
- Wire (any thickness will work….I used some I had left over from another project)
- Raffia
Directions:
1. First I painted the entire board front and sides white. And let dry (if I am in a hurry I like to use a blow dryer to keep my steps moving, but still make sure paint is completely dry!)
2. Place shape stickers where you want them to be. Make sure they are sticking well to board.
3. Now paint top of board red, right over the stickers. Let dry completely before removing stickers!!!
4. Once completely dry, remove stickers.
5. I then added green highlight over the white within my red lines. Easy to follow because paint usually makes a ridge at the vinyls edge. Let dry.
6. Next I actually hand painted my lettering in black. (Tip, if you don’t like your handwriting, you can use a letter stencil or cut vinyl for the lettering.) Let dry if painted.
7. Then I used Minwax One Step Polyshades in Antique Walnut. I applied it with a foam brush gently coating the entire sign. I didn’t wipe off excess. I left to dry!
8. Once first coat was dry I used a 220 sanding block and gently sanded top. (Make sure you aren’t trying to remove stain, just rough it up a little) Then wiped clean with a tack clothe.
9. Then I applied the second coat. Allow to dry completely.
10. Next I placed the small eye hook screws into the top of the board. I placed each about 1 1/2 inches from the sides edge. If you have trouble screwing them in, you can use a small 1/8 or 1/16 drill bit to start the hole for you.
11. I then took my wire and looped it into the hook and back up about 1 inch and twisted it around itself. Securing both sides to the eye hooks. You have to determine how much hanging length you want at this time.
12. I finished it off with a little raffia to the wire.
I hope you enjoyed this wood craft. If you did, be sure to check out more on my blog The Patriotic Pam. And a special thank you to Sugar Bee Crafts for letting me guest post!
I also LOVE to cook….here are a few of our favorite recipes for you to try!
Thanks for checking out this post from www.SugarBeeCrafts.com – – click on over to read it in its entirety – you’ll love it!


Love love the sign! So fun and festive! And thank you to your husband for his service Pam and you for the sacrifices you make as an army family.
Thanks Kathy! :O)