


this post is in collaboration with DMC - I was sent product for the project
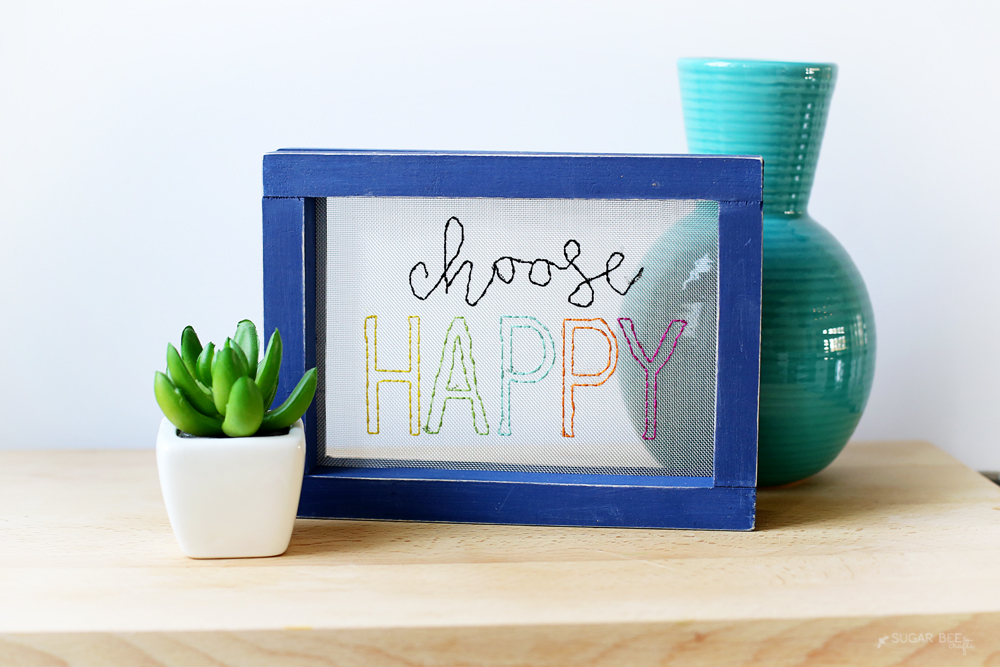
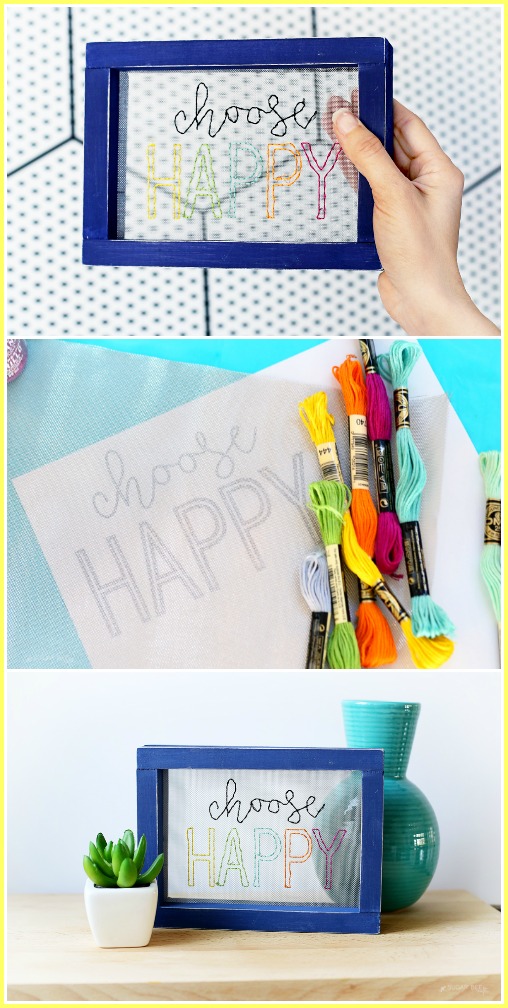
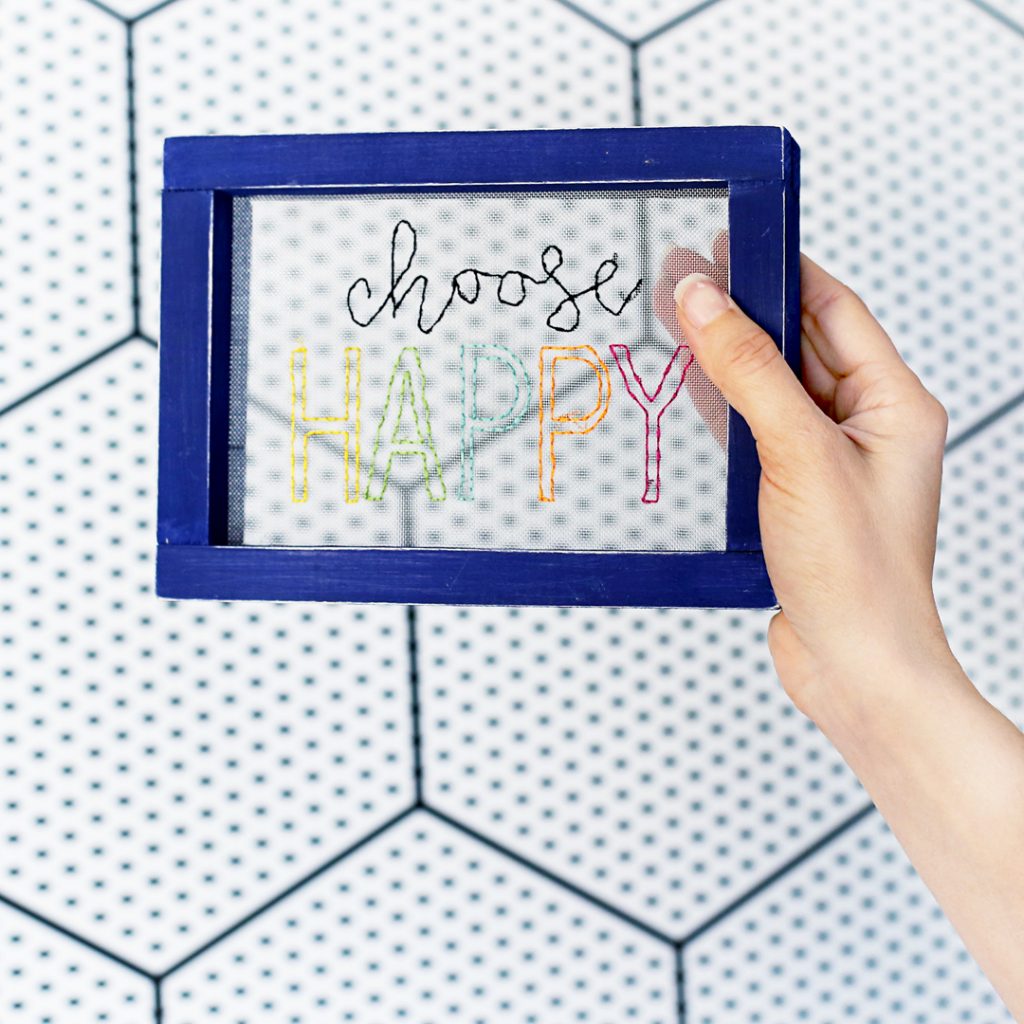
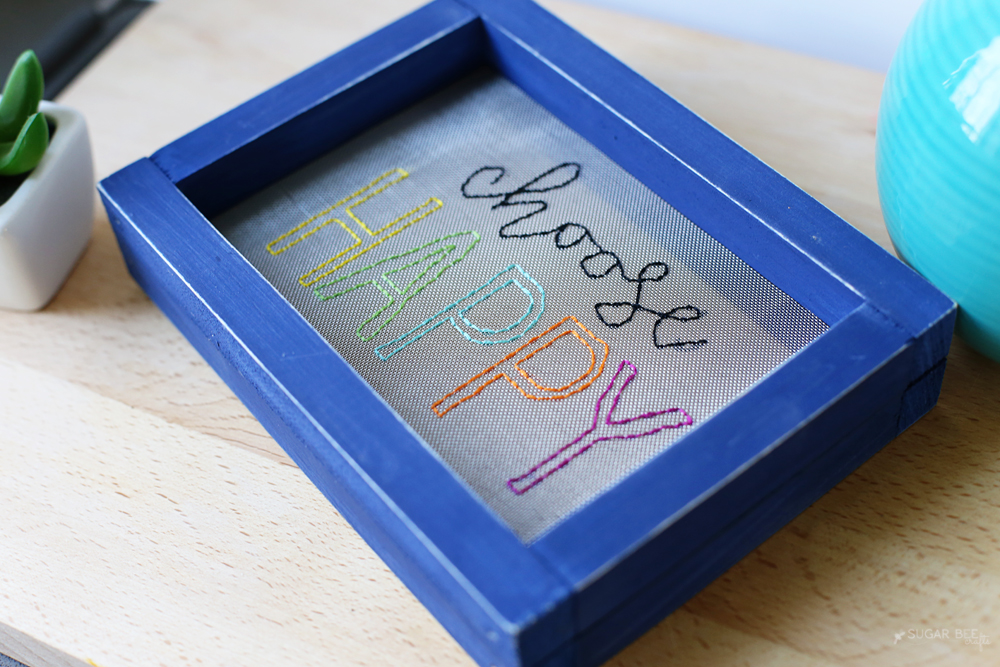
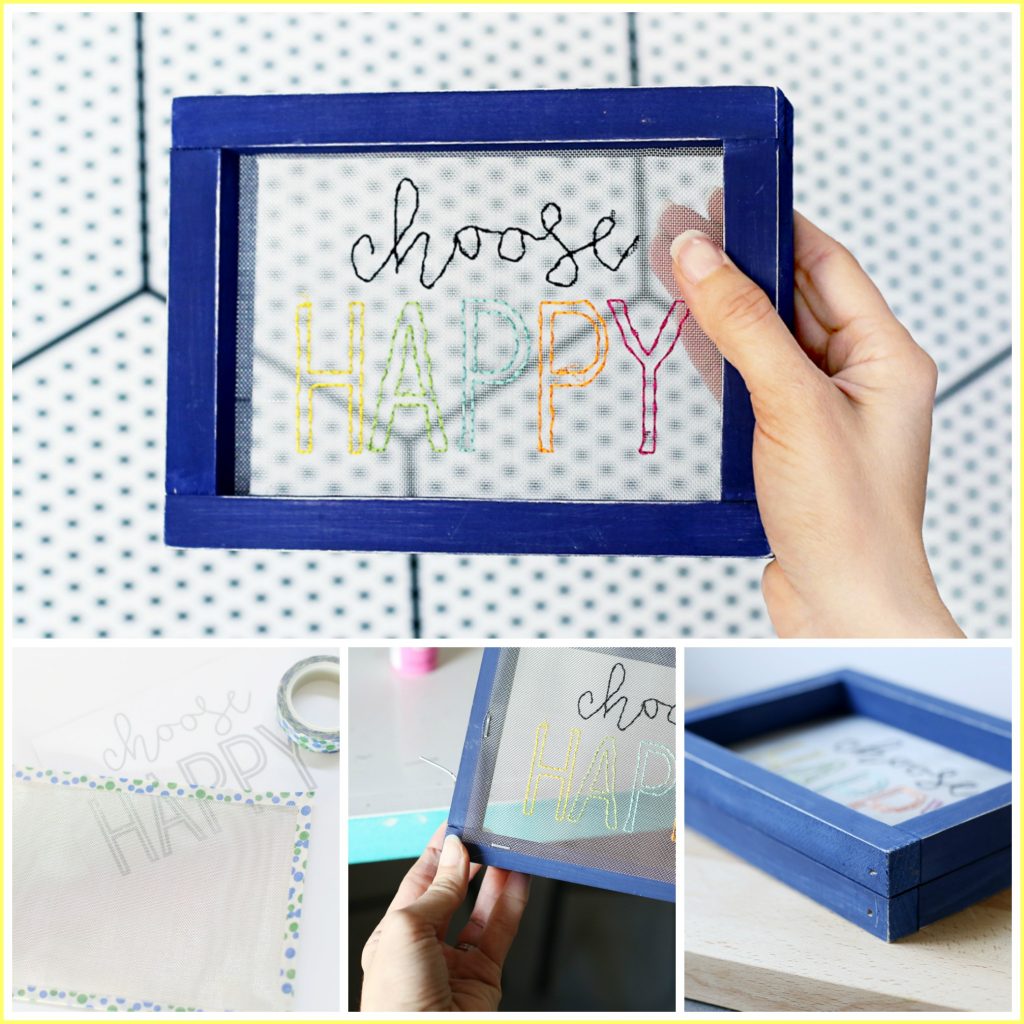
You guys! I just tried the coolest thing – mesh fabric! I’ve been on an embroidery kick lately and it was so fun to try embroidering on a new medium. I love how this Choose Happy Mesh Embroidery came out – it’s unqiue and awesome and I love it!
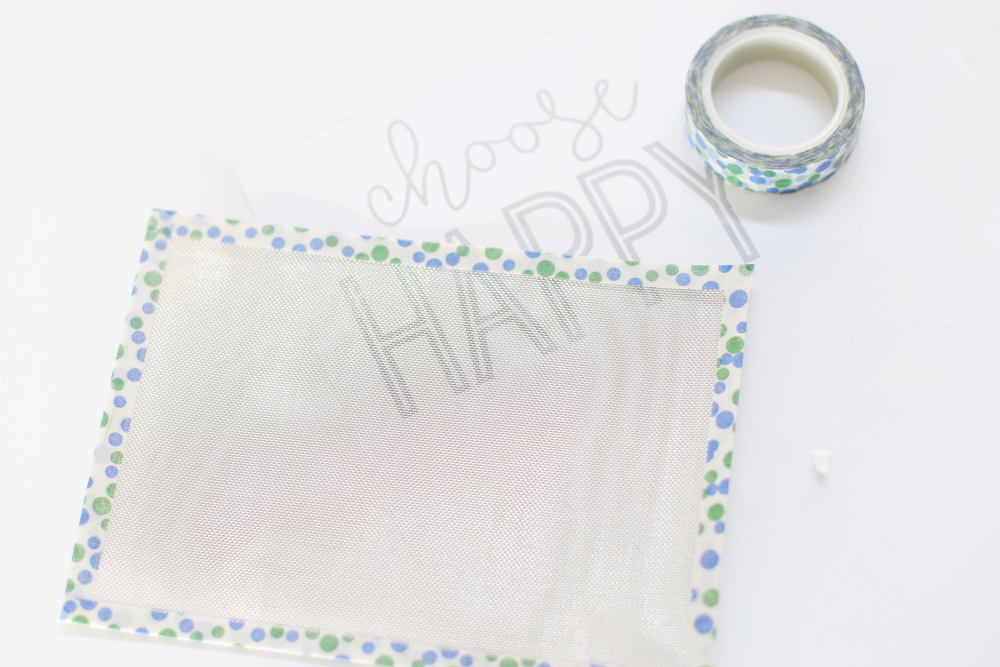
DMC has a couple of new materials that you’ll want to check out – -I tried out the mesh fabric. They also have cork fabric – yes, cork!! Think of all the cool things you could make! The mesh is more flexible and feels more like fabric than screen, yet you can still see through it like a screen – it’s really cool! It comes in a roll of fabric that is a 10 inch by 10 inch sheet. And it’s reversible!! gold on one side, silver on the other. Love that. I used the silver side for my project.
It’s a little tricky to take pictures of something that’s essentially see through! I wish you could come over and see how awesome the project turned out in person 😉
So, let’s jump right in to the tutorial!
Choose Happy Mesh Embroidery
You’ll need:
-DMC Mesh Fabric
-DMC embroidery floss in desired colors
-washi or masking tape
–quote pattern
-wood frame pieces (size depending on your project)
-paint
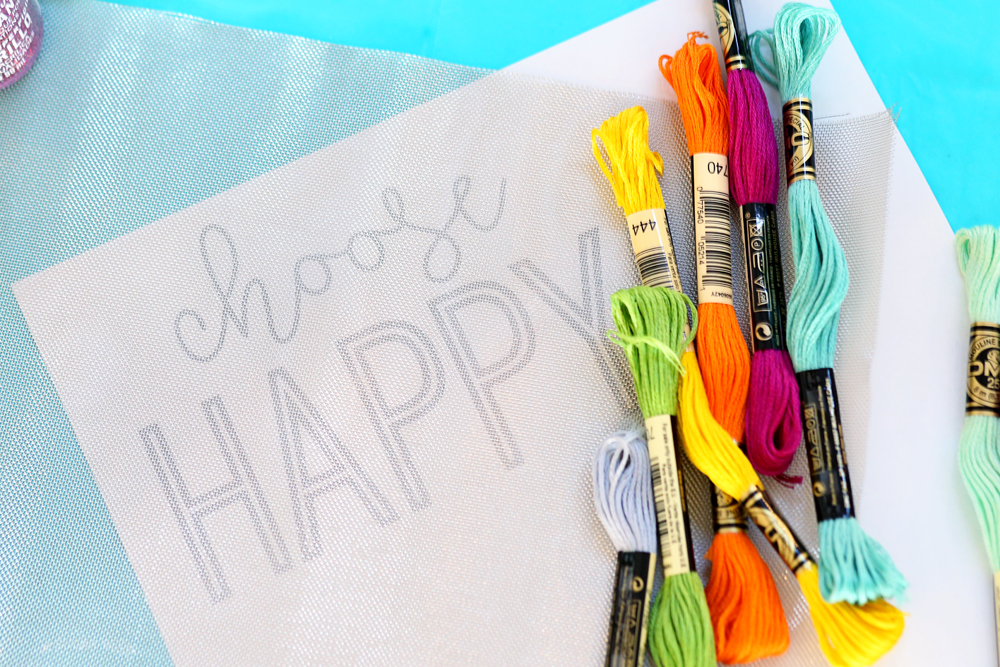
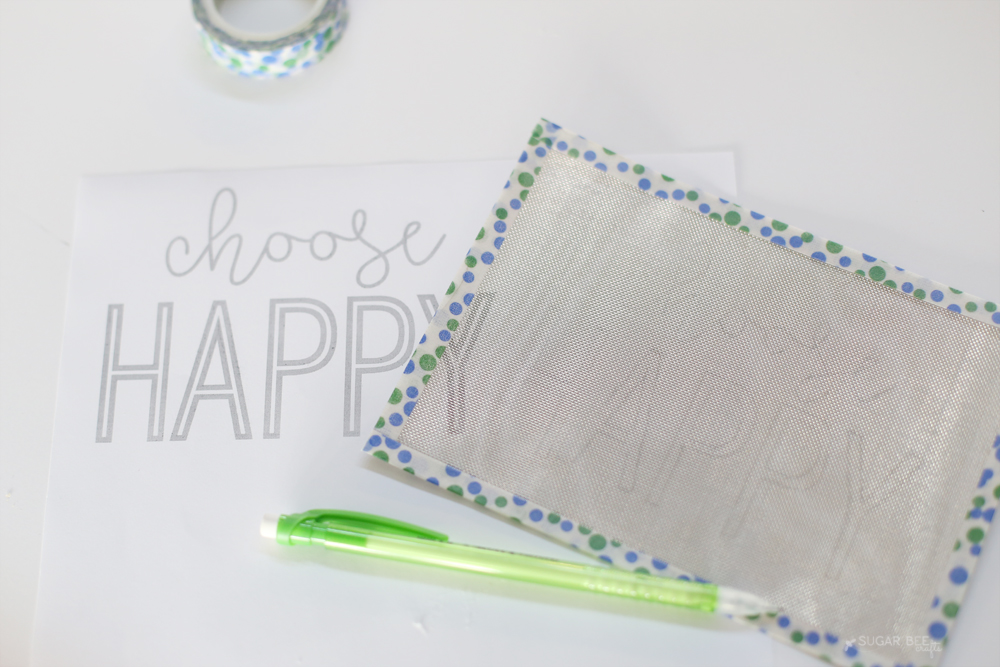
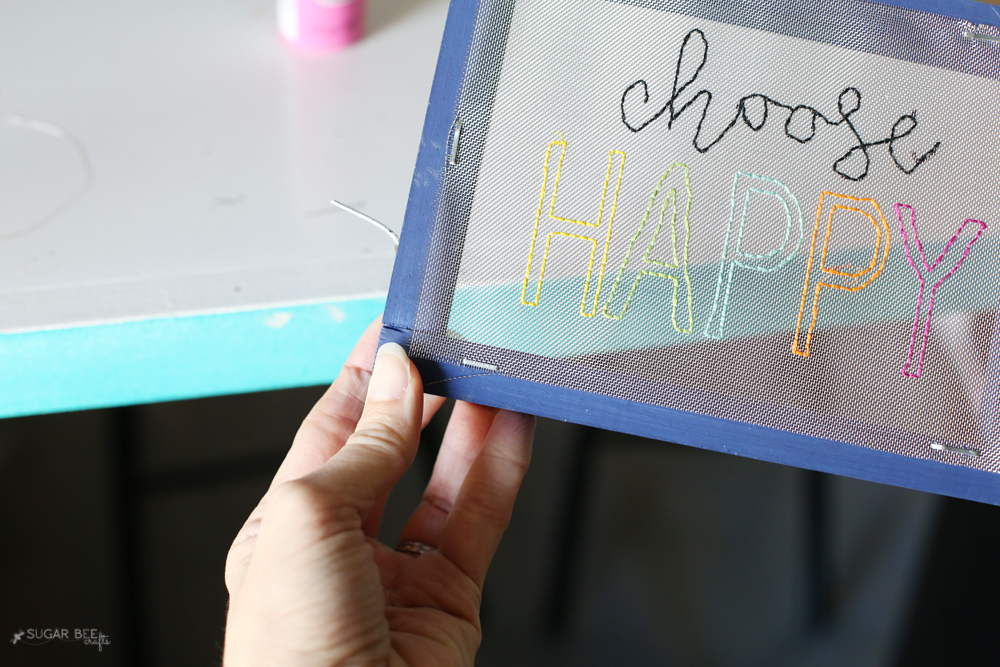
First up, let’s talk about the embroidery. I typed out my quote and printed it to use it as a pattern. Then I cut the mesh to the size that was slightly larger than the pattern I was using. Since the mesh is fabric, it will fray like fabric, so I used washi tape to wrap the edges to prevent fraying. It also helped to hold the mesh flat and make it easier to work with.
Then I used a pencil and traced the pattern onto the mesh. As I worked, my fingers would rub off some of the pencil, so I retraced a few areas as I worked along.
Then you just embroider like normal! Well, mostly like normal – if you’re a messy-back embriodery type of person, you’ll need to be conscious of how the back is looking, since the mesh is see through. So you’ll need to tie off your floss between each letter, etc., to make sure it’s nice and neat.
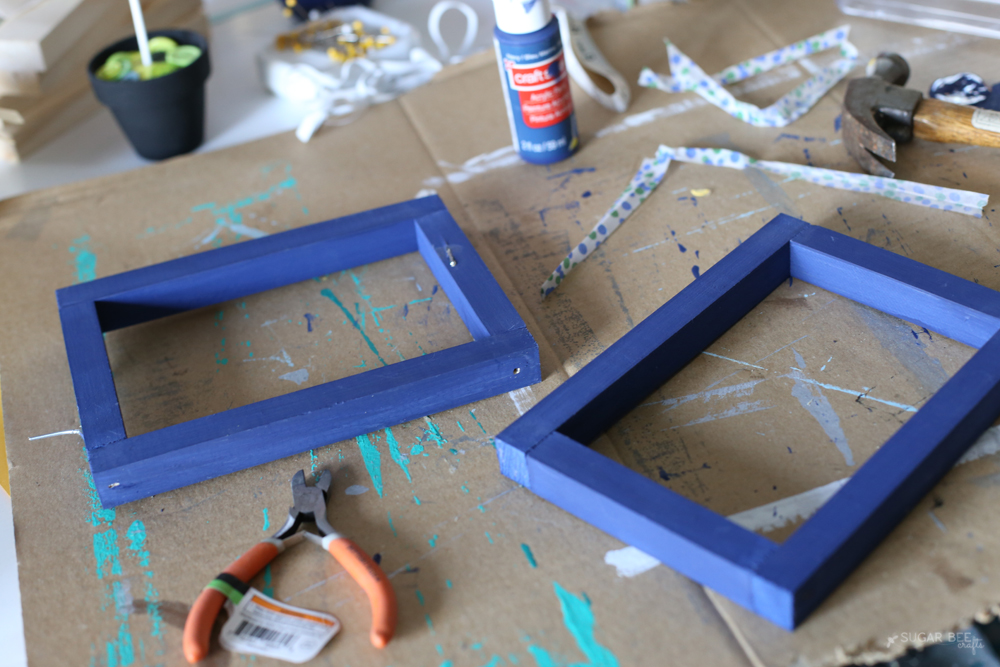
Next up, the frame!! So I used small strips of wood and painted all the pieces before assembly.
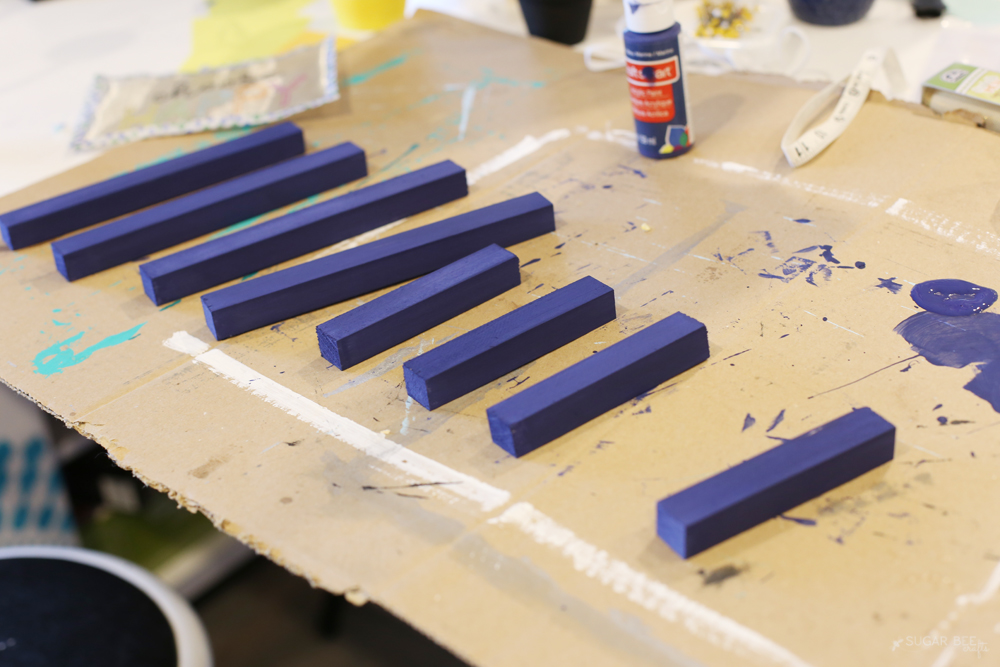
I nailed the frames together. As you can see below, I constructed two separate frames:
So you’ll take one frame, and staple the mess on top of it (my mesh was slightly bigger than the frame). This will secure the embroidery in place.
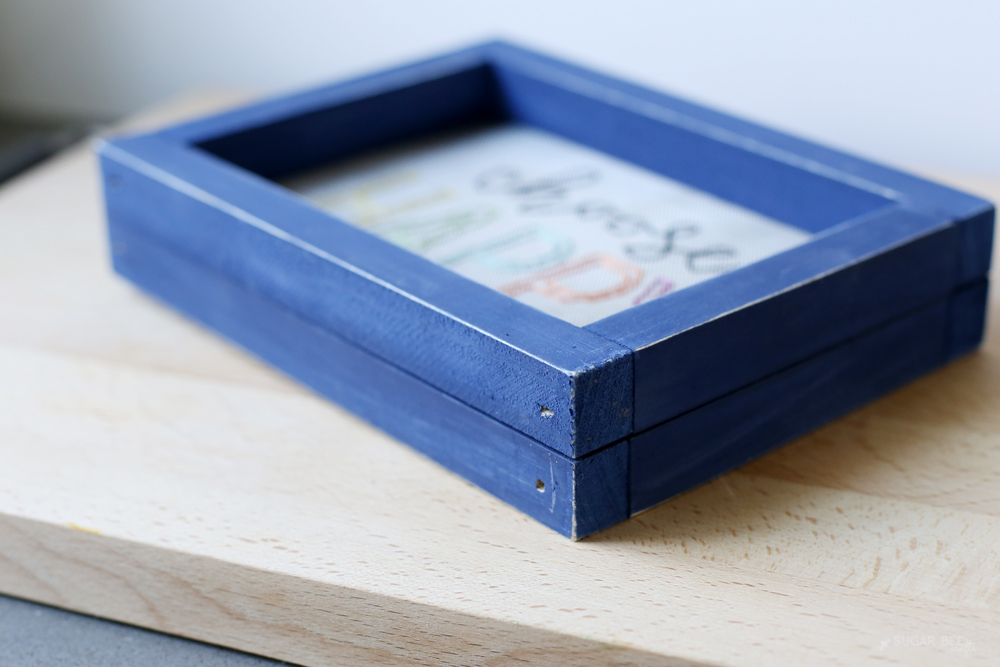
Then you’ll place the other frame on top and nail them together (I nailed in from the back side so you can’t see the nails). So you have two stacked frames with the mesh suspended in the middle.
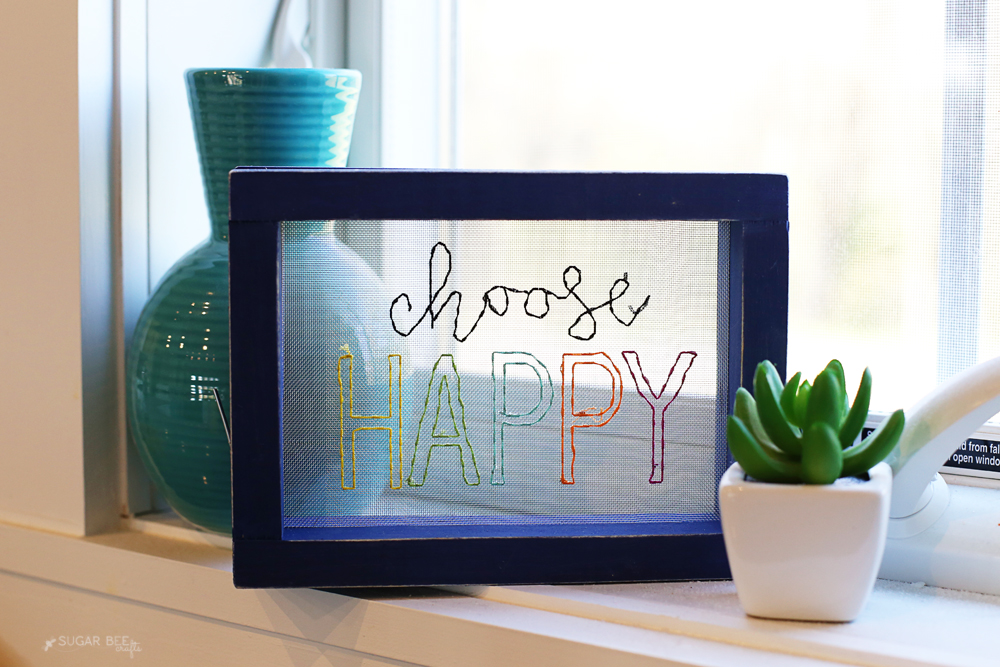
I love how the frame will stand on it’s own, so that you can set your creation wherever you’d like. Mine looks awesome in my kitchen windowsill!!
Can’t wait to see what you make with the mesh!
I wish i were more crafty! Love this idea!