You know, when you’re trying to write “happy birthday” on a cake, and the first letters are huge and you run out of space so the final letters are super tiny and it’s all slanted and wonky anyway… yeah, that was all my cakes, until I learned this awesome easy trick – –
First up, you need to have want you want written on the cake, written on paper. If you have good handwriting, etc, you can just write it out yourself. I don’t, so I printed something off of the computer. Think of the endless fun and cute font options, etc – yep, use that! Then print it out – it needs to be reversed, so either flip it via computer before you print it, or once you print it or write it on one side, flip your piece of paper over and see if you can see the lines through it. If you need to, trace them onto the back of the paper to make it darker.
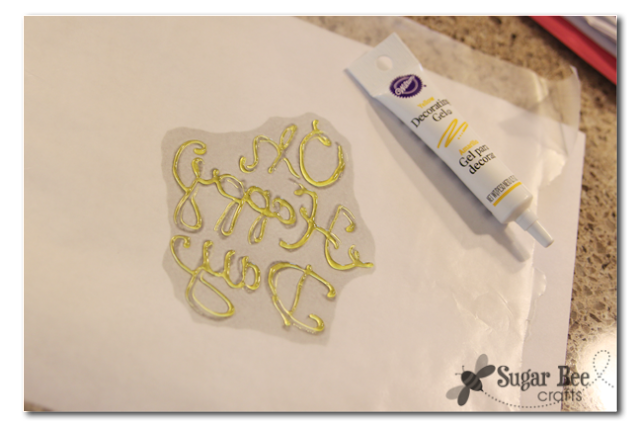
Now, lay a sheet of wax paper over the lettering. Then use Decorator Gel (found in the cake decorating section) in a light color and just trace over the letters onto the wax paper, like so:
Take that wax paper, and flip it onto your cake. Press and rub the letters gently to transfer the gel from the wax paper to your cake:
Then remove the wax paper – it’s a little hard to see, but in this next picture it’s the gel on the cake that’s left when you remove the wax paper:
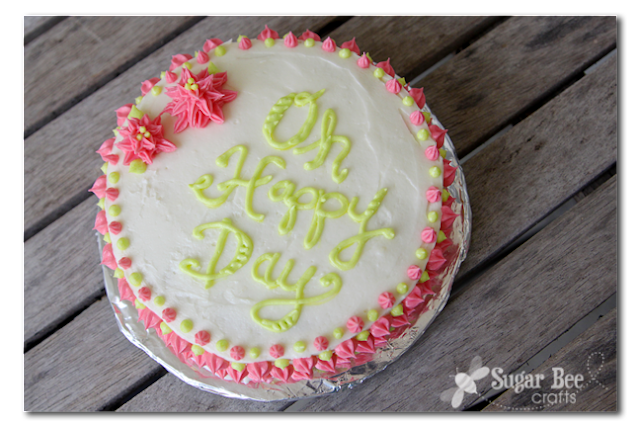
It won’t be perfect, but for sure it’ll give you the general area where each letter should go – perfect lettering spacing! Then you just trace over the gel with your icing and it looks like you have the best cake writing ever. It’s that easy! The tracing is just a couple extra minutes of work and it’s so worth it!
I made this cake as a sample to show in a class of 8-11 year old girls where I was teaching basic cake decorating. Dotted sides are a fun look and a way to give them lots of practice using an icing bag and tip:
And my favorite kind of flowers are these spikey ones – they’re fun, and they’re easy to make. Just make a tower of icing, then make spikes come out of the tower, all the way around, layer on top of layer:
It was a mother/daughter activity, which was great because it meant that each girl had a dedicated helper with their cake. It was a fun time all around!
So – – any other cake tricks that I should know about??


smart!!
Great idea! I’ll be trying this for the next bday celebration.
Super idea! I’ll have to keep it in mind next time I make a cake
Okay why haven’t I thought of this before it is brilliant. Nothing worse than getting to the last letter and running out of room ~ Lisa
I thought EVERYONE knew about what I call frosting “sausages”, but have been proven wrong. Plastic wrap is your SAVIOR in cake decorating, in case you didn’t know! Just lay out your plastic wrap, drop some frosting in the middle, then roll it up like a sausage. Easy peasy! Cut off the tip and put it in your frosting bag for easy change out and clean up! GENIUS!
There is a great tutorial here https://www.ourbestbites.com/2012/04/kitchen-tip-no-mess-piping-bags/ in case you need more details!
GREAT idea! Thank you, Mandy!!
This is such a great idea. Thanks for sharing!
awesome trick!
Thanks for sharing. You’ve made it look so easy with the pics and instructions.
I’m hoping that my lettering will be evenly spaced from now on!
it’s such an awesome trick!! good luck with yours
Great tip! What font did you use in this example?
sorry, I don’t remember the font on this!!