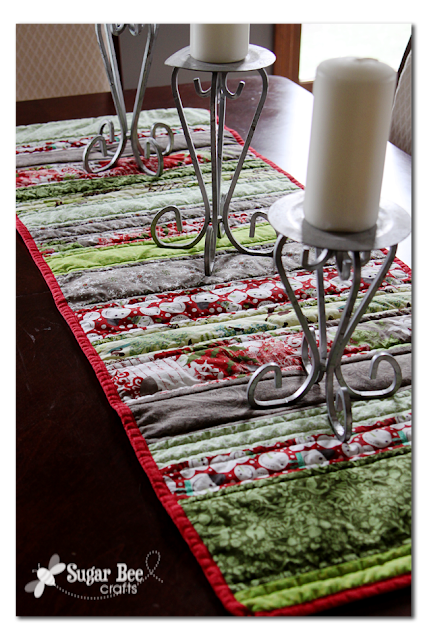
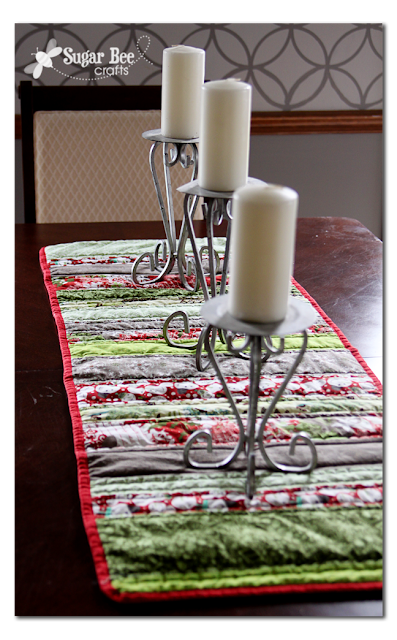
Did you see me on The Ribbon Retreat last month?? I love all the super cute Christmas Fabric out there and thought it would be perfect for a Holiday Strip Table Runner because that craft can showcase multiple fabrics.
First, you’ll need some coordinating holiday fabrics. You’ve heard me rave before about the Little Fatties at The Ribbon Retreat – they are packs of coordinated fabric from the same line – they take out all the guess work. I highly recommend them!! Total you will only need one Little Fattie fabric pack for the top of this project.
I used Moda Blitzen and Riley Blake Alpine Wonderland and mixed the packs, using several fabrics from each. A glimpse of some of the amazing fabrics…
I like to iron all my fabric before I start a project. After that, cut the fabric into strips. How many you need will depend on how long of a table runner you want. I chose to cut the strips at varying widths – 2, 3, 4, or 5 inches, to add interest. You could make them all the same if you want. This project has so many options to customize it and make it unique. I recommend a rotary cutter for cutting strips, but you can always use regular scissors as well.
After you have all the strips cut, lay them out to see which order you prefer. (You can tell I miscut 2 strips, longer than the rest – oops!). Then stack your strips in the order you want and head to the sewing machine.
Working through your stack, you will sew the strips with right sides together.
After they are all sewn together, you can trim up the edges to make them straight. Then cut a piece of fabric for the back that is about 1 inch bigger all the way around than the top that you just pieced. I used this fun vintage holiday tablecloth I had in my stash from a yard sale:
You will want to make a “quilt sandwich”. Lay out the backing piece, right side down. Then a piece of batting. Then the top piece, right side up:
Now for the quilting part. If you’re not a quilter, don’t worry! Quilting just means sewing layers together. Pick up that sandwich and sew using the pieced strip edges as guides. This quilts the top to the bottom.
I sewed a line of stitches about 1/4 inch on either side of the seam, like shown, for every seam on the front of the runner:
After all the quilting is done, trim up all along the edges to make sure everything is straight and nicely edged. Now it’s time to add some binding. I used double-sided bias tape that I made, but you can also easily buy the prepackaged version. I am no pro when it comes to binding, but this is how I do it. I open up one side, place the raw edge of the binding against the raw edge of the runner (on the back side), then sew down the crease in the binding, like so:
After sewing all the way around, you flip your table runner over to the right side and fold the bias tape back like it’s supposed to go. Then you sew carefully along the folded edge, like so:
And that’s it! This is a fun afternoon project, even for a beginner sewer!!
Thanks for checking out this post from www.SugarBeeCrafts.com – – click on over to read it in its entirety – you’ll love it!


Very cute & festive! I enjoyed your tutorial…thanks for sharing a fun project for Christmas. 🙂
wish I had the patience tomake something like this. IT is adorable Love for you to liink this up to friday food frenzy Holiday wrap up linky party of recipes and crafts when you get a chance! https://www.stayingclosetohome.com/2012/12/friday-food-frenzy-holiday-wrap-up-all.html
Maria
So adorable. My sewing machine broke this summer and the new one I’m getting for Christmas is sitting in my closet. This is on my list of to do projects once it’s up and running.
Love this! So cute. Great job as usual Mandy!
I can’t seem to find any “little fatties” quilting fabrics on the website you’ve given. 🙁
so sorry! this post was from last year, and The Ribbon Retreat has discontinued their fabric side to focus on ribbon. Maybe try searching online? Good luck!