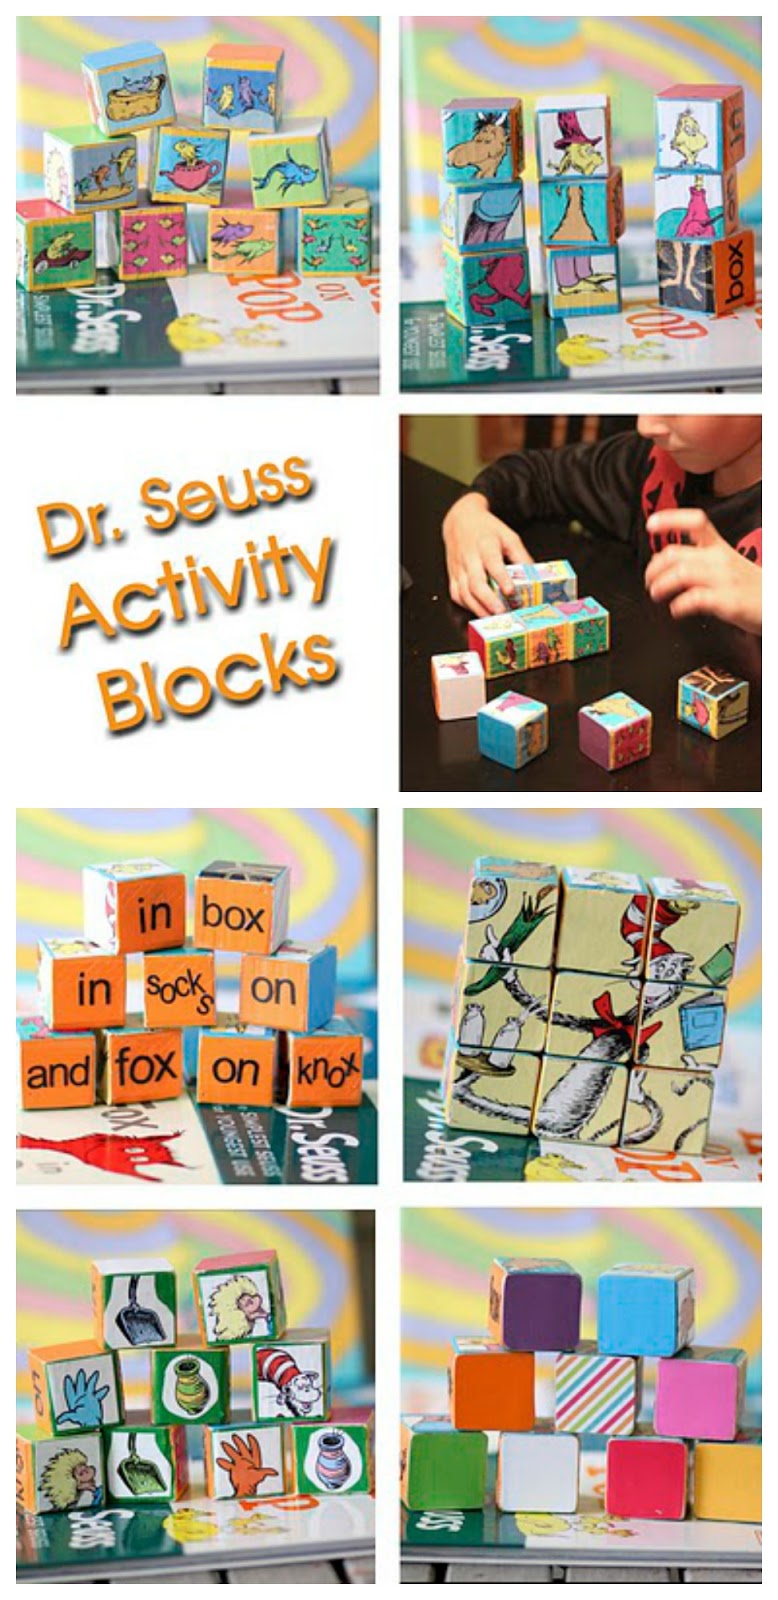
Check out these awesome Dr. Seuss Activity Blocks – way fun!! My kids have LOVED them – all ages can find fun things to learn and do with them.
For this project you’ll need:
-a 2x2x8 board (they’re at the back of Lowe’s – around $1.30 or something)
-mod podge
-various colors of craft paint
-optional: words cut out of cardstock or vinyl (otherwise you could just write them on with paint)
-Dr. Seuss book to cut up
-sandpaper
-colored paper
A note about the book to cut up – I scanned thrift stores and found an awesome activity book (for $.50!)- I only needed to use it – if using actual books you might need several.
Here’s the one I got (at Amazon it’s only $5):
Oh, the Things You Can Count from 1-10: Learn About Counting
Some others that I think would be good:
Did I Ever Tell You How High You Can Count?: Learn About Counting Beyond 100 (Dr. Seuss Beginner Fun Books)
Fun and Games with Counting (Dr.Seuss Flashcards)
Dr. Seuss Beginner Counting Cards
The Grinch’s Christmas Activity Book (Dr Seuss)
I’m sure there’s more, so just be on the lookout.
First, cut your long board into squares. Note that when it says 2×2, it’s not really 2 inches, it’s more like 1.5. Let me show you a trick on measuring and cutting – I learned this AFTER I cut my blocks.
It’s called a “stop” – clamp a scrap piece of wood over to the right distance – see picture:
Now, when you cut your 2×2 board, you scootch it up to the “stop” and then cut. Then scootch it and cut again. This way the cut is always measured the same. I didn’t do this and I measured on the board and marked 9 lines and cut on the lines – and they weren’t exact or something, because the blocks are all slightly different -oops. You’ll need 9 blocks. Here’s a picture of how to do it the right way:
And look, here I am actually using a power tool – you can do it!!
Next sand the blocks rough edges.
After that I painted each side a different color – you don’t have to do this, but I thought it would help the kids to know to turn all the blocks to a certain side (for example, with my set, all the green-background blocks are used for the matching game).
Now the fun part – decided what games you want, find corresponding pictures, then trace and cut squares like so:
The following are the games I had for my blocks:
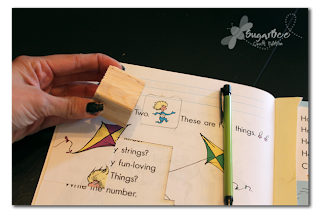
The blocks have 6 sides so there are 6 different activities:
— Word Game – using “fox in socks” arrange these blocks to create lots of fun and crazy rhyme sentences.
— Puzzle – even older kids enjoy the puzzle – it can be tricky because the blocks rotate so you have to figure which way is up.
— Look Alike – match pictures that look alike – one is odd man out.
— Color Naming – perfect for younger kids – name colors, have them find them, let them name colors – even “rainbow” is included.
—Counting Fish – one fish two fish – find the blocks with specific numbers of fish, group them in “less than” “greater than” and many other fun things can be done with this side.
—Body Parts Mix-up – head-body-feet of three “things” – match them all up, or have fun mixing them up.
Now, put mod podge on the back of your square of paper – it’s glue, so stick it to your block. After all the sides are stuck on and dried, I sanded all the edges again.
Finally, put a layer of mod podge over the entire block. That’s it – enjoy!!
I really enjoy these Activity Blocks – they are a new go-to if I need to bring something to entertain all my children, because they offer something for everyone. This craft is thrifty and easy, so I would love to make some sets for gifts to give to family/friends and also for teacher gifts – these are perfect to have in the classroom.
My kids have even thought of different games to play with them than the original 6 I thought of – like here, where they’re playing a memory matching game with the words.
Enjoy making a set!!


Awesome project Mandy!! 🙂
These blocks are so much fun! I love that they are so versatile. It’s amazing what games the kids will come up with with these fun blocks.
Thanks for sharing the tutorial!
justenoughstyle.blogspot.com
Love the idea, it’s in my to do list!
These are awesome! I’m going to make these for a Christmas present for my kids and maybe some nieces and nephews! I’m trying to do a mostly homemade Christmas this year…Thanks for the great idea!
What a super cute idea1 Thanks so much for this, I’ll be linking.
I’ve been thinking about doing something like this. Thanks for the tutorial!
These are so FUN! I love.
Very cool project!
This is just DARLING! I LOVE it. A little scared of cutting wood but maybe my handy sis would help me do it. I think my kids would really dig this!! Thanks.
i LOVE this idea! how fun!
Love it! I so want to make this for my granddaughters 🙂 thank you for sharing 🙂
Fabulous job Mandy! Great tutorial.
What a clever idea! You could use it for any book! Thanks for sharing! I just might have to make a set!
Thanks for this great tutorial. I love your ideas.
OK. I am inspired to invite you to come link up with us, so our readers can love you too: https://www.finecraftguild.com/diy-craft-tutorial-linky-party-20/
Every Wednesday there will be a new party, so bookmark our home page and you can come back over and over again with great ideas and tutorials.
We look forward to showing your work.
Smiles,
Have a happy day!
adorable! thanks so much for linking to this on Craft Schooling Sunday, great to see you! all the best!
What a great project! LOVE it! I’ve linked here: https://homeeducationjournal.blogspot.com/2010/11/few-ideas-posts-i-love.html
i love this! i’m featuring it on my blog today smallfineprint.blogspot.com
I’ve loved this idea since I saw it in the craft contest. I blogged about my lame blocks and mentioned yours last fall. https://www.obseussed.com/2010/11/time-to-re-do-my-dr-seuss-stacking.html I’m adding a link to this on my children’s book blog where I collect Dr. Seuss ideas and plan to feature it on Dr. Seuss’ birthday. Come link up any other Seuss Projects you’ve done.
https://www.obseussed.com/p/books.html
I LOVE this idea so much, it could be adapted to different ‘themes’ so easily too!
What could be better? Dr Suess meets a puzzle!
I have included them in a list of great tutorials to make for little boys and girls for Christmas.
If you would like to have a look you can see it here…
https://allysonadeney.wordpress.com/2011/11/28/handmade-gift-ideas-with-tutorials-kids-little-boys-little-girls/
Thanks for taking the time to put this together for us.
Ally on harrysdesk
what a beautiful idea. great job you have done. thanks for sharing.
Send gifts to Pakistan from Australia
Send gifts to Pakistan from Australia
Send gifts to Pakistan from Australia