Hey Ya’ll! My name is Ashley and I blog over at Apples By Ashley where I share a bit of sewing, diy, fashion, paper crafting, jewelry and thrifting. I am helping Mandy out today and I am very excited to be here!
Michaels sent over a few fabrics to try out, including some pretty burlap and fun canvas prints. At first, I had no idea what I was going to do with the fabric…but after organizing my office/craft space, I found an extra wire wreath form in my stash. I asked myself, “What can a wreath form do for burlap?” Show it off, of course! This project was super easy and quick; I created this beautiful wreath while watching a movie with my daughter.
I gathered my supplies: cocoa burlap, a wire wreath form, scissors, mini safety pins, and a couple rolls of wired ribbon. I didn’t have an exact vision, but I knew the burlap would create the perfect blank canvas.
I cut the burlap into strips, about 6 inches wide by the width of the bolt.
I then folded the strips (approximately in thirds) and safety pinned the raw edges together. A glue gun can also be used for this step; I was too engrossed in Hercules to run back up upstairs to snag my brand new glue gun…and safety pins got the job done.
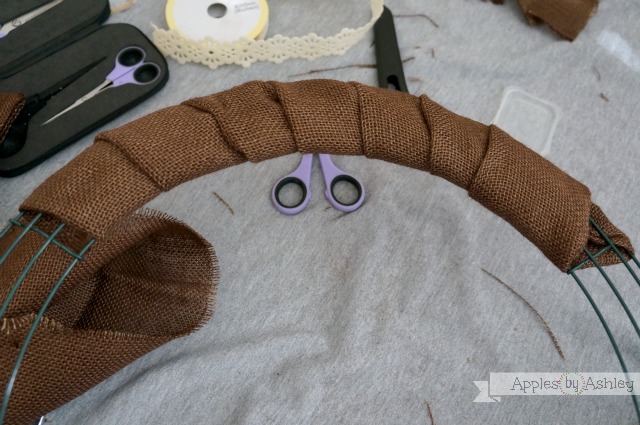
After folding and pinning the strips, I wrapped the strips around the wreath form (being careful to keep the safety pins on the inside of the wreath. It took 4 strips of folded burlap to cover the entire wreath form.
This is what the wreath looked like after all 4 folded strips of burlap were wrapped around the wire form.
A friend of ours dropped by last week with 5 lovely real peacock feathers. I had no idea what to do with these lovely feathers, except let them sit on top of our piano until something else came to mind. As I was pondering my crafty conundrum, one of the feathers happened to catch my eye. The feather reminded me of some wire ribbon I had (also in my stash) that I had planned to use on my Easy Interchangeable Wreath. However, I knew the ribbon would look just as amazing with the cocoa burlap versus the vine wreath. I pulled out the peacock themed ribbon and cut enough from the spool to create a big bow. After tying a bow, I slipped 3 feathers through the knot, pinned the tip of the feather to the opposite side of the wreath from the bow, and cut the feather shaft to the correct length.
A close-up shows the golden tipped straight pins holding the feathers in place. I used the pins because I was a tad bit worried about ruining the feathers while using any other adhesion method (like hot glue).
My daughter thought using the feathers was ‘so cool!’ which is kind of a win for me, since she hasn’t thought many of my crafty endeavors have been ‘cool’ lately. And, the wreath looks quite nice on our red door.
I think this wreath will look wonderful in the fall with all it’s warm gold and brown tones…but, now that the red white and blue holiday has passed, I am tempted to put away the stars and stripes and utilize my new wreath right away! Thanks for checking out my Burlap Peacock Wreath. And thank you Michaels for this fun opportunity to show off your new products. I hope you stop by Apples By Ashley for more inspiration for your crafty endeavors!


It turned out absolutely gorgeous.
This looks so nice!
I love these ideas 🙂
https://blogfashionarts.blogspot.com.br/
bjinhos