Hey everyone — I wanted to pop in and tell you of the Silhouette Deal – – but it’s for ANYONE, because the Double-Sided adhesive is amazing, and you can hand-cut basic shapes using the starter kit, so it you want just that, go for it.
But obviously I do love my Silhouette, and if you want a Portrait, there’s a deal for you too!
What I cranked out…tutorial below…and a separate bonus project, so be sure to read the whole post…
But first, here’s that amazing deal, just used the code SUGARBEE when you check out – – seriously, the kit is only $13 and comes with glitter, a scrapper, the sheets you need, plus digital download designs – what a deal!
So, back to my projects…remember when I made a stencil, painted on glue, pulled the stencil off, and glittered and I mentioned how the lines weren’t as crisp as I imagined, etc? Well anyways, that’s why this Double-Sided Adhesive is pretty awesome – super crisp lines of glitter – does it get any better!
Project #1 – Glitter LOVE Plate
I found a couple of these heart plates at Goodwill Outlet (I’m addicted to that place – glassware costs $0.59 a pound – what a deal!!) and thought they’d be perfect for some Valentine decor.
First get your design loaded and cut it using the software. There is a “Double Sided Adhesive” option for cutting, so be sure to pick that. And have your sheet white-side up. It’ll cut all the way through, like so:
I used this “love” design that came with the kit. I’ll have to say it’s a little tricky as a first project. I should have started with the hearts you see above, but that was my second project. Anyways, it was tricky because it’s a more intricate design AND I shrunk it down AND I had a “helper” sitting on my lap while trying to peel the sheet off the mat, etc. So I would say there’s a bit of a learning curve but you can combat that by starting with a simpler project.
Anyways, after being cut, you pull the yellow backing off then place the design where you want it. Then you pull the white backing off the front (does that mean it’s called “fronting”?). Now what’s left is just a sticky film type of thing – – you can kind of see in this picture below if you look close:
Then you can pour glitter on – – we brushed it on because I didn’t want my helper dumping glitter. It’s a great quality of glitter, FYI, not chunky at all – it’s the awesome dusty glitter. So get it on top of the sticky film, then brush it off. That’s it!
He was excited about the project:
Love the sparkle of glitter! (I’d better – it’s now all over my craft table…)
Project #2 – – Nail Decals
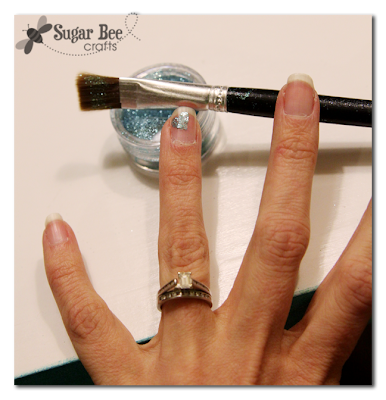
While I had the sheets out and ready, I went ahead and cut a few small hearts for nail decals. This is WAY easier than trying to hand-paint a design. I just stuck the heart on my nail and glittered it:
And then painted over it with a clear coat. So far the glitter is staying on great because it’s sealed on with that clear coat. I can’t tell you how long it will last, because as of writing this post, I’ve only had it on a day – but so far so good. Taking pictures of your own hand – tricky!! This is the best I could do, and you can’t even see the heart that well:
So – – you need this, right! You can get the kit WITH the portrait (the smaller version of the Cameo) – maybe a happy valentine’s present to yourself?? or you can get JUST A KIT. Pick what’s best for you – – just use code “SUGARBEE” to get the discount. Deal Page HERE.


Next time you want to take a picture of your nails, maybe you should try the claw that many people do for Pinterest. Fold your fingers in towards your palm, so the nails are facing the camera a bit better.
:o)
This looks really cool…will have to try it out!! Love how the plate turned out!!
love the fingernail idea!