I was choosen to review Plaid’s DIY Simply Screen screenprinting kit – loved the opportunity. I had spotted this in the store before and was intrigued so it was fun to test it out. It worked great for me, first try. So a quick interruption of Guest Post Extravaganza while I tell you all about it……
Then read your directions, and re-read them. I wanted to make sure I got it right (yes, I’m crafting in my pjs – doesn’t everyone?)
The packaging become a light box (comes with the light bulb and everything). I plugged it in to get it warmed up. You need an area without direct light – I used the bathroom with the light off and door shut. Then in a dark area, you get out the transfer sheets, peel of the backing and stick on your design you printed out. I taped them down when I slipped them in the bottom of the box to make sure they stayed together. Then it “cooks” for about 30 minutes – it’s burning the image from your printout onto the transfer sheet. Don’t open that bathroom door til it’s done…..(update, it probably isn’t that sensitive, I just wanted to be sure no extra light got in)
I pulled it out and thought, well that didn’t do anything. But I moved to the next step just in case – soak it in water – and look – you could kind of see my image – it did do something!
Now this step takes patience – – you use a sponge to wipe away the burned part. It probably took me 20 minutes. I found it easiest to do this on a plate with water on it – I’d rub one side, flip it, rub the other side, change the water (to keep it warm) and repeat a gazillion times. (Update – maybe I let it go too long under the light box – it should only take a couple of minutes to rub it off – I also rubbed lightly – I was being cautious). Some rubs I didn’t think were working, but they did – – this is how it turned out – perfect! The top font I chose was “distressed” so the outcome was exactly how it was supposed to look.
So basically this blue thing is a piece of screen coated with a blue plastic film. The heat and rubbing takes the film away from where it looks white – actually it’s not white, it’s see-through screen.
Moving on to printing…..gather your supplies:
What you’re going to do is squirt a line of paint along the top and then drag it over your image. In this picture, I’ve already used the screen a couple of times, so that’s why it looks red:
Guess what – – your lucky day — I made a live action video of how to do at home screen printing – –
See, easy, right? And the design is so crisp! Along with my kit I was able to try out the glitter stuff – – it works almost the same — you drag special glue through the screen instead of paint, then pull the screen off and cover with the special glitter. With both glitter and paint you have to iron it 24 hours after application to heat set it.
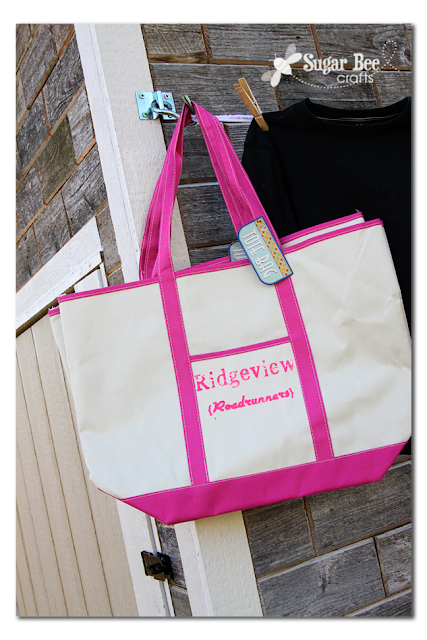
I also did a couple of totes – Teacher gifts, check! Side note, these totes I got at the dollar store a while ago, so they were only $1. I was remarking to the cashier how nice and high quality they seemed, and she said they were overruns from Kohls – what a deal!
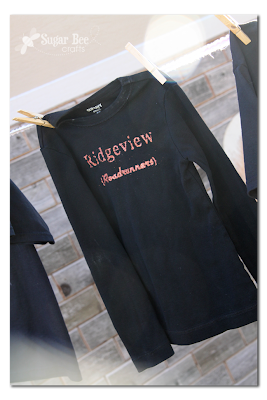
The glitter shirts (pink glitter shown below) are the star of the show – I just love them! The boy shirts are alright, but I should have gone with white shirts – – as the red paint dried, it got darker and doesn’t show up well against the black. Remember my video – the red paint starts out so bright, as you saw in the video. Compare that to this dried shirt. Oh well. Mental note, next time use white shirts!
see, the ones in this picture that look blank really had that dark red image on them….
Anyways, let’s review:
–it worked for me – I got a great, crisp image, exactly of what I printed. Some people reported having trouble with the image not burning on the screen, but mine worked great.
–totally customizable – you can use whatever you can print from your computer, so sky’s the limit
–the box is reusable – and you can buy refill screen packs, so you only have that initial kit cost one time
–use white shirts – but this will work on so much more than shirts – think canvases, stockings, etc….
–you can pick one up at Hobby Lobby
I was provided the Simply Screen at no cost, but the review is all my own opinions.


You could have come up with a theme for Grandma Day Camp!! and made our t shirts…
that is totally awesome! screen printing has been on my radar, but that looks easier than the sunlight method
Ooo! This looks like a really fun project! Love the way it turned out, especially the tote idea.
Oh nice!!! This is a great way to make school shirts for cheaper! They are usually super expensive to buy especially if you’re getting one for everyone in the family!
Wow, you went to town with that.
Wow, I had no idea it could be so easy! I’ve seen a lot of DIY tutorials, but they often come out looking pretty DIY, if you know what I mean. These look much more professional! I will definitely have to give this a shot sometime, there are a lot of things I’d like to have custom shirts for. Thanks for sharing!
Great !! Informative!! It’s a totally fun to do this..really amazing..Cheapest way to make school T-shirts..I am so impressed seriously..@Mandy thanks for sharing this post..:)