Hey Sugar Bee Craft readers! I’m Susan and my little place in blog space is Living with Punks. I’m mama to three punks and wifey to the biggest one of them all :). I love to sew, cook and craft, and whatever is on the agenda for the day, it will usually include a tutorial…that’s just how I roll…
I want to give an extra-special thanks to Mandy for having me over today. I am certainly flattered and can’t wait to share with you all today!
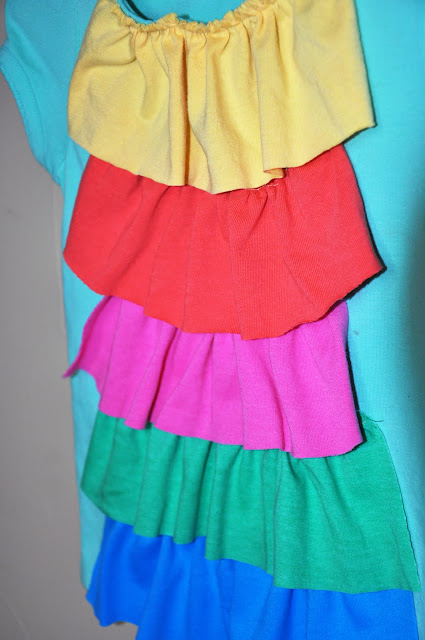
Just in time for the spring and summer season is this Popsicle Ruffle Top for your little girl, or use the same method to make yourself one!
You will need:
- Plain T-Shirt
- 5 Different color knit fabrics for ruffles (old t-shirts work great)
- Thread that matches color of shirt
- Thread that matches color of top ruffle
Here are the knits I decided on for my shirt
And here is the shirt…It doesn’t even have to be a new one. I chose this one to cover up the stain that screamed at me every time she wore it. Measure your shirt from the front neckline to the bottom hem. Mine was 12″. I knew I wanted larger ruffles and I wanted them to go all the way to the hem. You need approximately 3/4″ of the ruffle hiding behind the one in front of it, so after doing all the adding, I knew I needed my ruffle height to be 3″ per color.
Arrange the colors however you like
Now, I knew I wanted my ruffle width to be 6″ on the shirt…how did I arrive at that you ask? Well, I just eye-balled how wide I wanted the ruffle to be and measured 🙂 Whatever width you decide on, you need to double it. I wanted mine to be 6″, so I cut my strips at 12″. So here I have 5 pieces cut at 3″ x 12″. (disregard all the matching thread..that was a little too ambitious)
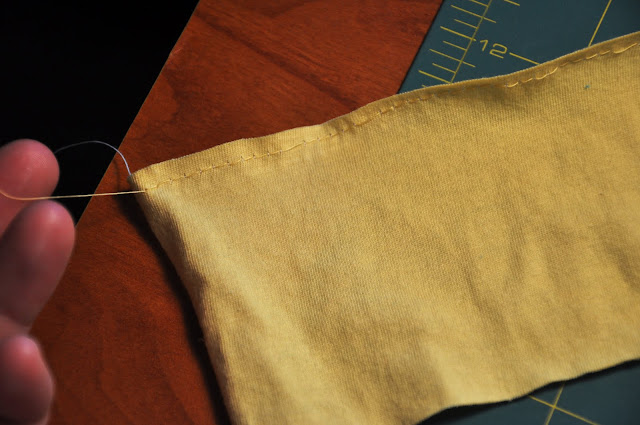
Now take your top piece and run a basting stitch using the same colored thread at the top about 1/8″ from the edge. DO NOT BACK STITCH!
Pull the top thread on both sides to create your ruffle
Ta-da! Now go and ruffle the other four pieces and then come back 🙂
Take the top ruffle and place it right on top of your neckline, overlapping it just a bit. You don’t want the neckline to peek thru when it is being worn
Stitch down using the top ruffle thread color. Go ahead and stitch right on top of the ruffling stitch
Your next step will be to put the bottom ruffle on. This is to make sure you get your spacing correct. So, attach the bottom ruffle so that the bottom of the ruffle is even with the bottom hem. Sew right on top of the gathering stitch with the shirt colored thread
Next, place the 4th tier above the bottom tier (green for mine) and pin in place. You want it to overlap the bottom tier and cover all the stitching
(approx 1/2-3/4″) Sew right on top of the gathering stitch to secure in place
Continue with the third tier, using the same method
and the second tier…. Mine need to have a slight curve in order to match the curve of the top tier. Just eye it and pin in place and stitch down
And your all done!
I LOVE Ruffle T’s with jeans
And I love it with the white shorts….so Palm Beach!
Thanks Mandy for having me 🙂
Thanks for checking out this post from www.SugarBeeCrafts.com – – click on over to read it in its entirety – you’ll love it!


So cute, and really looks like SUMMER!
That’s adorable! I love all the fun color!
Rachel @ Maybe Matilda
Adorable! I’m with Rachel, I love all the fun color! So cute!
So cute and so summery!!! Love the bright colors!!
That is so cute!! I linked to your tutorial on Craft Gossip Sewing:
https://sewing.craftgossip.com/tutorial-popsicle-ruffle-top/2011/05/23/
–Anne
DARLING! love this! 🙂