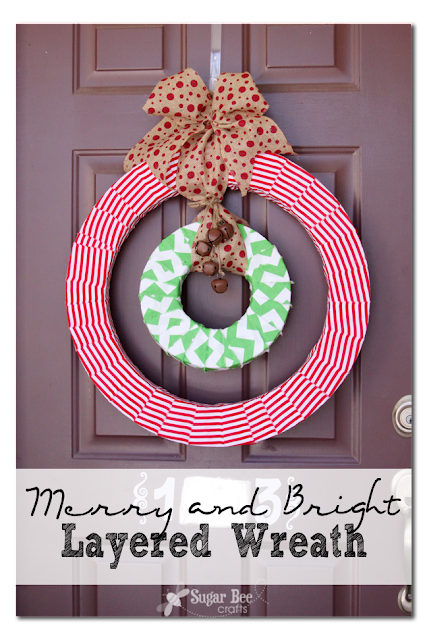
What is holidays without a new festive wreath? I had to make a new one for the fun of it (and just think, a few short years ago I was attempting my first wreath – now I’m hooked!)
I was sent some crafting supplies from FloraCraft in round rings of styrofoam. I loved how they nested and immediately thought it’d be awesome to do a wreath inside of a wreath. Adds more color and dimension and fun!
I knew I wanted to go with bold bright colors, so I picked up red stripes and green chevron fabric. To balance the brightness, I also grabbed some fun burlap ribbon.
Basic Steps to Make This Wreath:
–tear fabric into strips
–wrap strips around wreath forms
–hang with burlap ribbon
You can do this!
So first, cut or rip your fabric into strips. I ripped mine, because it’s faster, and because I like the look of the ripped edge:
Then I simply wrapped those strips around the large wreath form. I secured the ends with hot glue and when one strip ended I glued it down, then glued down the start of the next strip and kept wrapping. I made sure the strip seams were on the back of the wreath form.
Repeat with a smaller wreath form that will fit inside the larger wreath form. Then using burlap ribbon, tie the smaller one where it hangs inside the larger one and top with a bow, as you can see below. I added some rustic jingle bells for that extra touch of awesomeness.
Then stand back and enjoy!! I love how a simple project like this (less than 30 minutes) can have such a big impact – it’s a win win.
Since this is a simple project, you have plenty of time still to pull it off. Go grab your supplies and give it a go.
Big Thanks to FloraCraft and their Foam for the Holidays:


Love this! The bright colors are so fun, and so is the printed burlap ribbon. Thank you!
Oooh, I do like this!