


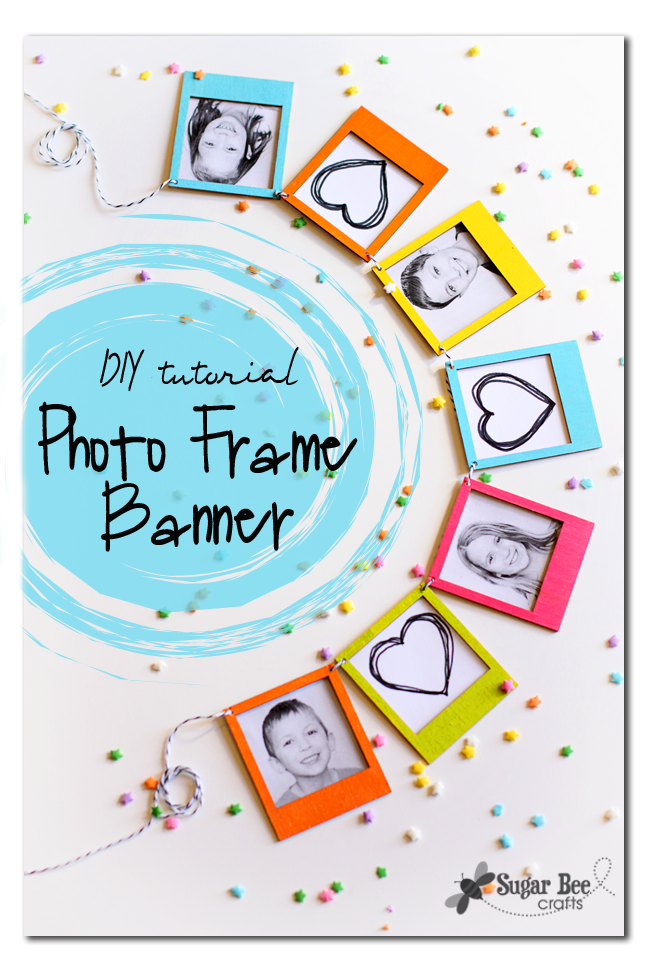
This is just one of those projects I LOVE – it’s so cute, easy to do, and involves displaying photos – all things I love. It’s so great when a craft looks even better done than it did in my mind 🙂 I know lots of you will be recreating this DIY Photo Frame {mini} Banner, and I’ve got a tutorial for you to show you how I put it together.

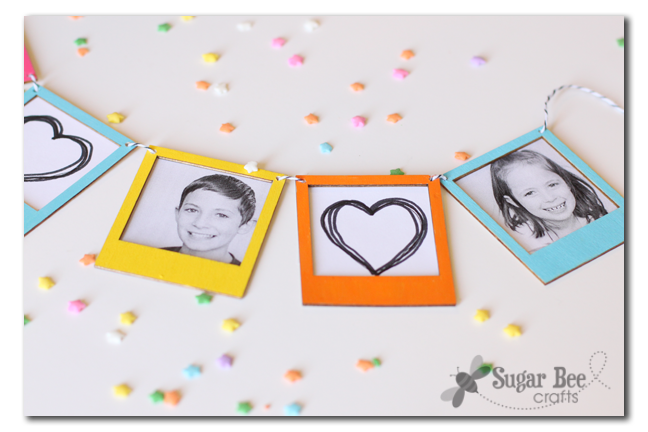
So cute, right?! And it’s mini-size – those pictures are each 2 inches by 2 inches. Everything is cuter in a mini version 🙂 Let’s jump right in to that tutorial…
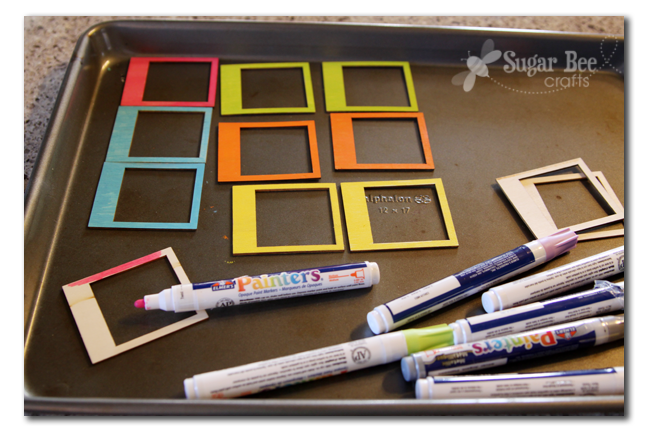
First up, gather your supplies. I am part of Elmer’s Craft It Crew and the challenge this month was to use Elmer’s Painters – which was awesome, because I’m a pretty big fan. Obviously, since I had all these colors (and more!) on hand. I also had some twine on hand – baker’s version makes it even awesomer. The mini frames I picked up at Michael’s – they were on a display right by the front door, and I had to have them. They are actual wood and 12 frames came in a pack.

First step after your supplies are ready – go ahead and paint your frames. I love using Painters for projects like this – they give you the ease of a marker with the coverage of a paint. They are actual paint, in pen form. I like using them for little projects – they’re perfect! To get them going, shake them and then depress the tip in until you see the paint start to seep down it – I tried to catch a picture of it here (see, the tip is half white and half silver) – –

Then just use it like a marker and paint the entire frame. I painted 2 frames in each color, then didn’t end up using them all. I painted 2 coats on each frame to make sure it was nice and vibrant, but that probably wasn’t necessary.
Next I used a small drill bit and drilled holes in the top 2 corners – the picture shows it on my counter, but don’t actually drill on your counter (I hung it over the edge) – Trevor was worried when he saw the pic 🙂
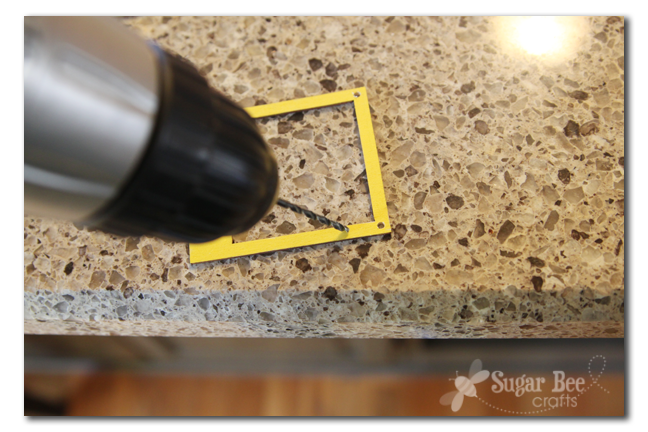

If I were to do this over again, I might drill BEFORE I painted – there were a few frames that chipped where I drilled so I had to do some touch-up painting. But none split or cracked the frame, which I was worried about because they’re pretty small and thin.
I then printed out 2 inch by 2 inch images of my kiddos (just using my home printer). I wanted to break up the banner a little so I also printed 3 hearts. I wanted a hand drawn feel to them so I just used a marker and drew over the heart, messy, a few times.

Closer view of the heart:
To attach the pictures and prints, I simply used scotch tape to adhere the picture to the back. I used a small piece of tape on all four sides – you can kind of see it below:

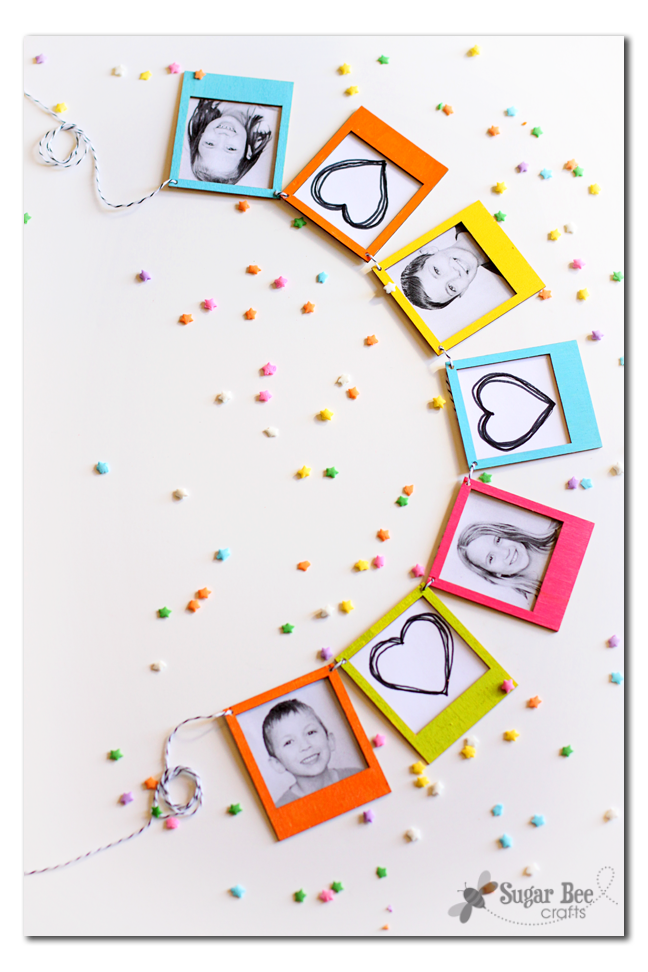
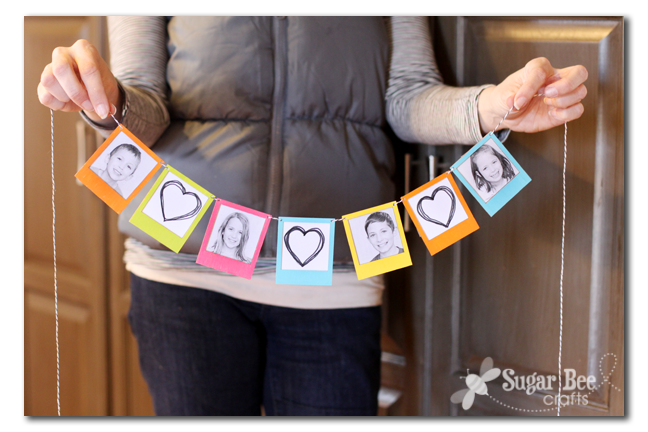
To put the banner together, I simply threaded the twine in and out of the drilled holes. You can push the frames as close together or far apart on the twine as you’d like.

You can kind of get a gauge for the size below – see the frames compared to the size of my hand:
I have my crib mattress display thing in my entryway, and I know this will be super cute clipped to it for everyone to enjoy as they come into my home.

So there ya go – how to make a simple Mini Photo Frame Banner. Just some pre-made wooden frames and some Painters, plus some tape and twine, and you’re on your way. You can make this – really! – give it a try!

–If you enjoyed this project, please share it on facebook, G+, or your favorite social media–
And if you’re looking for more projects and you enjoyed this, you will also like:


Love this, Mandy! Great job!
this is so adorable!!! I’m def making this soon!
Oh my! I love this. What a great idea for birthdays, holidays, kids’ rooms, etc. So cute 🙂 Thanks for sharing!
So cute! I love these! Unfortunately, there isn’t a Michael’s too close to me, but I could do card stock for a quick & easy banner and try to remember to pick up those frames when I’m near a Michael’s 😉
I really love how this turned out! Super cute.
So dang cute! Love it!
Oh my gosh, I love this! It is so cute and I love the bright colors. Thank you, as always, for all of your inspiration.
This is ADORABLE, Mandy! I love the way those paint pens work!!
This is awesome! I love it so much that I featured it on my Blog post “12 Quick and Easy Christmas Crafts” I would love it if you could check it out 🙂 https://eclectichandmadecreations.com/2014/12/19/12-quick-and-easy-christmas-crafts/
Beck recently posted…12 Quick and Easy Christmas Crafts
Love this! It’s the perfect craft/decor for all of my Instagram photos!
Kate | TheOrganizedDream.com