


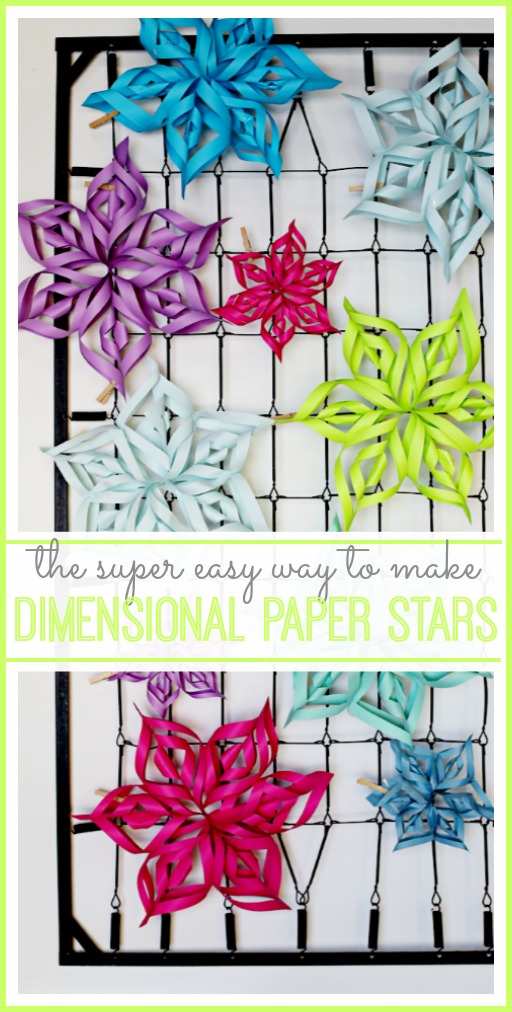
When I saw the Paper Stars Tutorial over at Funky Vintage Lovely, I knew I had to make them.
Follow that link for the tutorial. Note that your paper needs to be double-sided – I didn’t realize that when I started. I made mine with 6 sections instead of 8. Also, instead of staples and glue dots, I used hot glue to hold it all together.

This took longer than I thought – a whole movie’s worth of cutting and gluing, but it was a lame movie so I was glad I was being a little productive while I wasted my time watching it.
UPDATE:
I found a SUPER SIMPLE, MUCH FASTER way to make these!! And even made a video tutorial about it – you can find all that info here:
I have a covered porch so I strung them across the front door. They hit tall people in the head, but I don’t have an issue, so it’s fine by me 🙂

Hooray for actually doing something on my Projects to Make list – wahoo! (you know, sometimes things get put on that list, never actually to be accomplished….) Go make yourself some Paper Stars!!
Wow – I love those!!! So cute!
Those stars are gorgeous. The look great.
These look great! I like how some of your papers have different designs on both sides.
I used to make these at work out of Post-Its sometimes & just used tape to hold the pieces together. It was kind of awkward, but worked alright.
Those are awesome! I’m totally going to make some of those today. Thanks for sharing!
Anna
http://www.askannamoseley.com
Too fun!! And very patriotic. 🙂
OH my GOSH! These are FABULOUS!!! I have to check out this tutorial!!! They look great, Mandy! 🙂
Thanks Mandy for linking to the starbust tutorial!! Yours turned out great. Love all the different papers…and I bet 6 squares were easier to fit together than 8!
Happy 4th of July!
Hey they turned out great! I think I’ll have to try these.
Have to tell you–I loved your hot glue tip, and also about making them with just 6 points instead of 8. Both saved me some time! Here are mine:
https://craftingintherain.blogspot.com/2011/07/simple-patriotic-table.html