


Hi Everyone! I am so excited to here on Sugar Bee Craft Edition today. Don’t you love her blog? She is so creative and I just love her projects.
I am Crystal from Crystal’s Craft Spot. Its my little spot to share my current craft projects, tutorials, recipes, and ideas I want to use in the future. I started my blog because I didn’t want to overload our family blog with my new creations. I try to post something new almost everyday and I enjoy a variety of crafts. It is my way to relax and take a break from a busy day. Here’s a little more about me:  I’ve been married for 5 1/2 years to the greatest guy ever. I am a stay at home mom of two adorable little girls (4 and 2). I teach my daughter preschool at home and we post our fun activities and crafts on our preschool blog. I love to read and watch movies I love Blogs! I love looking at others for crafty inspiration, I love staying in touch with old friends and making new friends
Here are some of my favorite projects you’ll find on my blog: Family Motto , Easy Wall Art, fabric high chair, and My bedroom furniture
 I’ve been married for 5 1/2 years to the greatest guy ever. I am a stay at home mom of two adorable little girls (4 and 2). I teach my daughter preschool at home and we post our fun activities and crafts on our preschool blog. I love to read and watch movies I love Blogs! I love looking at others for crafty inspiration, I love staying in touch with old friends and making new friends
Here are some of my favorite projects you’ll find on my blog: Family Motto , Easy Wall Art, fabric high chair, and My bedroom furniture
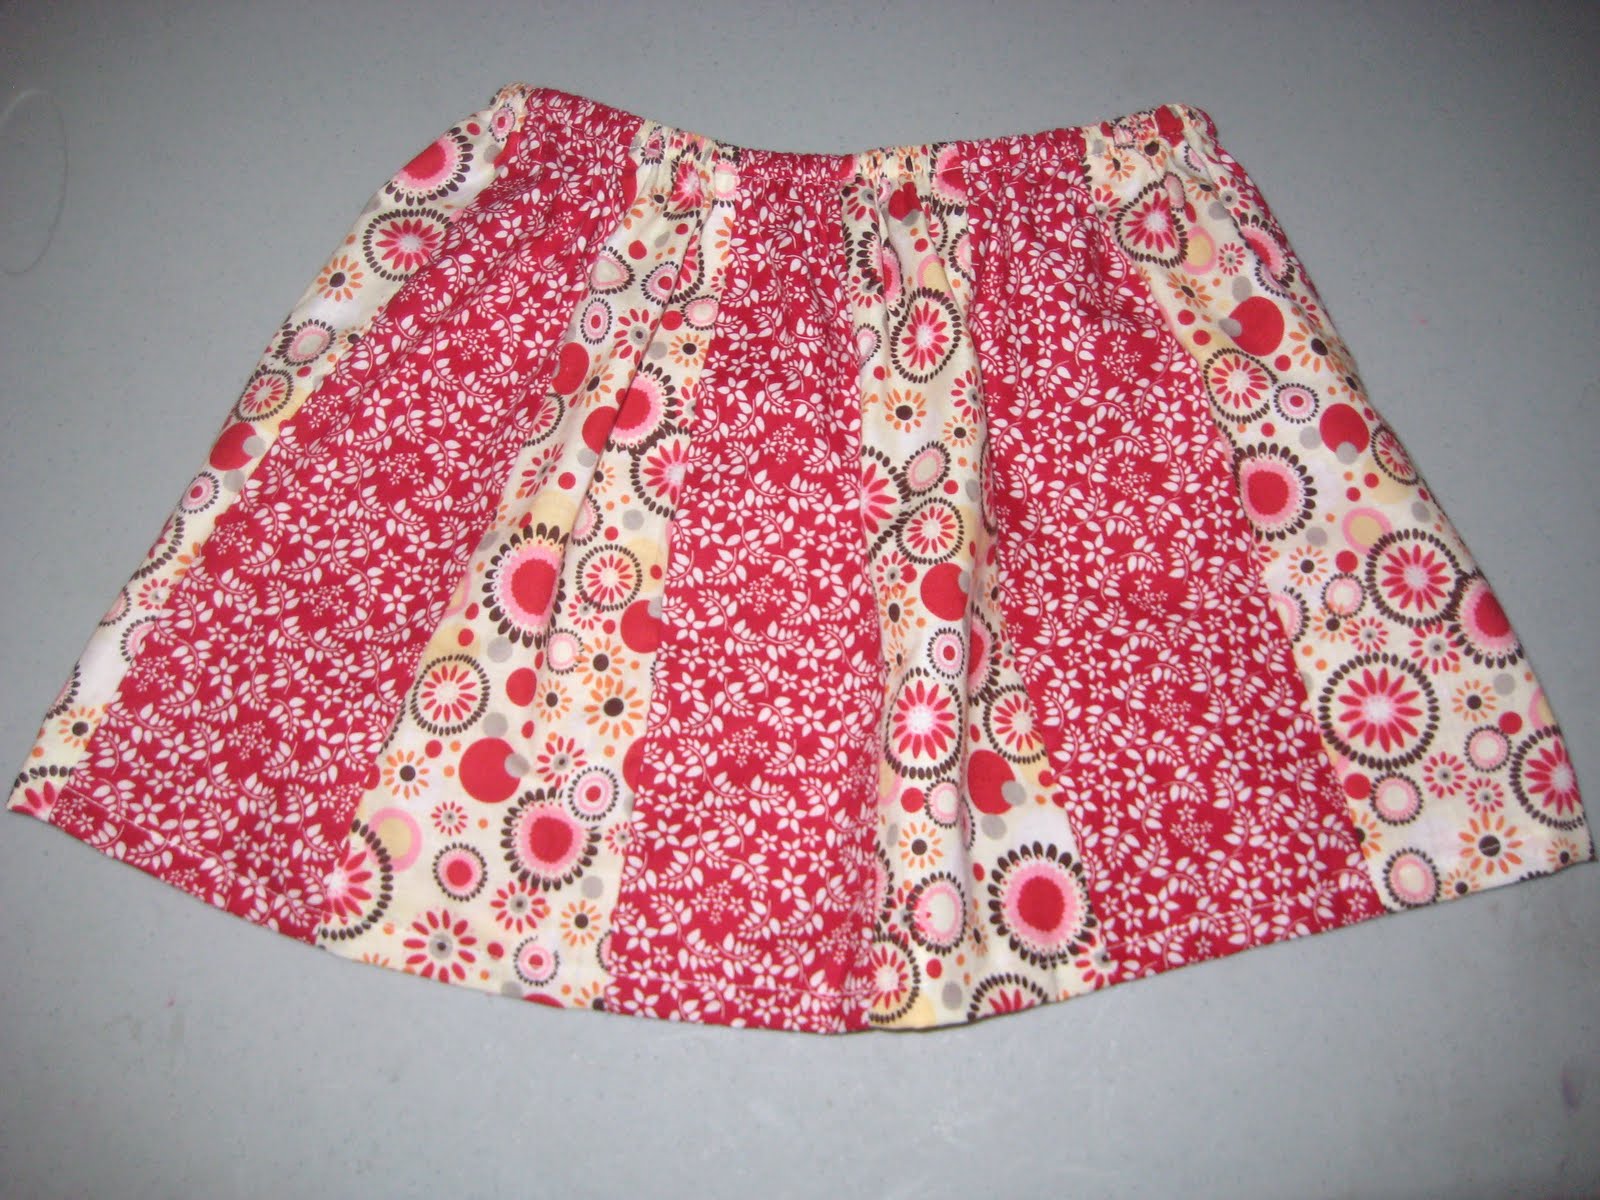
Now for the fun part! Today I’m going to share with you how to make an easy and super cute skirt. I call it the Panel Skirt. I love that its so simple, cute and you can easily change the look with the fabric on number of fabrics you use. I saw my cousin wearing one and my Aunt gave me a quick explanation…now I’m going to share it with you.
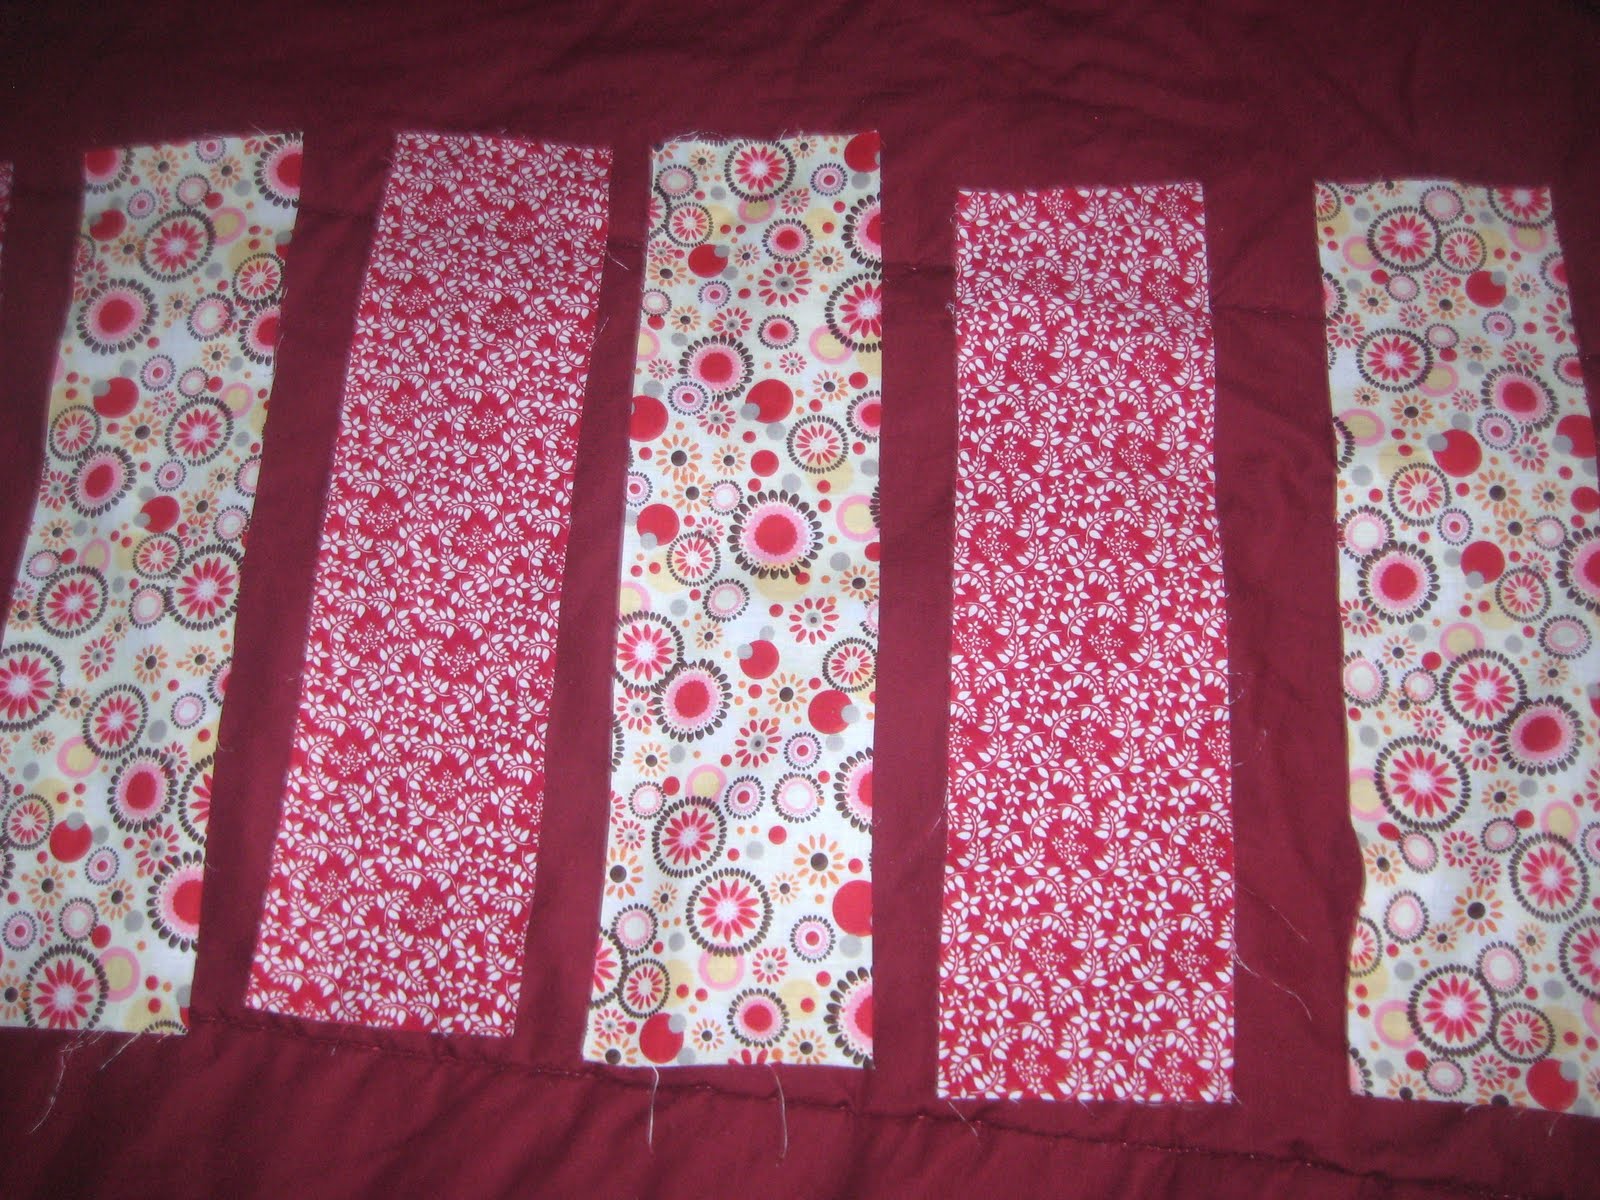
Start by picking at least 2 coordinating fabrics. For my 2 year old I used 2 fat quarters.
Here’s the tricky part-deciding how many panels you will need. First decide how thick you want each panel. I did mine 4″ and it worked really well. Measure your daughters waist-mine was 23 inches. Now divide your waist measurement by how thick you want your panels. So mine looked like this 23/4=5.75. Round up to the next number. So it would be 6. Then double that number. So I made 12 panels 4 inches thick. Make sense?
For the length of the panels Measure from the waist to where you want want your skirt to end (I did mine right below the knees). then add 1 inch.
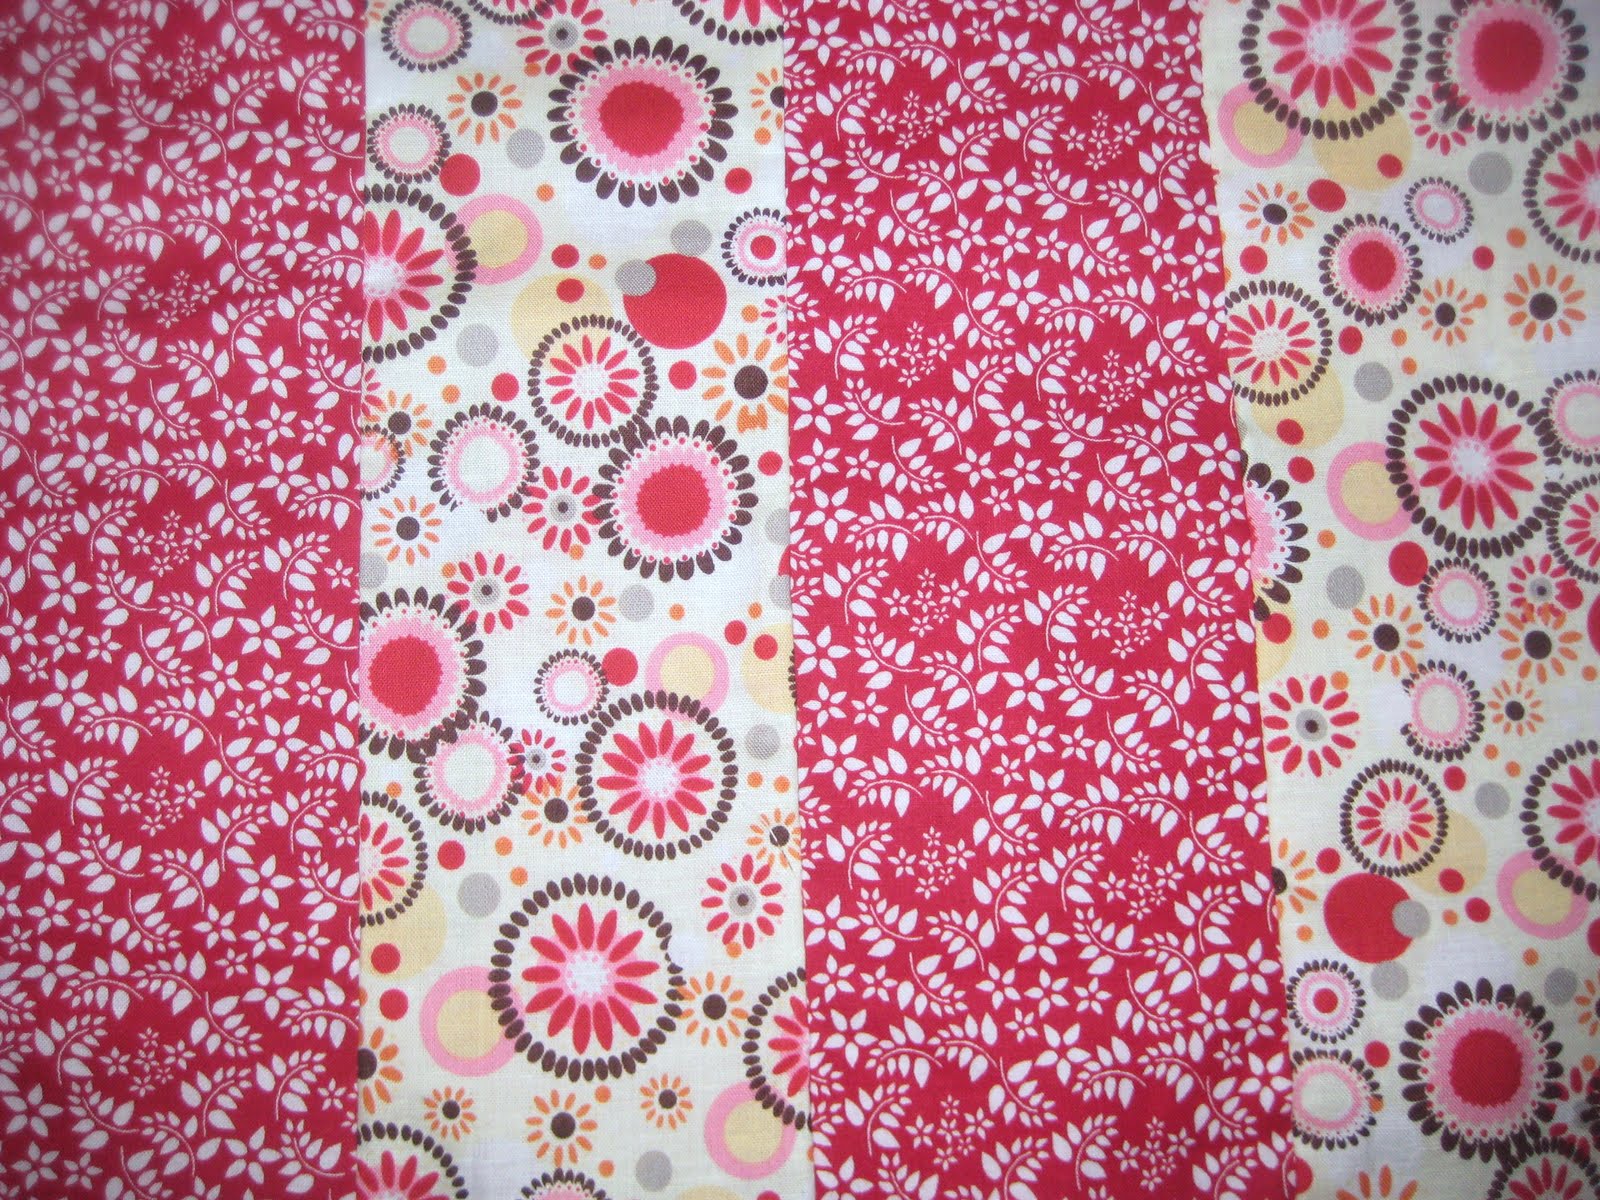
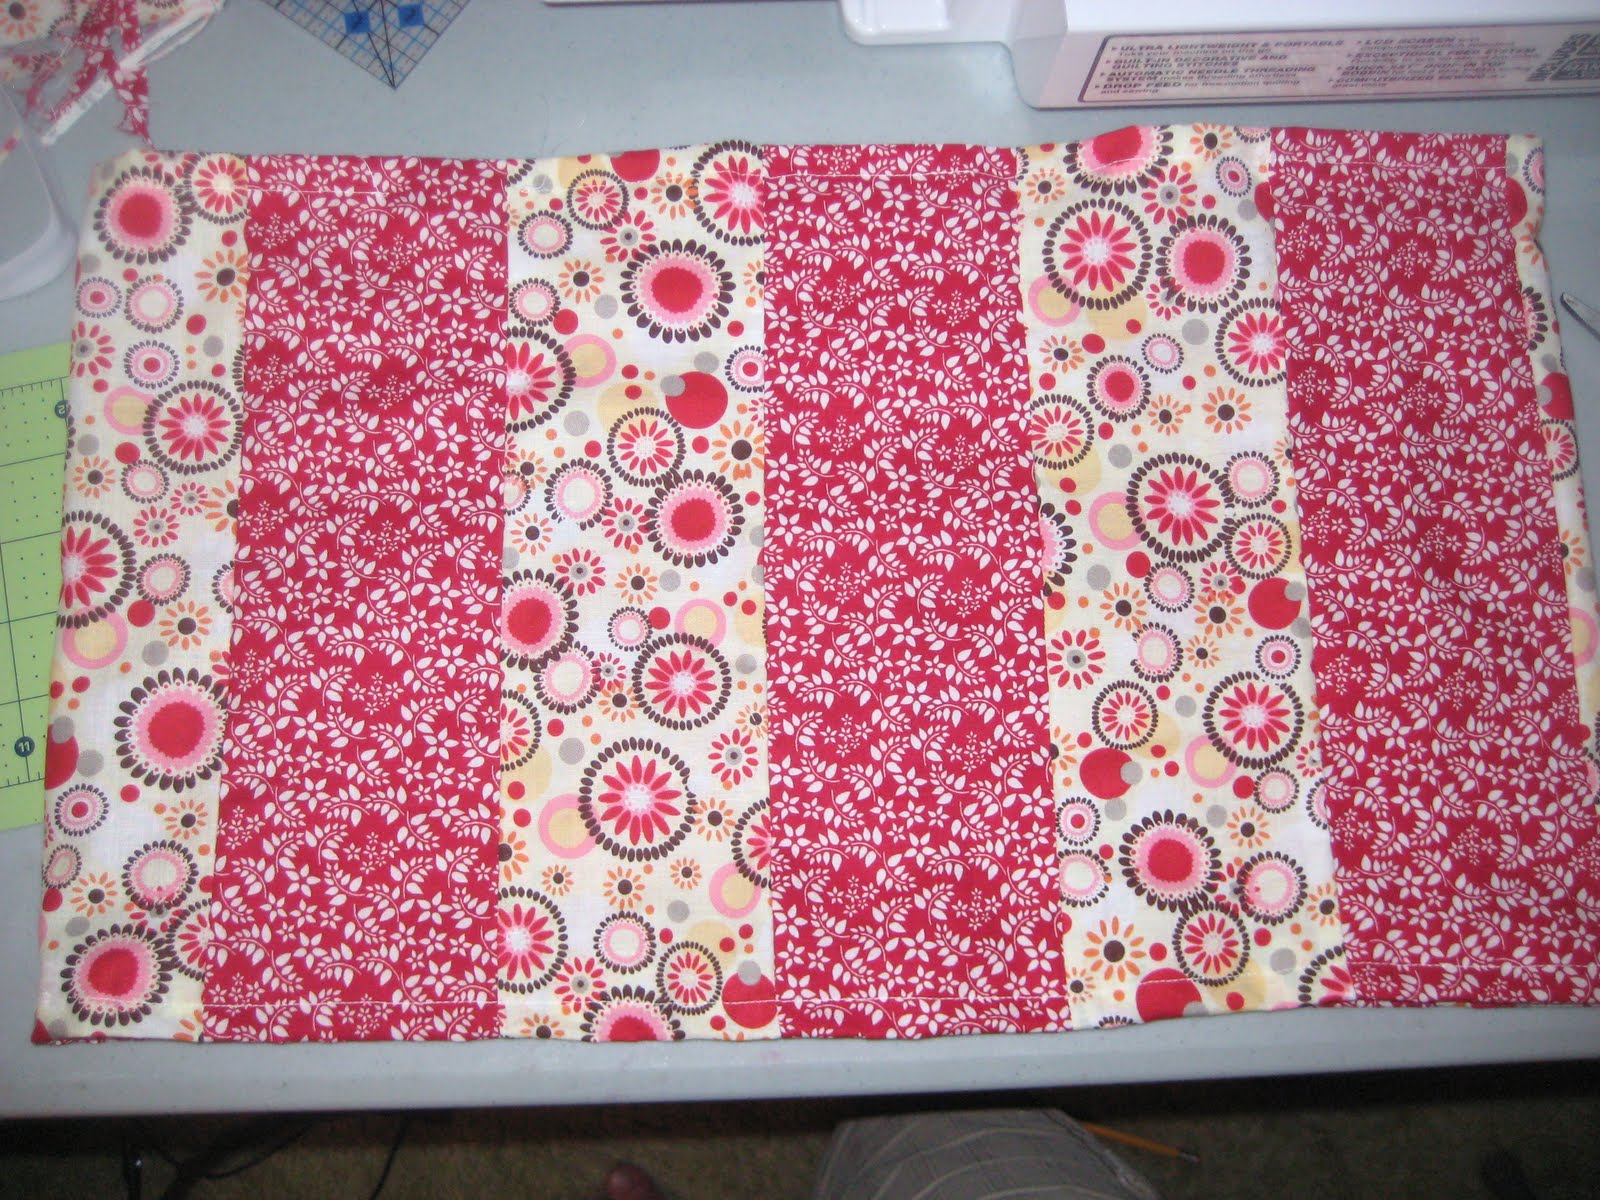
Cut our your panels whatever width and length you need. They should look like this. Alternate fabrics to create your pattern (this would also look really cute with 3 or more different fabrics as well…Like I said the possibilities are endless).
. Take the first two and pin right sides together. sew. 
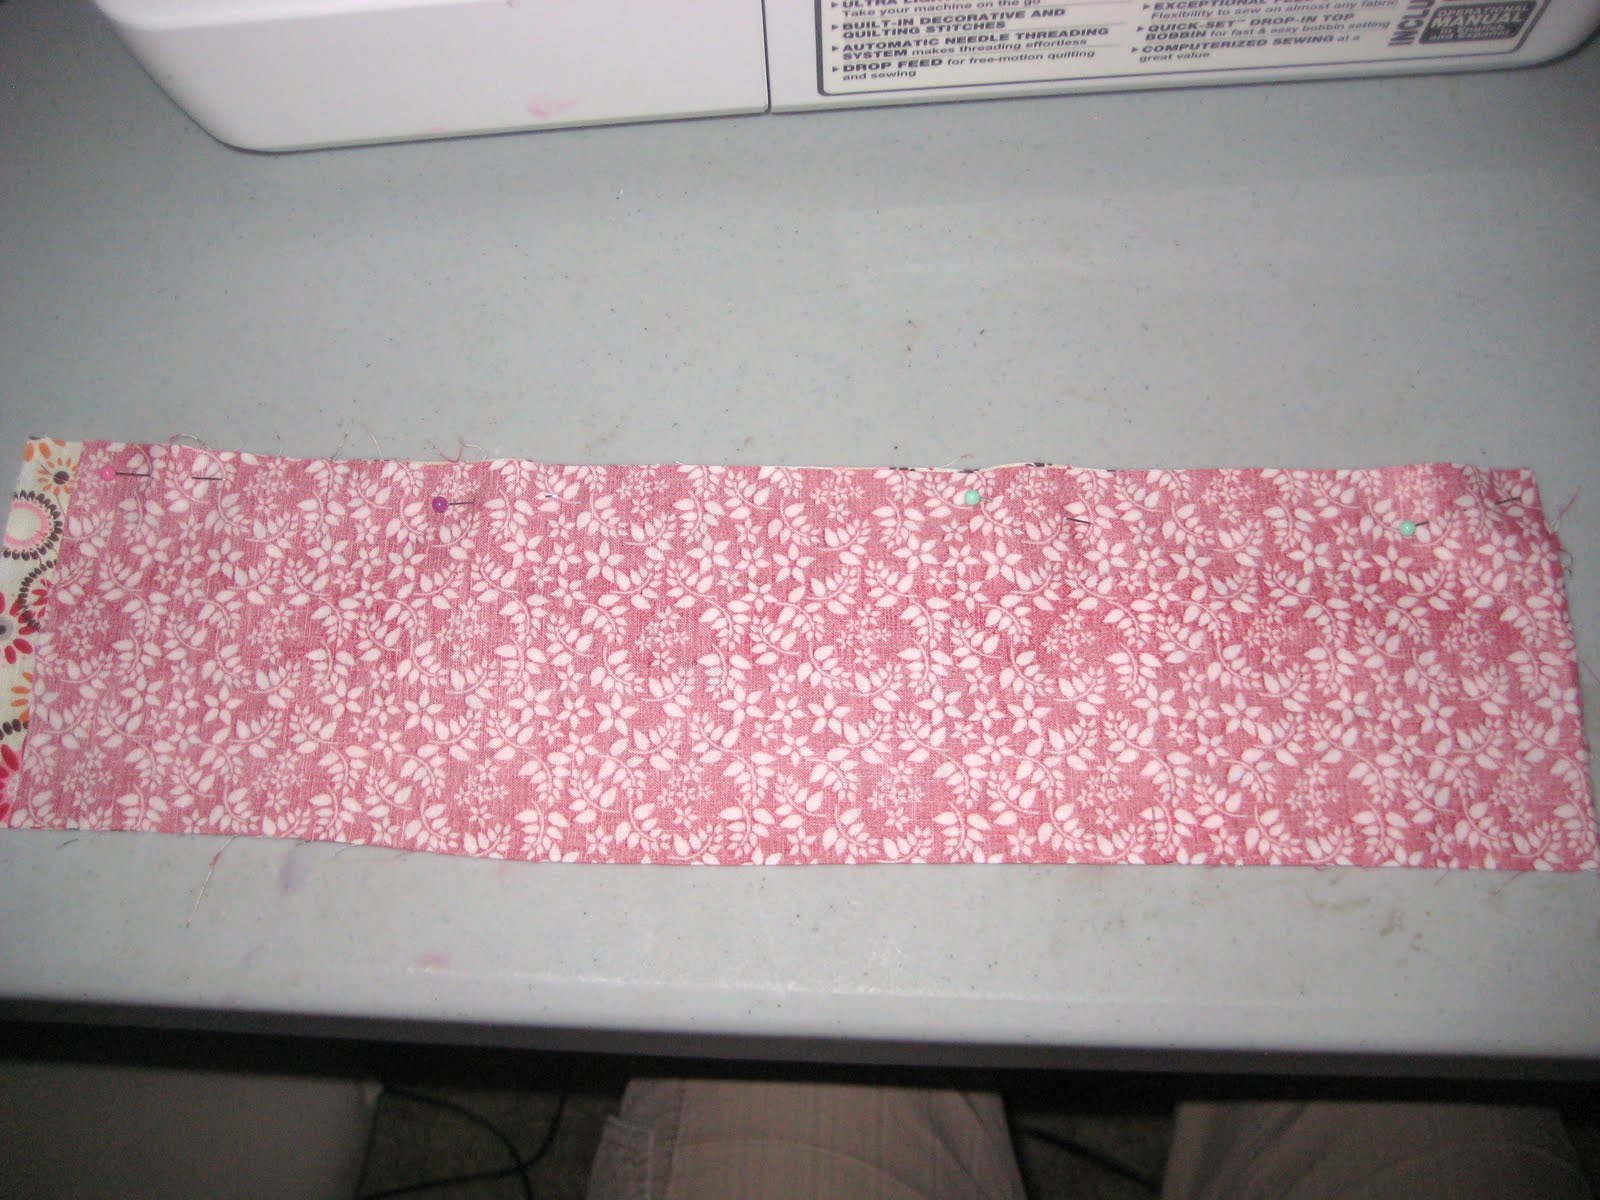
Add the next one and continue until you have sewn all of them together. Pin and sew your first and last one to complete the tube.
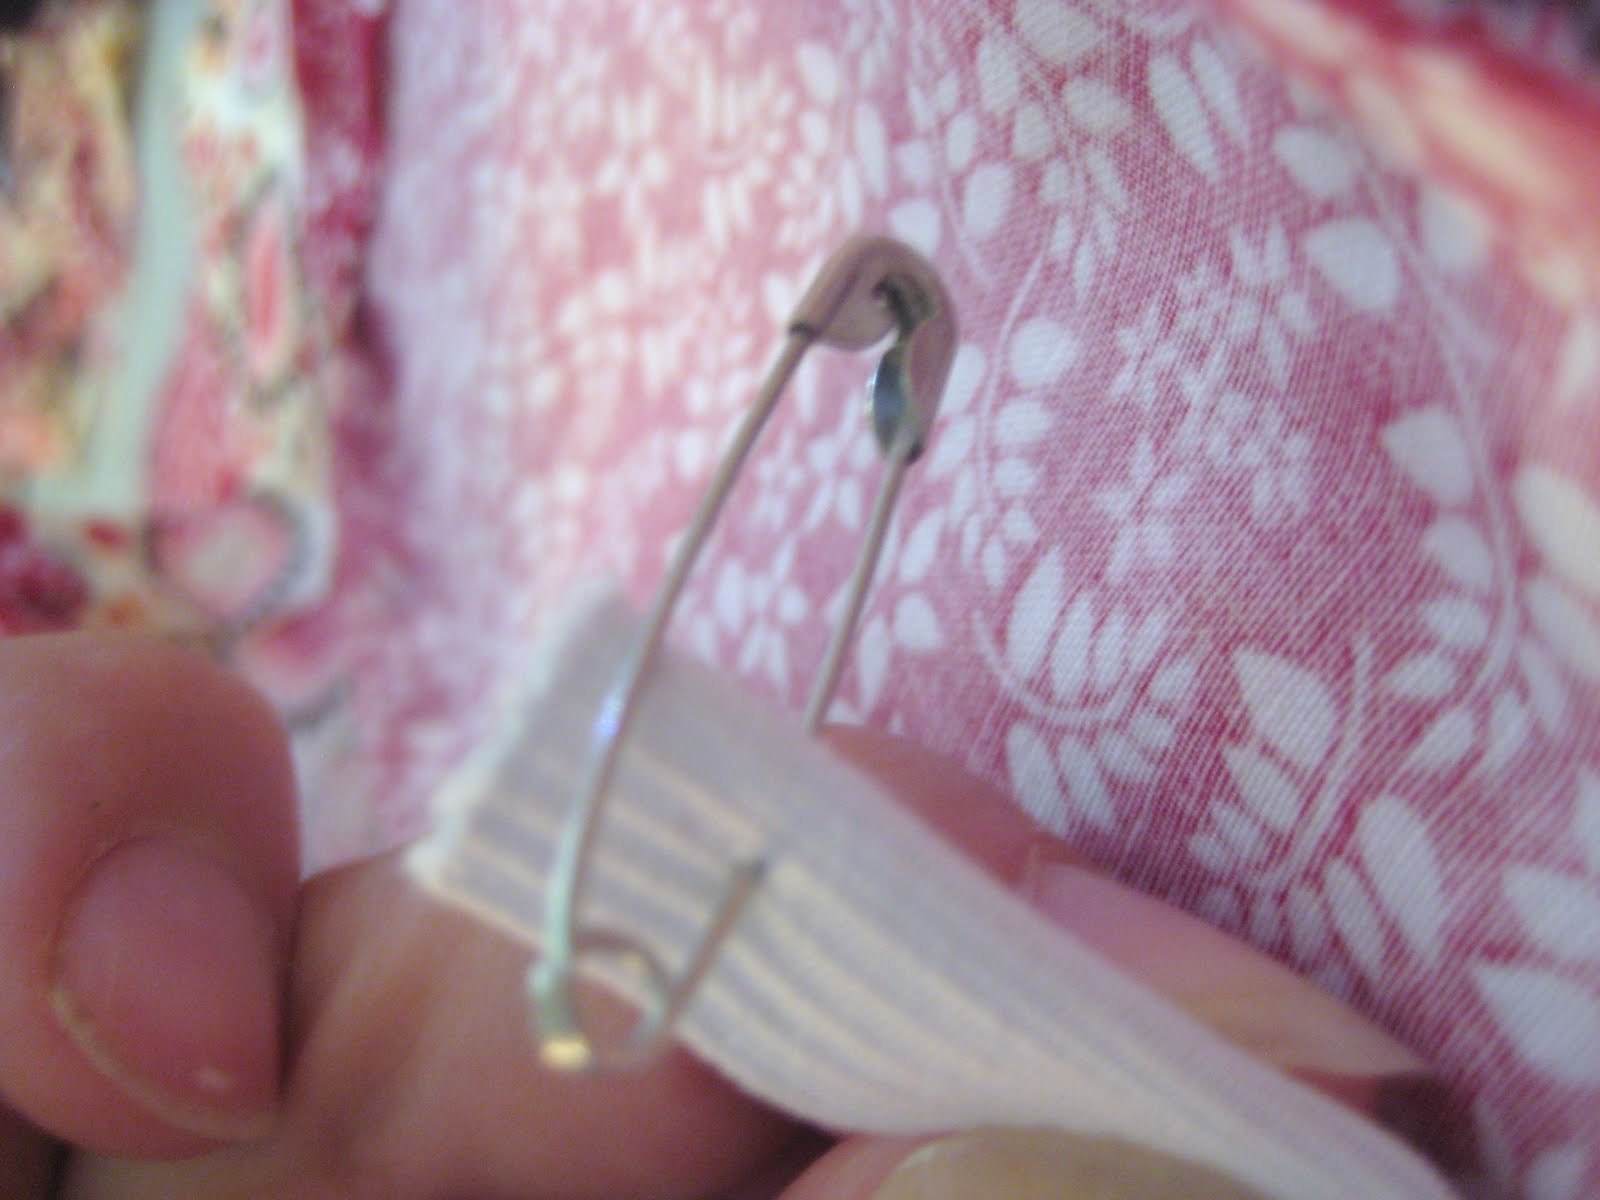
Hem one end for the bottom and make a casing at the top. (If you need more details on this step look here…it another easy skirt I made.)
Grab your safety pin and elastic and pull it through your casing. Sew the two ends of the elastic together and sew your casing closed.
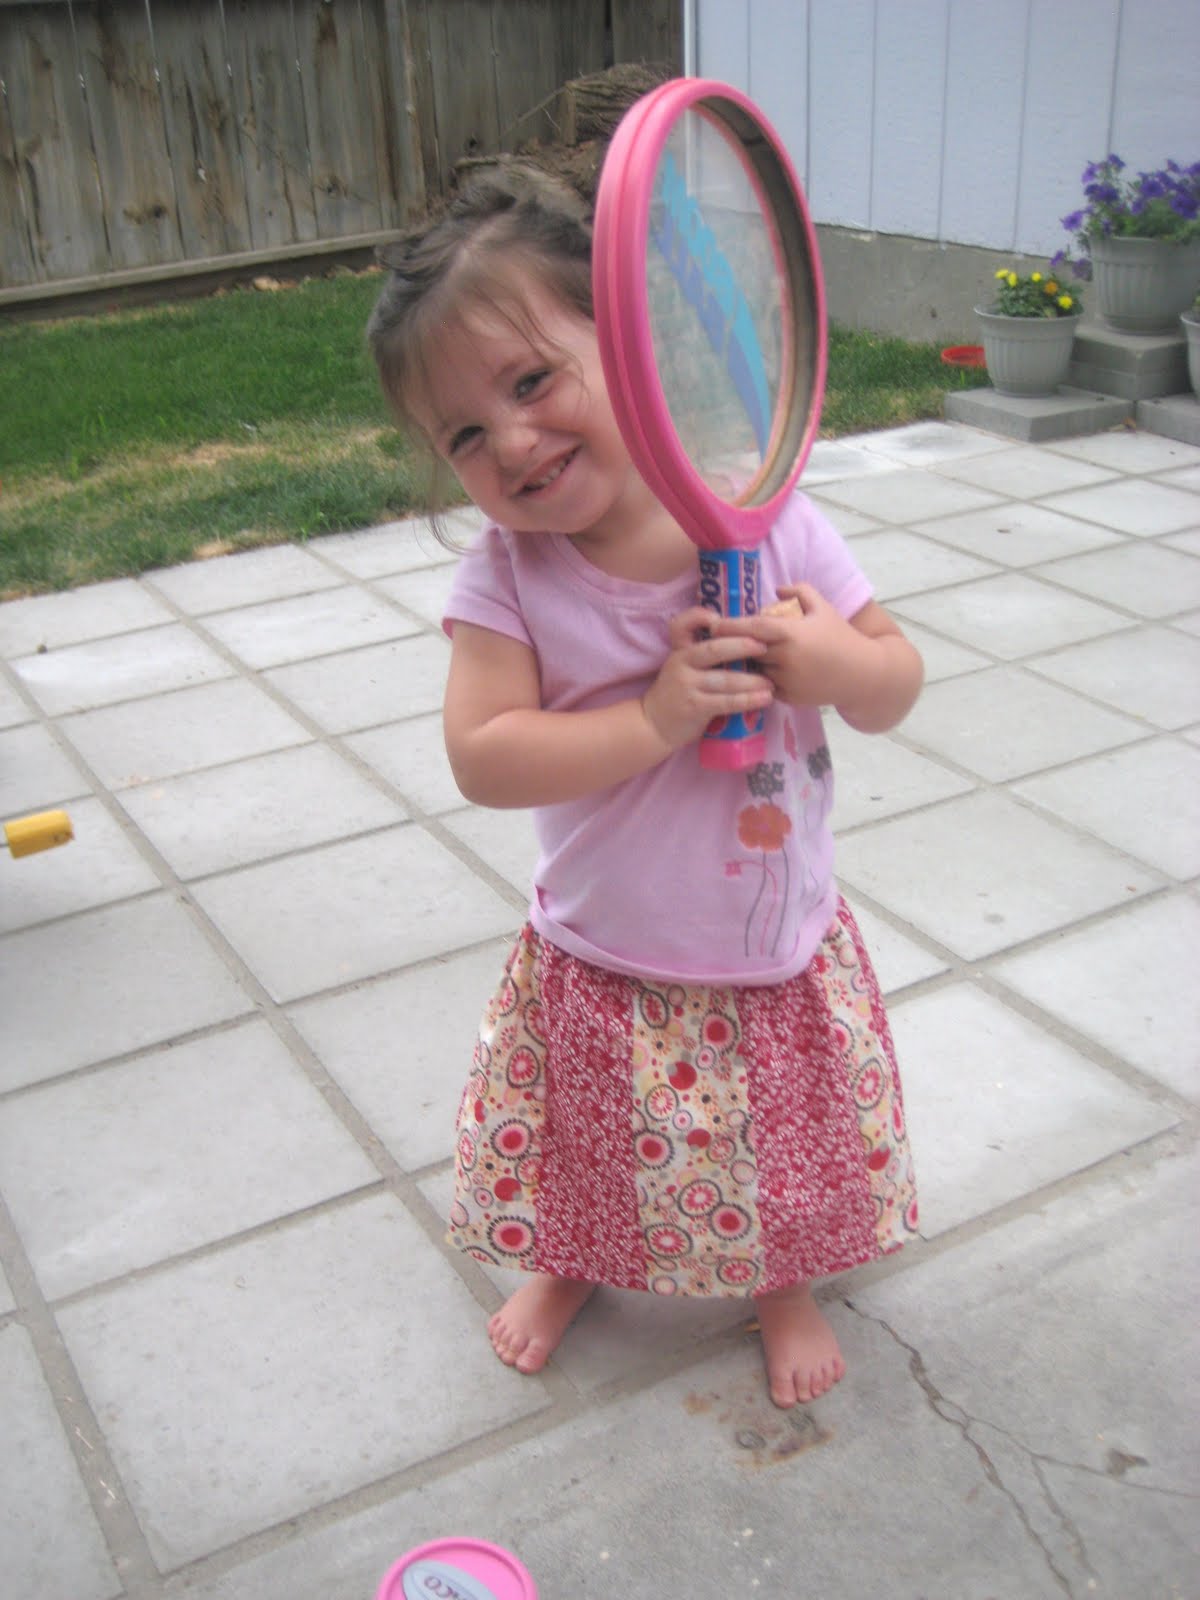
That’s it! You now have a fun little skirt.
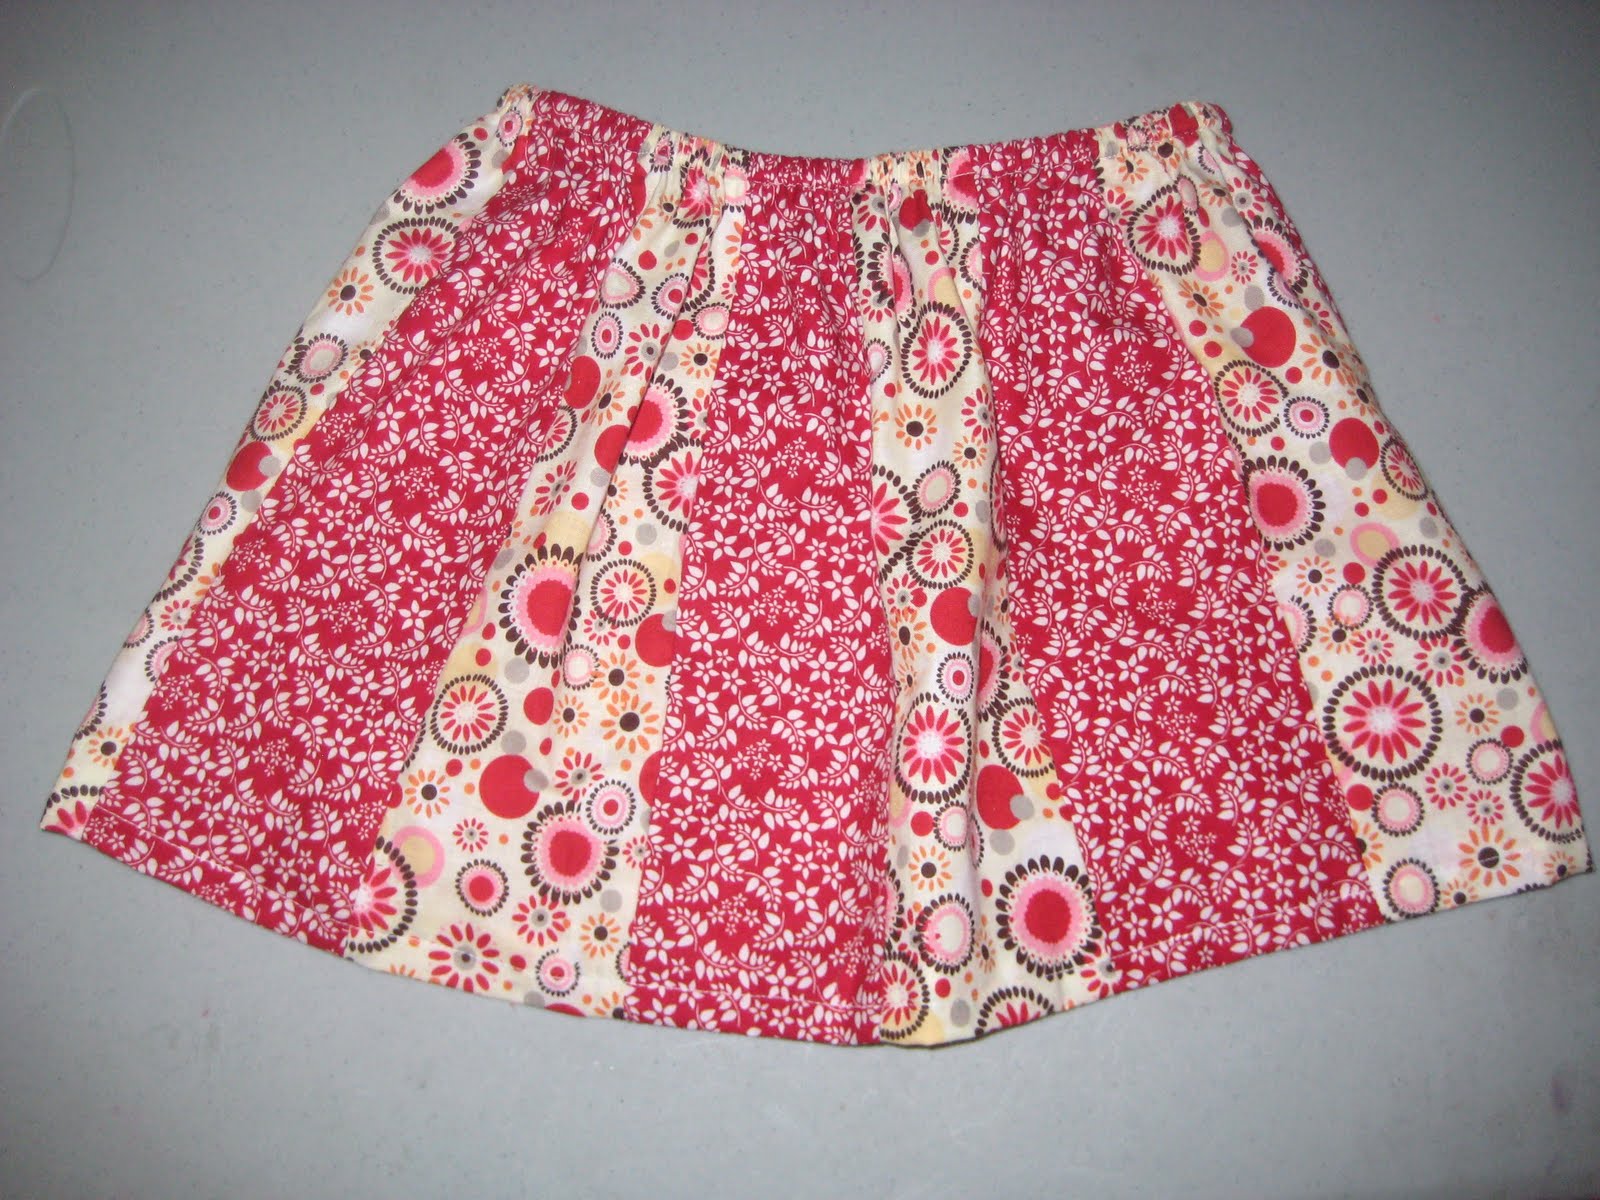
Put it one your little one and enjoy. No matching shirt required 🙂
I hope you enjoyed this little project and please stop by my blog anytime for more tutorials and projects! Thanks Mandy for letting me take over your blog today its been a lot of fun!
Thanks for checking out this post from www.SugarBeeCrafts.com – – click on over to read it in its entirety – you’ll love it!
What a pretty skirt!! I love the stripes of different fabric prints!
I linked to your tutorial over at Craft Gossip Sewing:
https://sewing.craftgossip.com/tutorial-paneled-twirly-skirt-for-little-girls/2010/08/12/
–Anne
ummmm…awesomely simple and fun with endless possibilities for fabric combinations. I love when I can use all the bits and pieces I refuse to get rid of. Thanks! Anna (and Sylvie) Collins